Related Articles
Launch a Meta Ad with AI (Manual Builder)
Quick Reference Keywords: Create Facebook ad · Instagram ad · Meta ads · AI ad copy · Lead generation ad · Facebook lead form · Ad targeting · AI marketing
💡 Try Siren instead. This is the original step-by-step (manual) builder, and it's still fully supported. For most users we now recommend Siren, our AI ad strategist - a guided chat experience where Siren researches successful ads offering similar products and services, writes your copy, and designs your media for you. Click Create Ad with Siren on the AI Ads page, or see Build a Meta Ad with Siren. Prefer a traditional form-based flow? This guide is for you.
Overview
The manual ad creation flow is designed to be self-explanatory - just click through and follow the prompts to launch! This guide provides a walkthrough with screenshots explaining what is going on at each step. Brayv.ai generates ad copy, creates images, and optimizes your ad automatically.
Estimated time to complete: 2-5 minutes
Prerequisites: Connect Facebook
Before creating ads, you must connect your Facebook account.
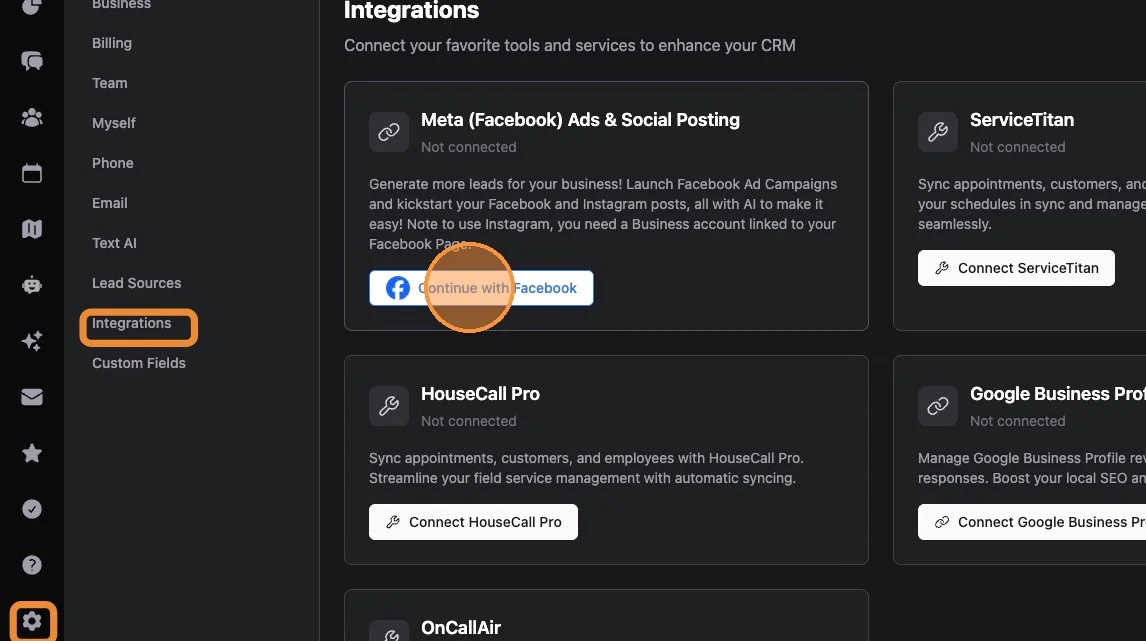
1. Go to Settings > Integrations > Meta (Facebook) Ads & Lead Forms > Click "Continue with Facebook"
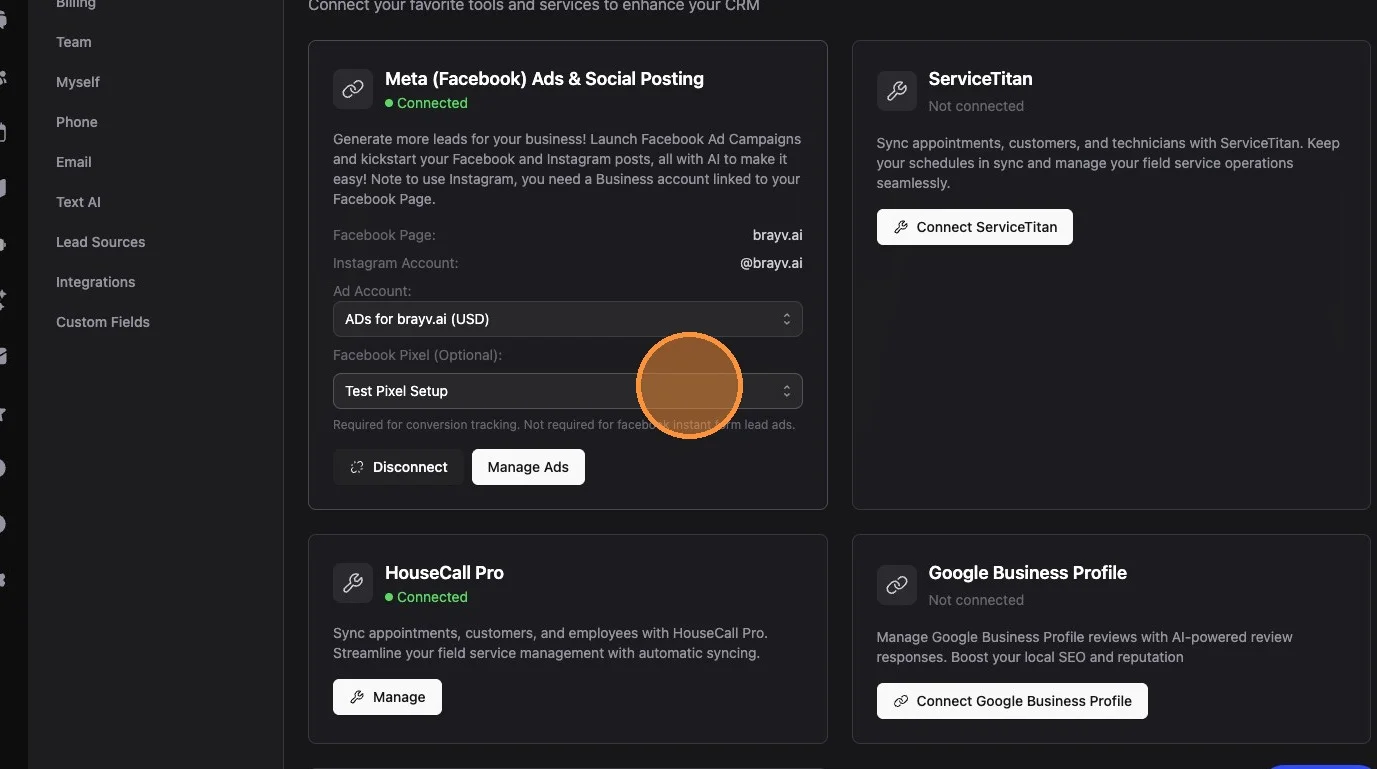
2. Select the appropriate ad account (your business ad account, not a personal one). Brayv picks or creates a pixel for that ad account automatically - you don't need to set one up in Events Manager. You can still change the pixel here later if you want.
Part 1: Starting a New Ad
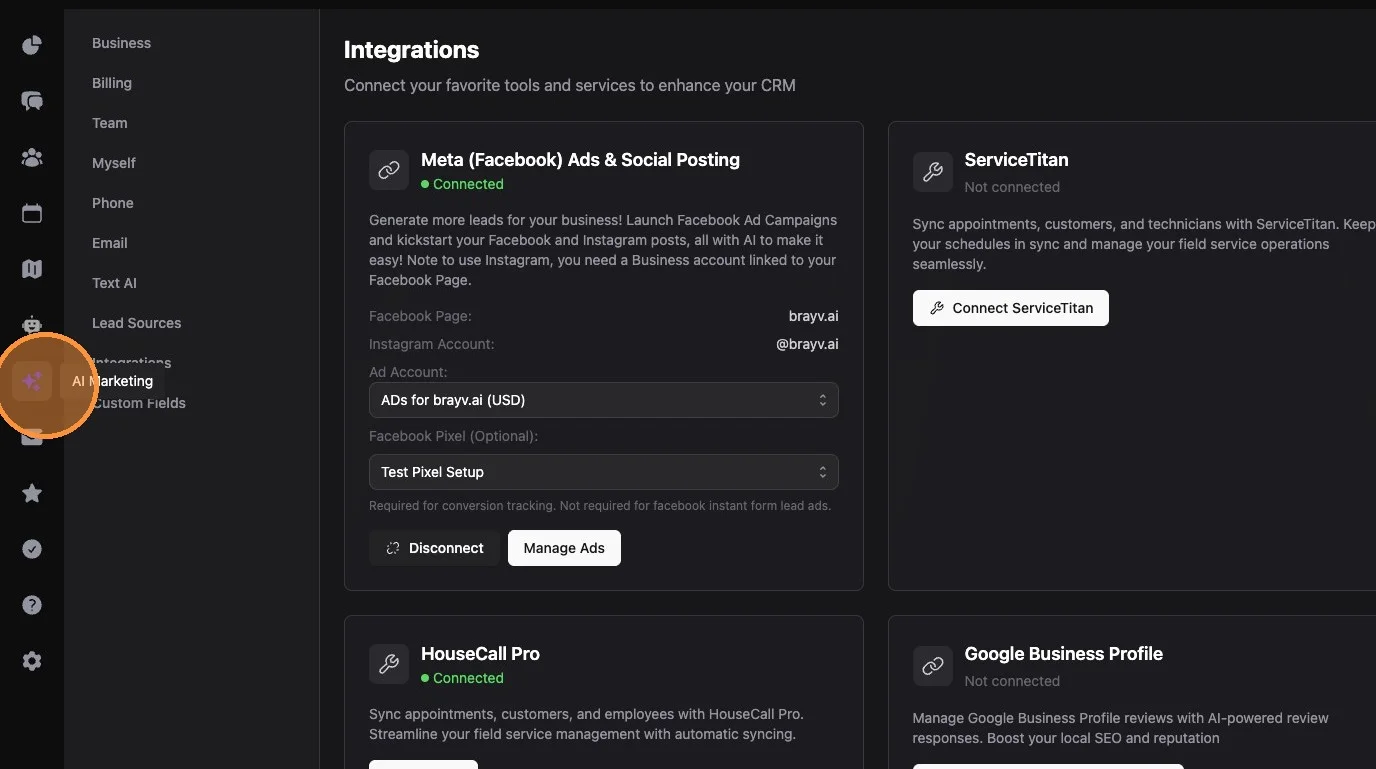
3. Click AI Marketing (sparkles icon, main left-hand menu), then open AI Ads
4. You'll see your connected Facebook page, Instagram account (if linked), ad account, currency, and pixel. Below that, recent campaigns on the left and drafts on the right.
Your progress is saved as a draft each time you generate copy or click Next, so you can leave and reopen it from Drafts later. Anything you entered on a step before generating copy or clicking Next isn't saved yet.
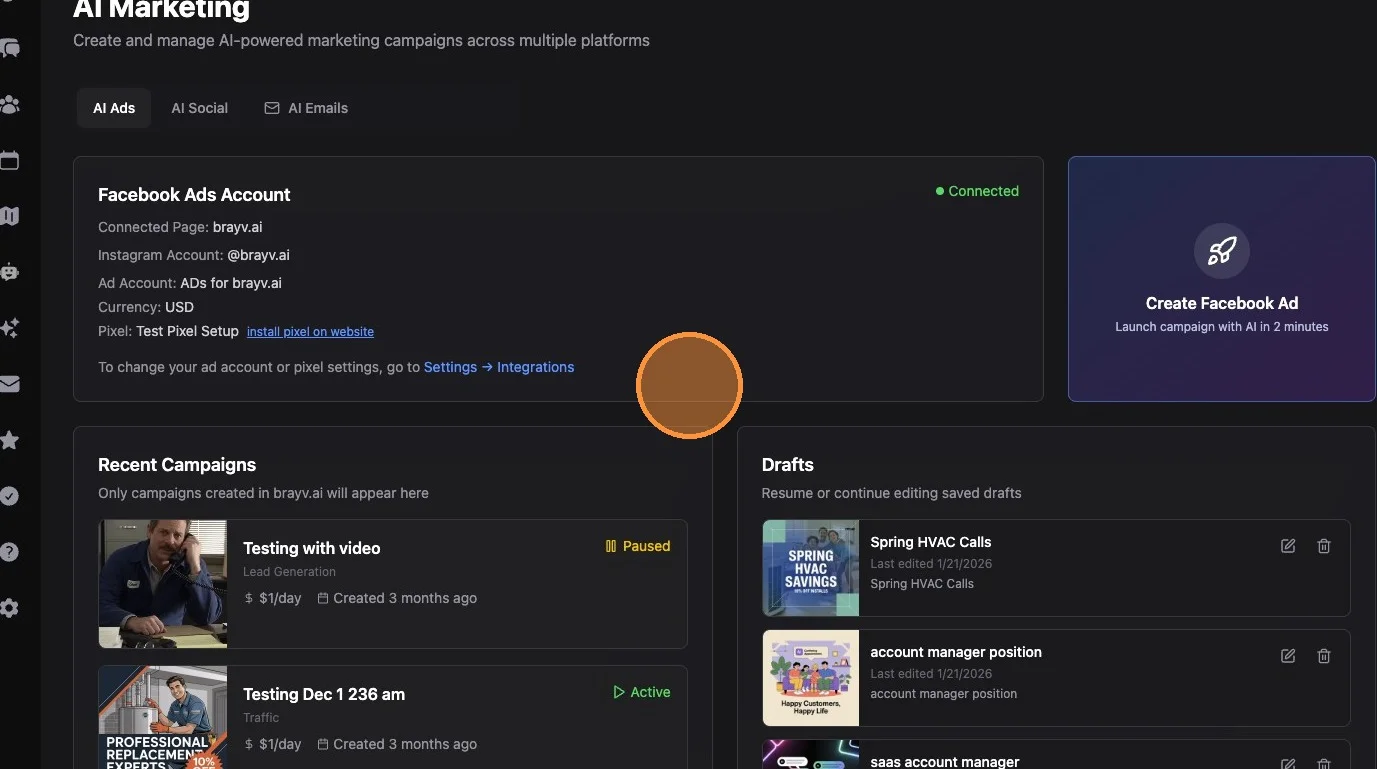
5. Click "Manual creation with AI assistance" (this opens the step-by-step builder shown below). To use the guided agentic chat experience instead, click Create Ad with Siren - see Build a Meta Ad with Siren.
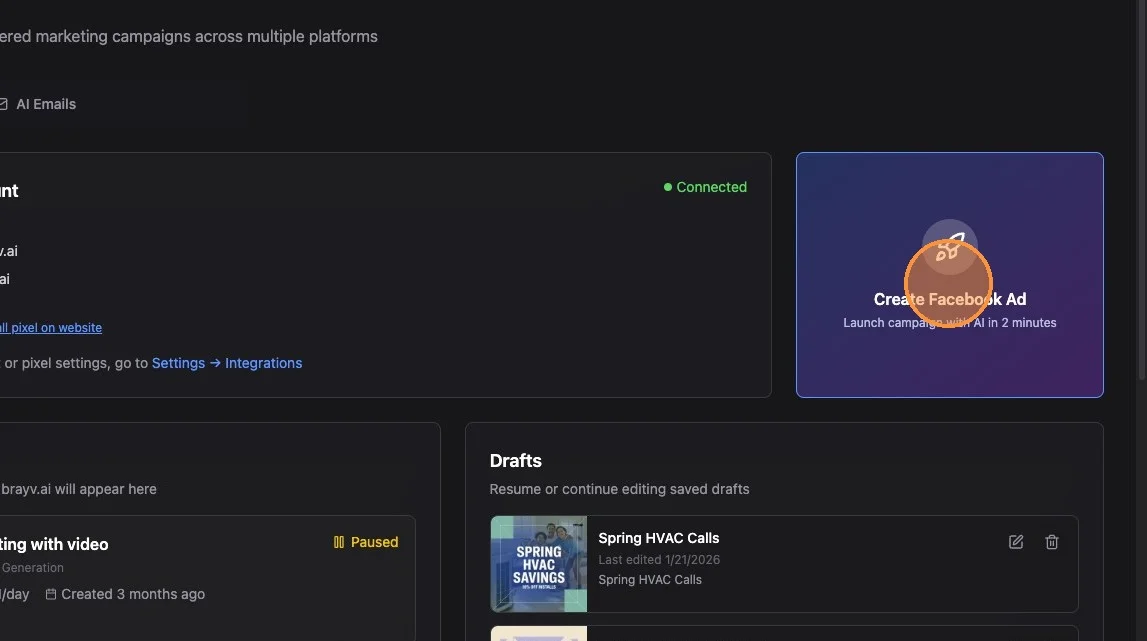
Part 2: Ad Details and AI Copy
6. Select your ad category. Most ads fall under "Not a Special Category." Below that, review your business name and context (pulls from account settings).
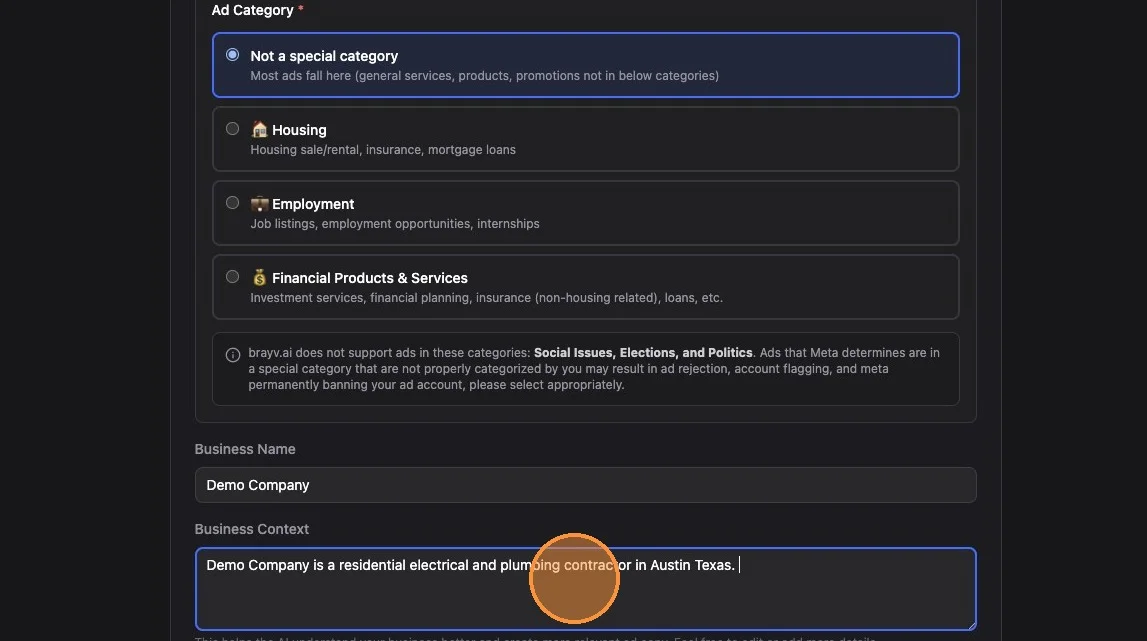
7. Fill in "What Are You Advertising" and "Target Audience."
"What Are You Advertising" should be a specific offer like "new water heater installations for 20% off" or "summer sale on pools: save thousands" - not just your business name.
Target audience should describe your ideal customer, like "homeowners in Northeast Houston."
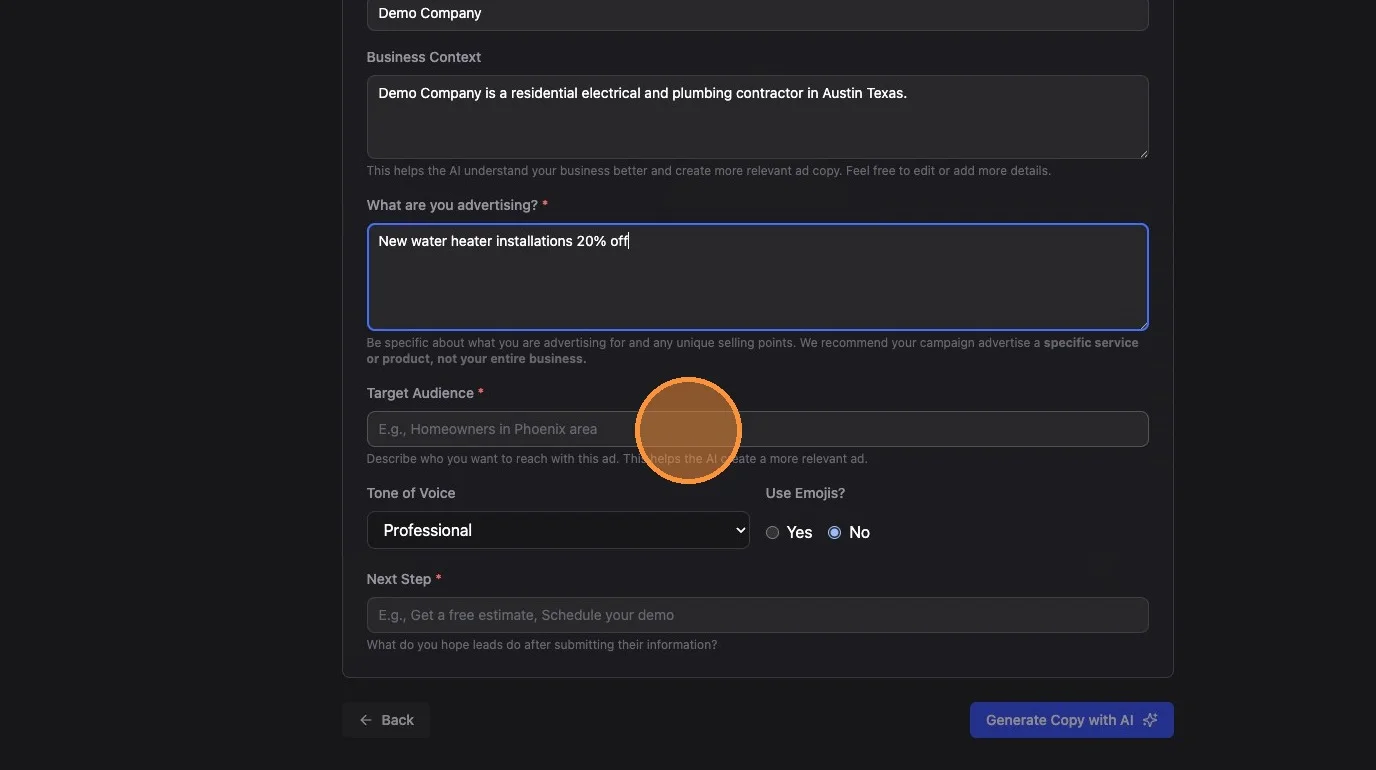
8. Select the tone of voice and whether to use emojis. These settings apply to the ad copy (text the AI generates to accompany your media).
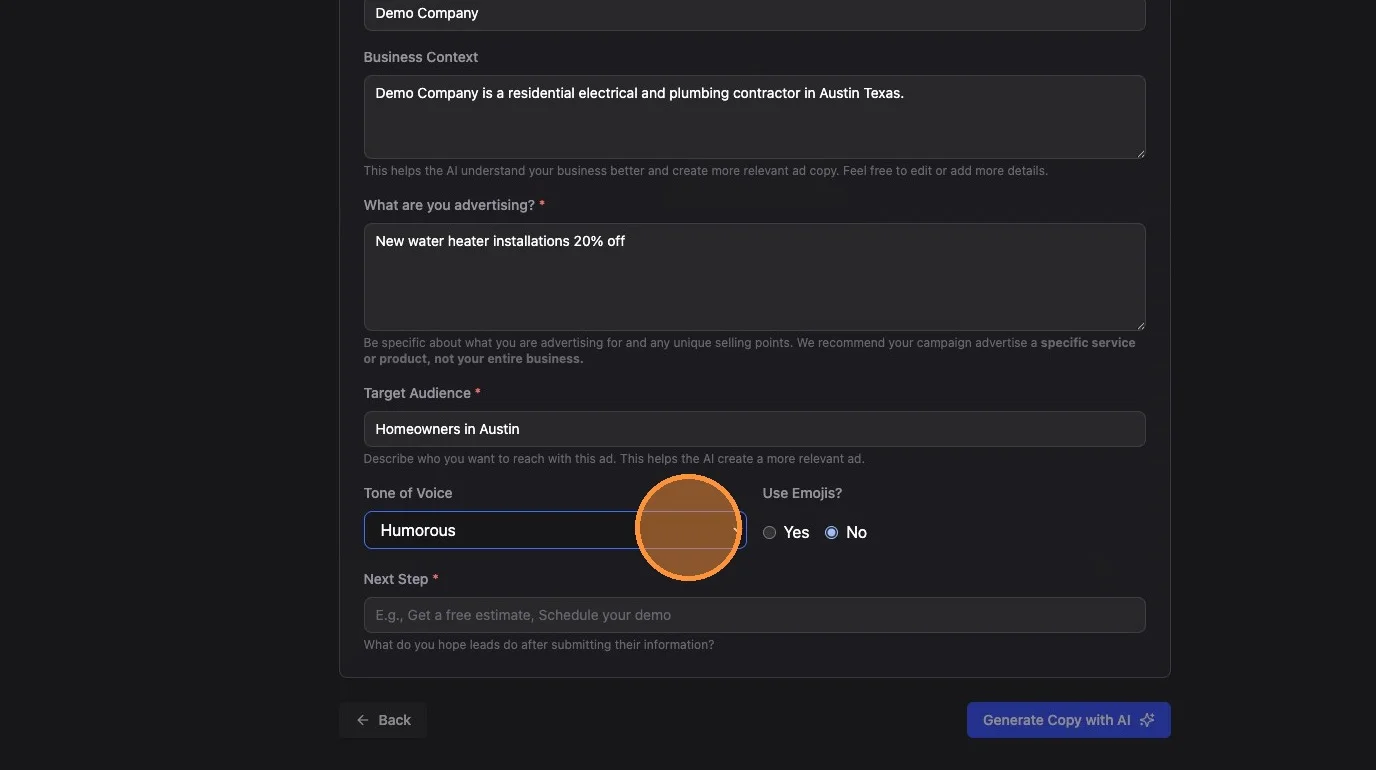
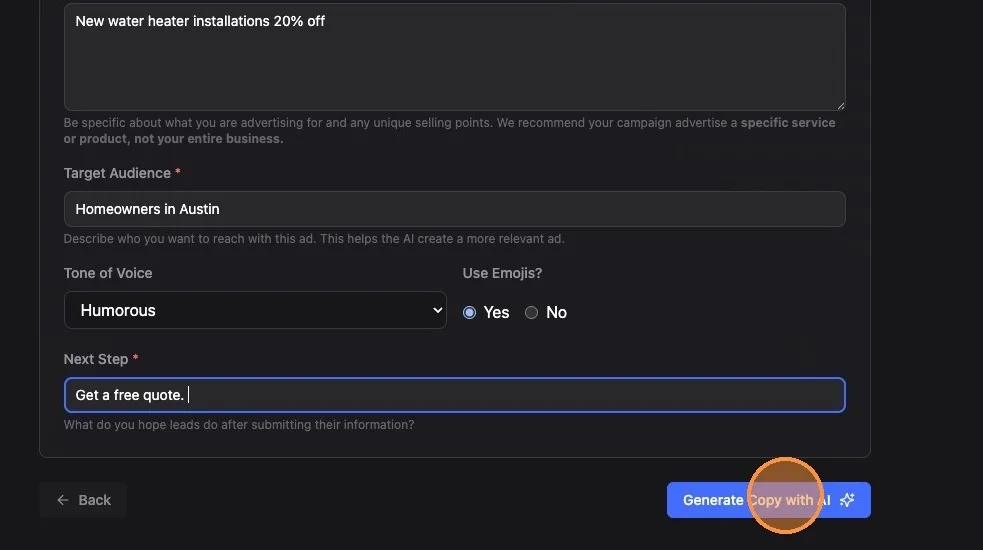
9. Enter a next step - what should leads do after submitting their info? (Book a consultation, get a quote, schedule an installation, etc.)
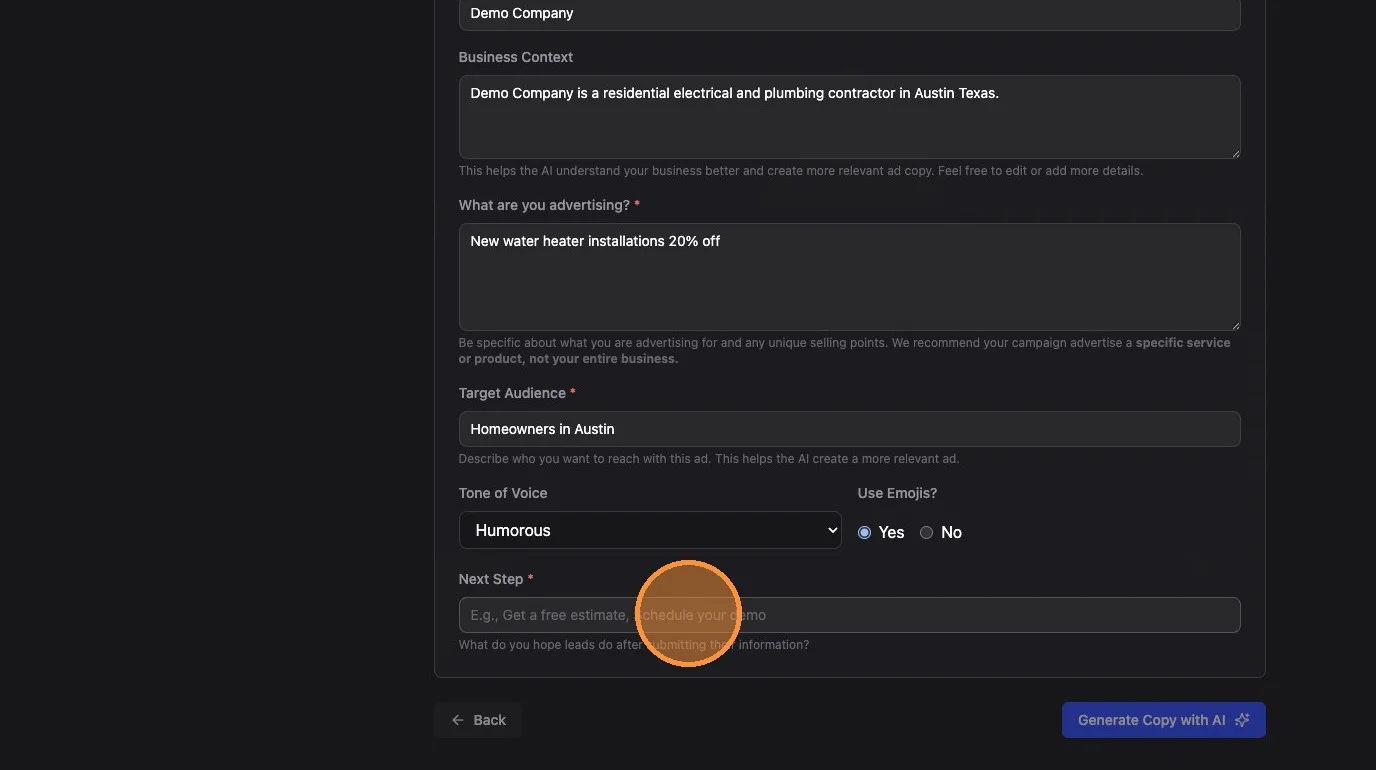
10. Click "Generate Copy with AI"
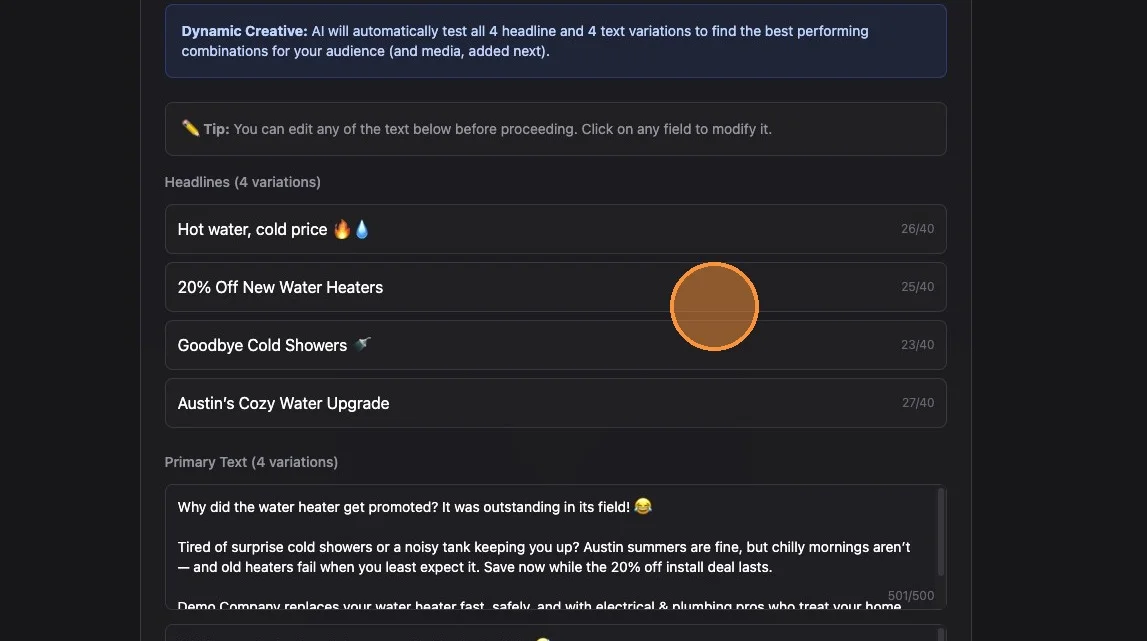
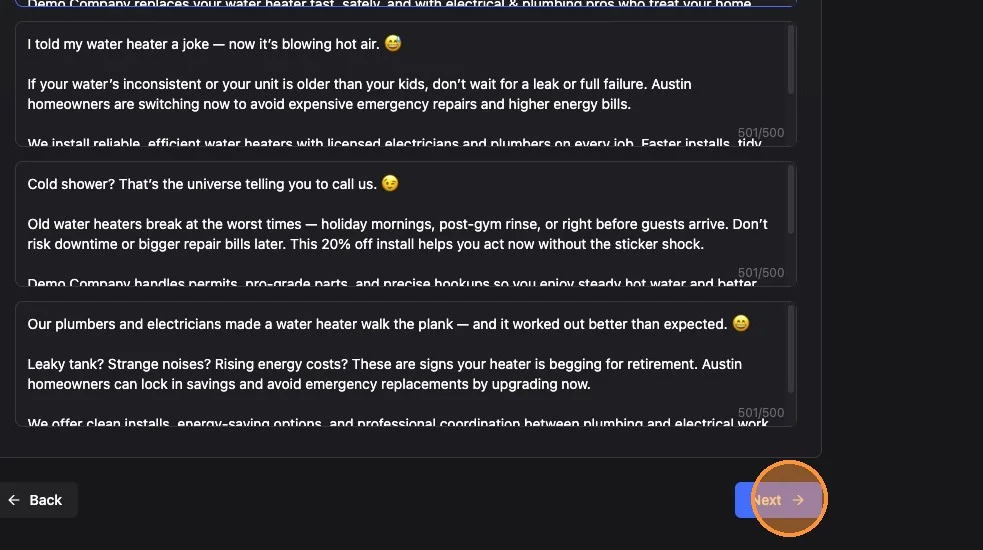
11. Review and edit the primary text and headlines the AI generated. You can go back a step and regenerate if you'd like.
12. Click Next
Part 3: Media
13. Add media (images or videos). You can generate with AI or select from your media library. When selecting from the library, you can also upload new media.
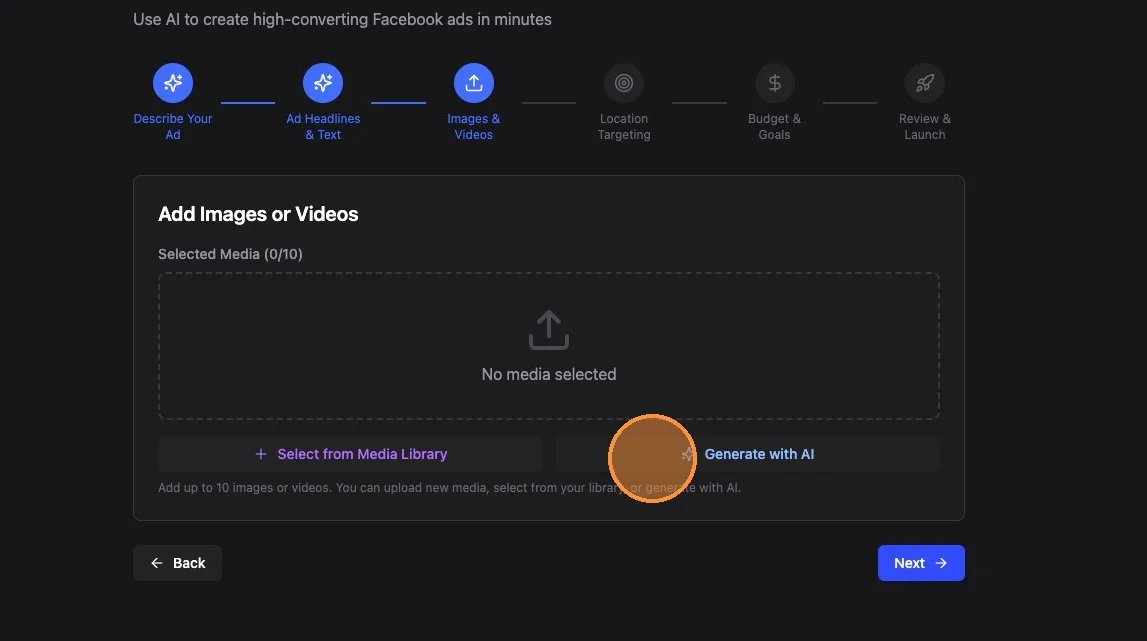
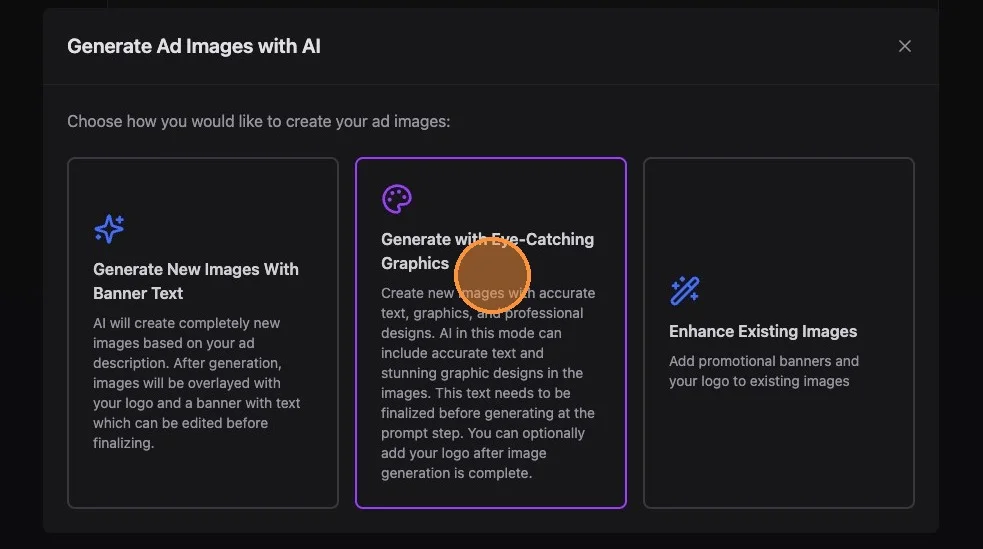
14. If generating with AI, select one of the options
15. If you chose "Generate with Eye-Catching Graphics," review the image prompts and edit as needed, then click "Generate Images"
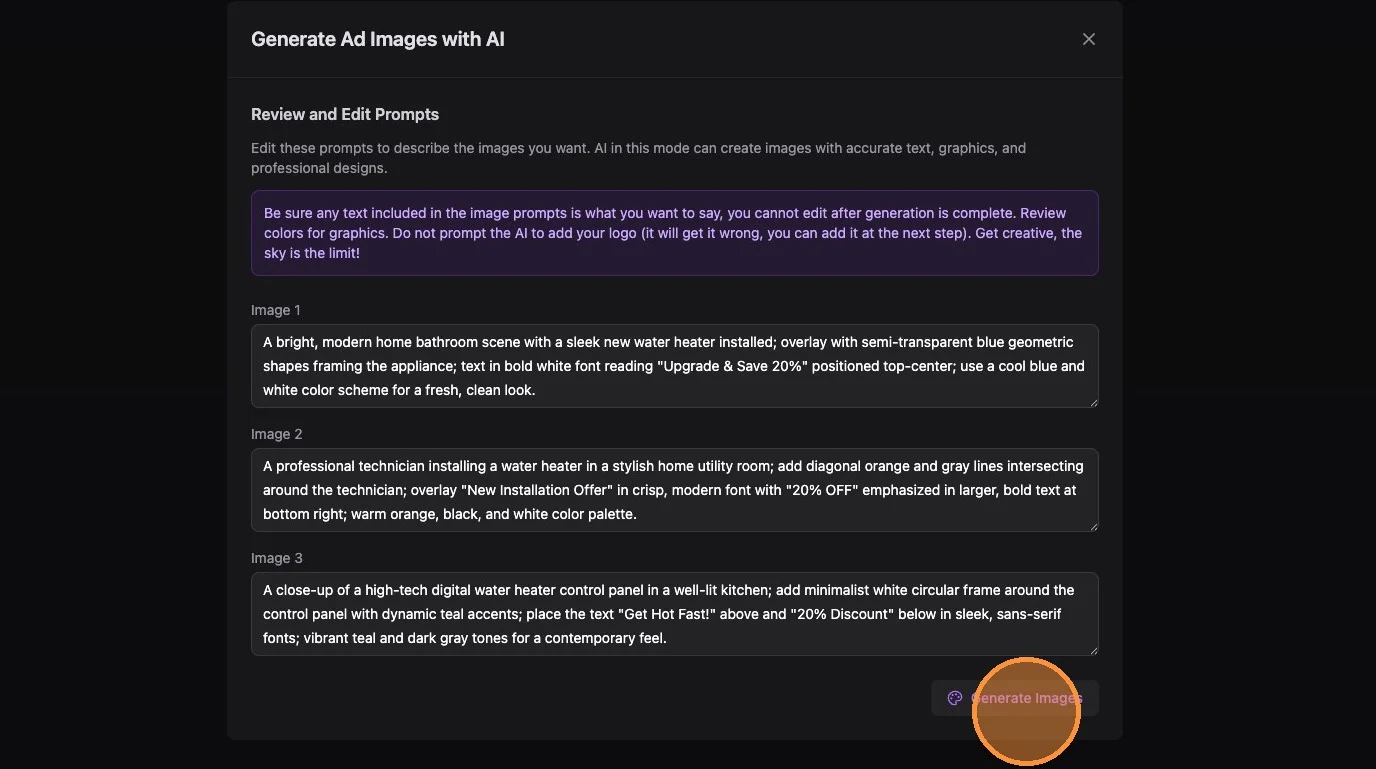
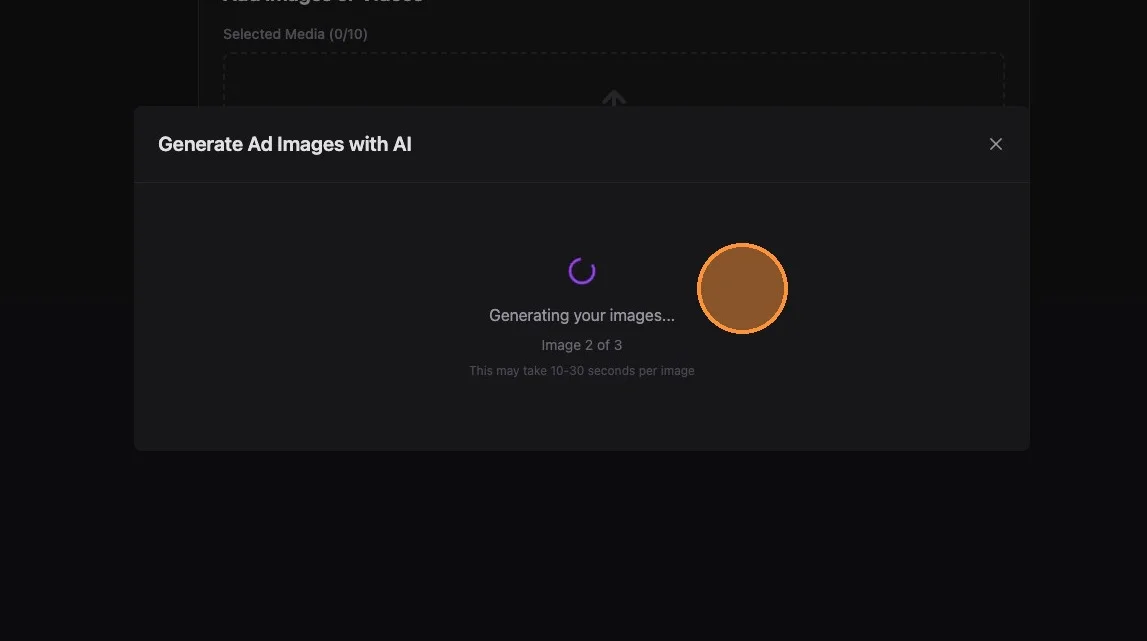
16. Generation may take 10-30 seconds per image
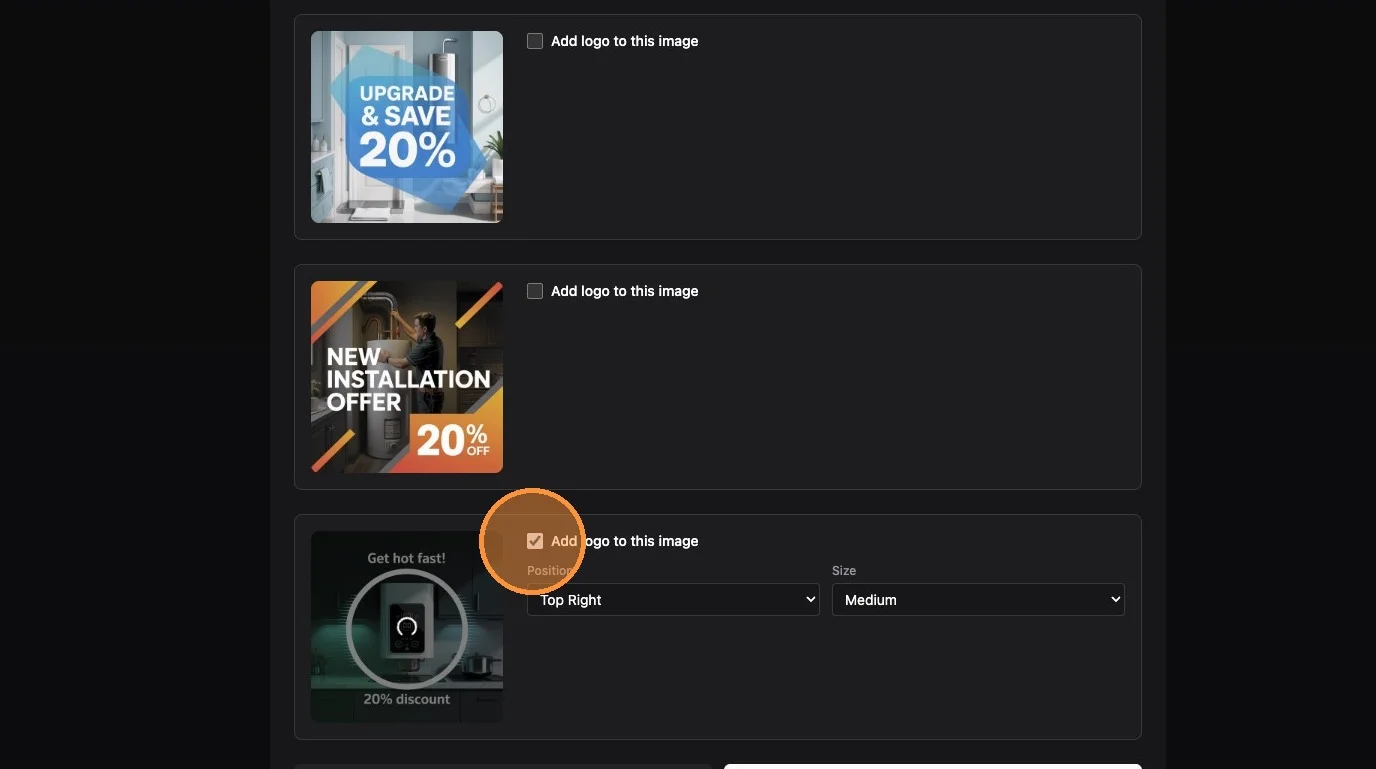
17. Optionally add your logo to the generated images
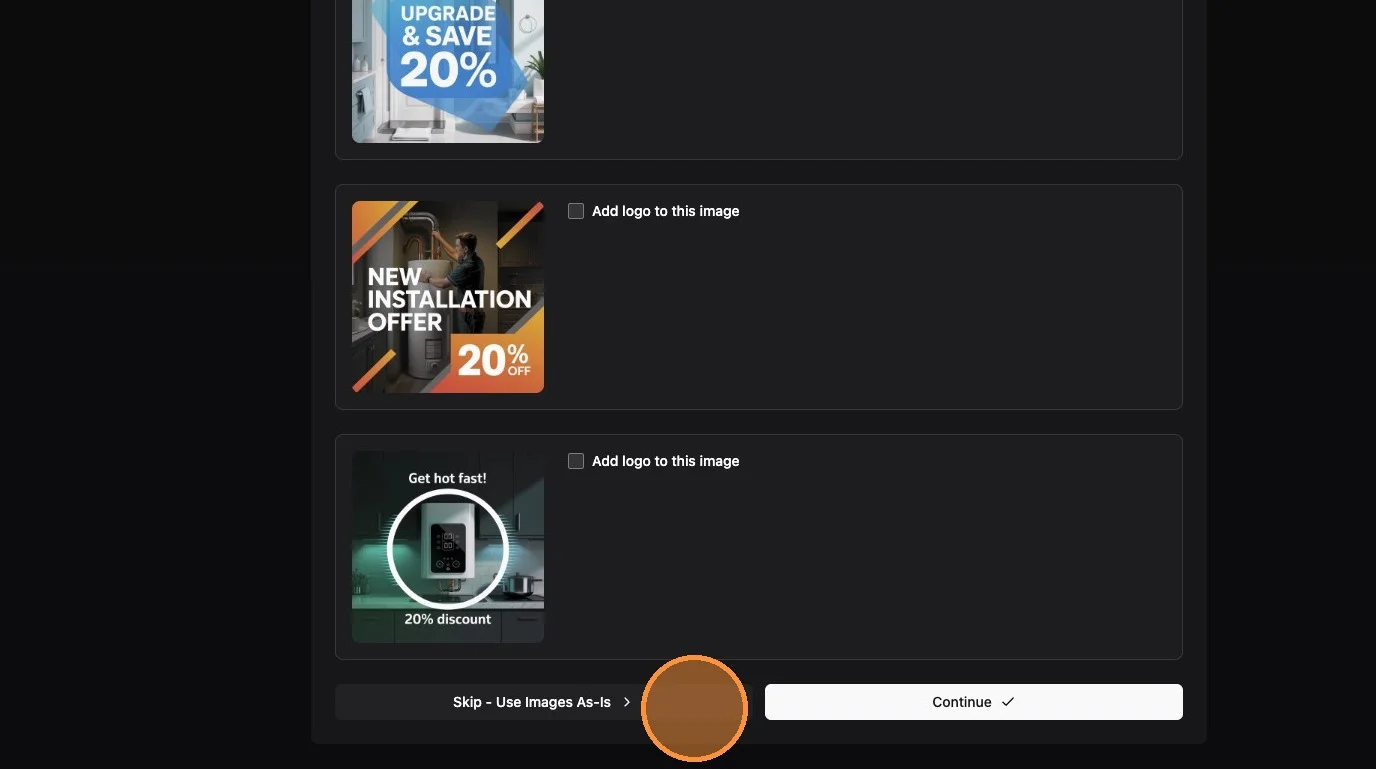
18. Or click "Skip - Use Images As-Is"
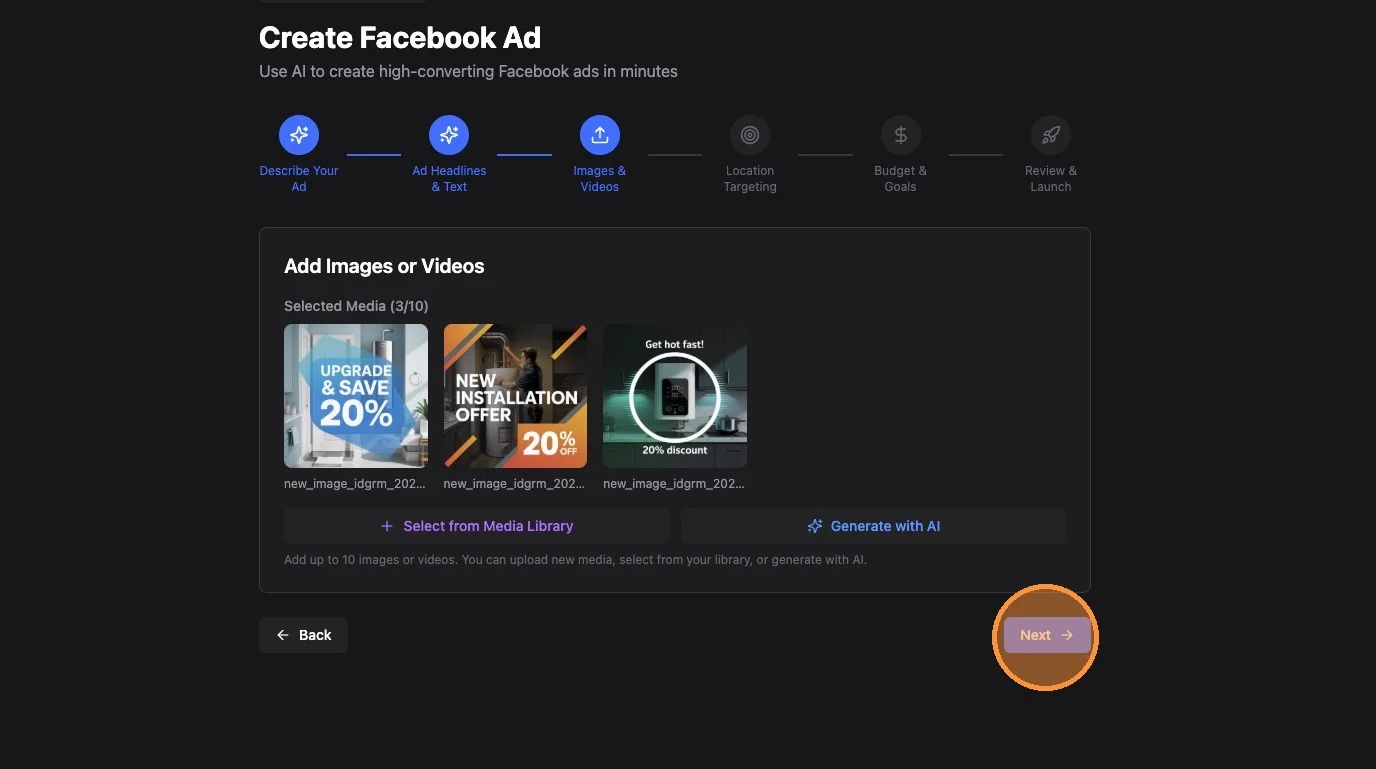
19. You can add more media (up to 10 images + videos per ad). We recommend a combination of images and videos. When ready, click Next.
Part 4: Targeting and Budget
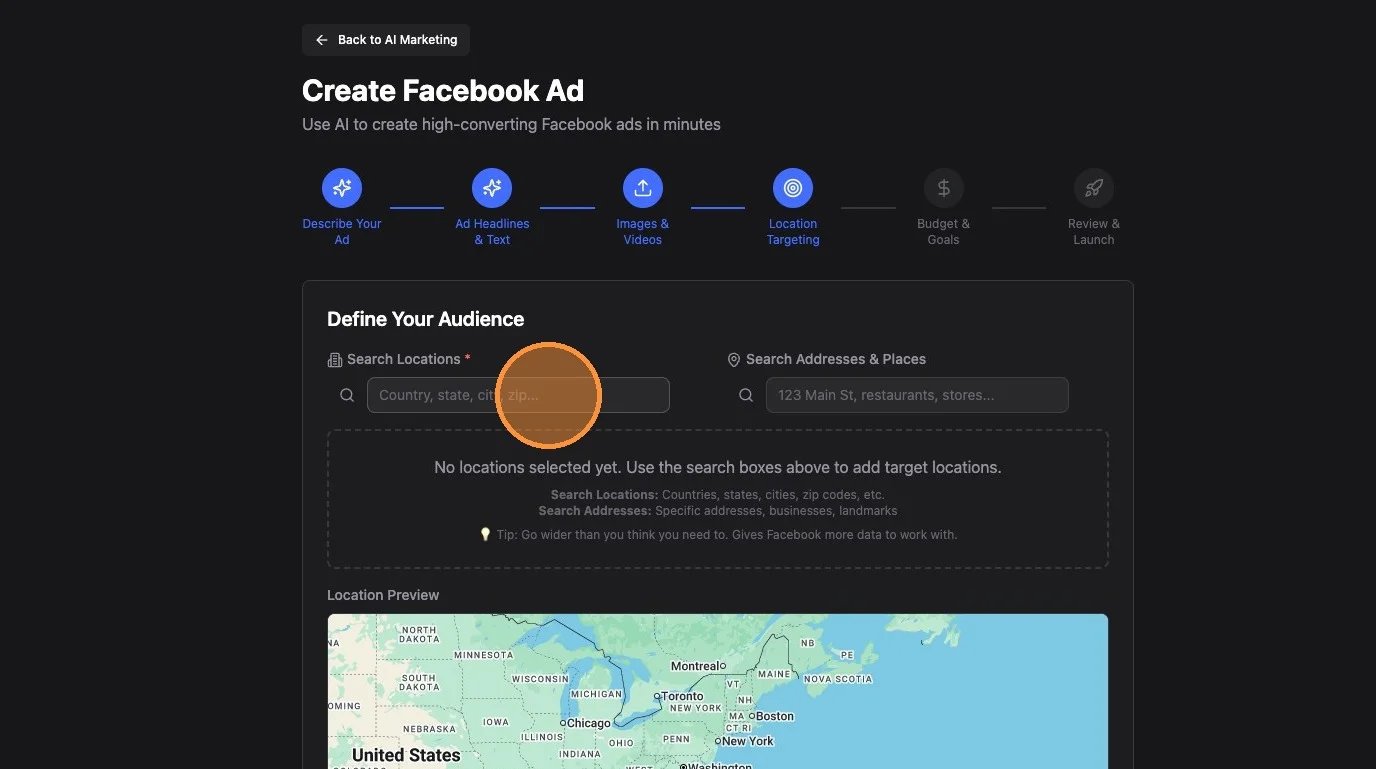
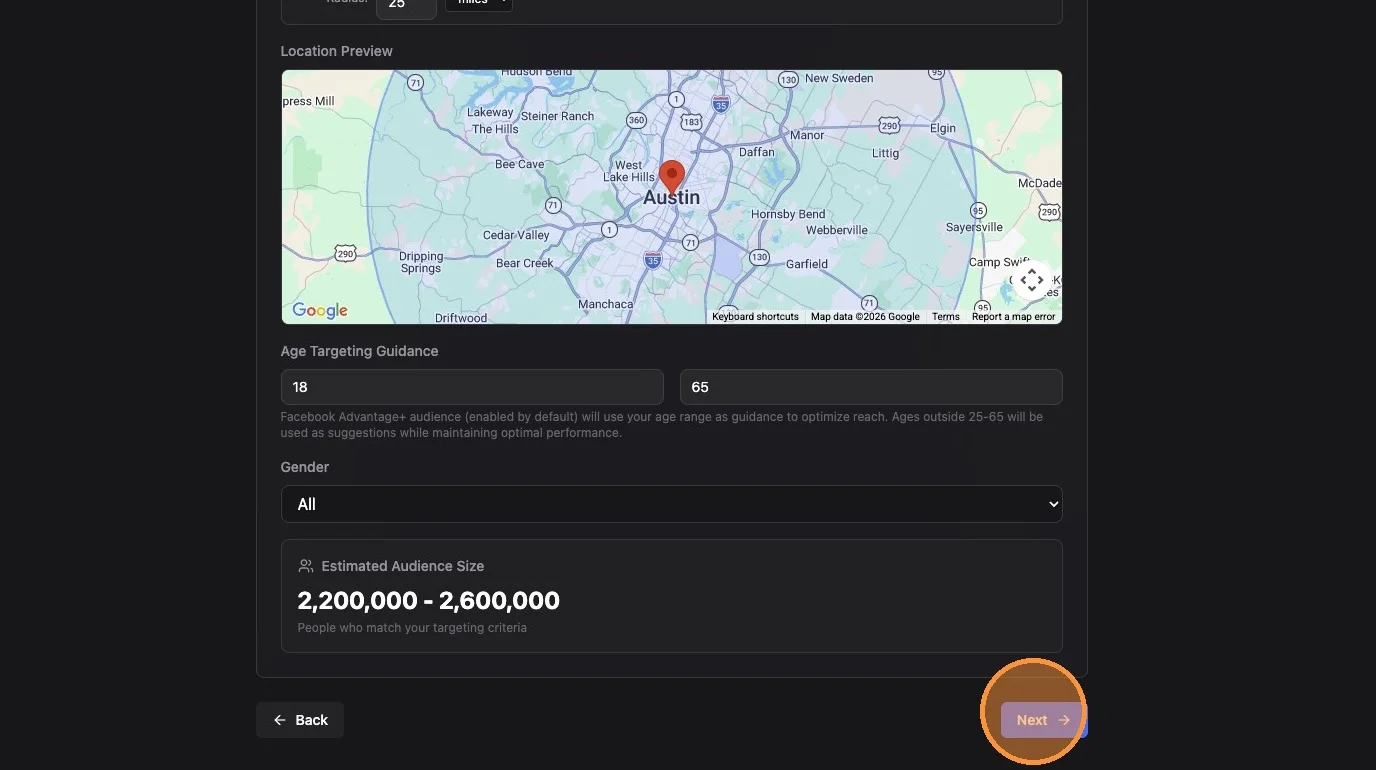
20. Add the location(s) to target. You can add cities, zip codes, or state-specific addresses. Some locations support radius targeting (Facebook limitation). You can add multiple locations. You can also set an age range and gender; Facebook treats the age range as guidance and may show the ad a little outside it. For special-category ads (housing, employment, financial), Facebook requires ages 18-65, all genders, and whole cities or areas with at least a 15-mile radius instead of zip codes.
21. Review the estimated audience size. If you get a warning about a small audience, consider expanding your radius.
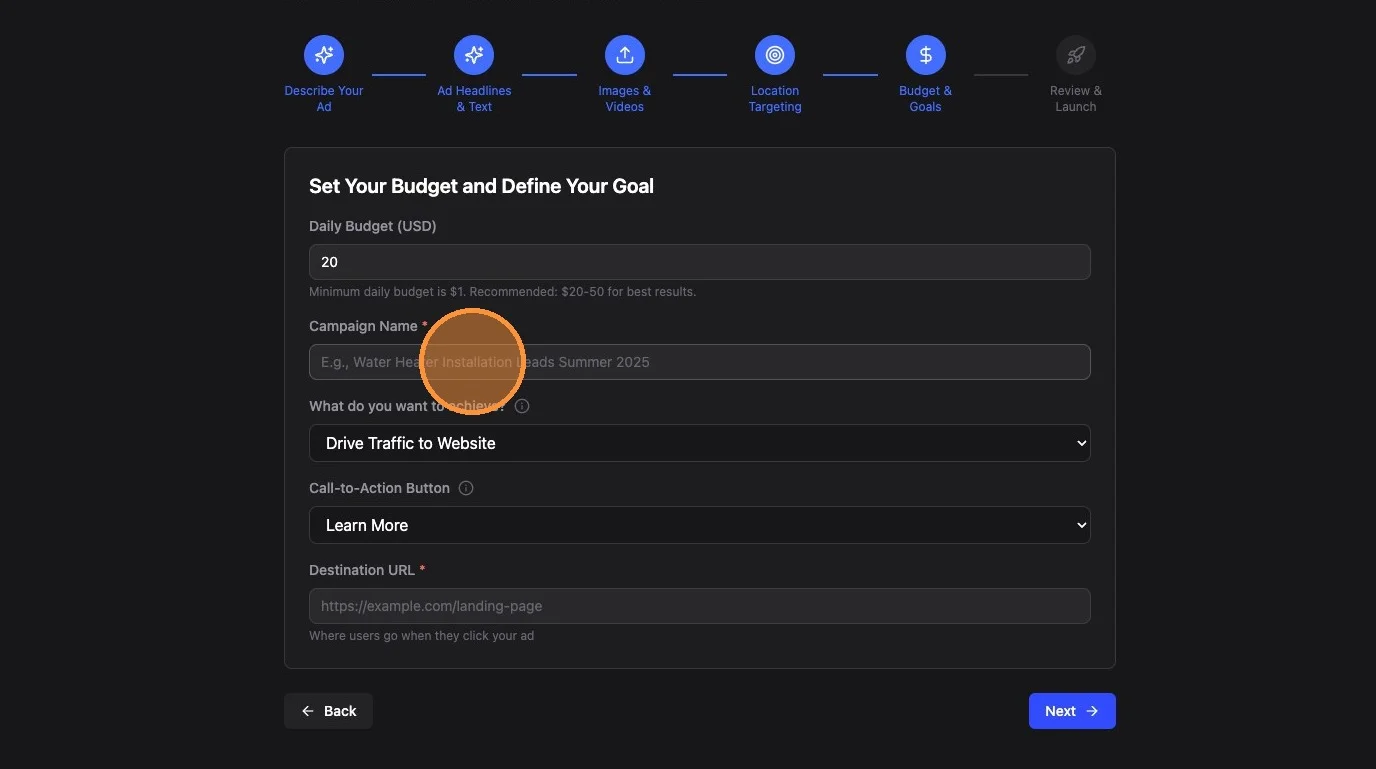
22. Name your campaign and set a daily budget. Facebook respects this budget on average - some days may go slightly over or under.
Part 5: Lead Capture Method
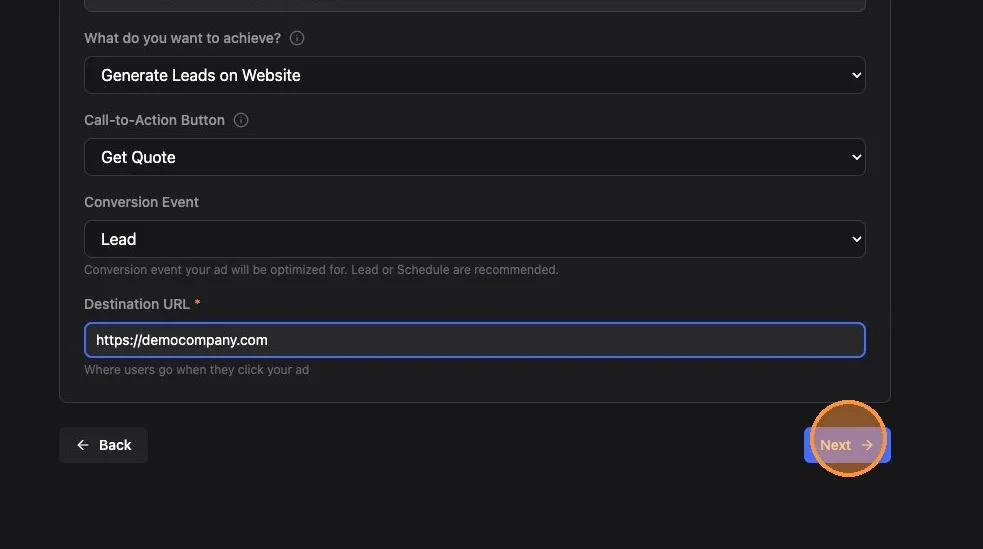
23. Under "What do you want to achieve?" select your lead capture method:
- Collect Leads with Facebook Form - Recommended for new customers. Leads fill out a form directly on Facebook.
- Generate Leads on Website - Recommended for new customers when you have a landing page with a brayv form (or a 3rd party form that sends leads into brayv.ai). Facebook optimizes using the conversion data brayv.ai sends back automatically; installing the pixel on your website is optional.
- Drive Traffic to Website - Specialized use case for maximizing clicks. Not recommended for most lead generation scenarios.
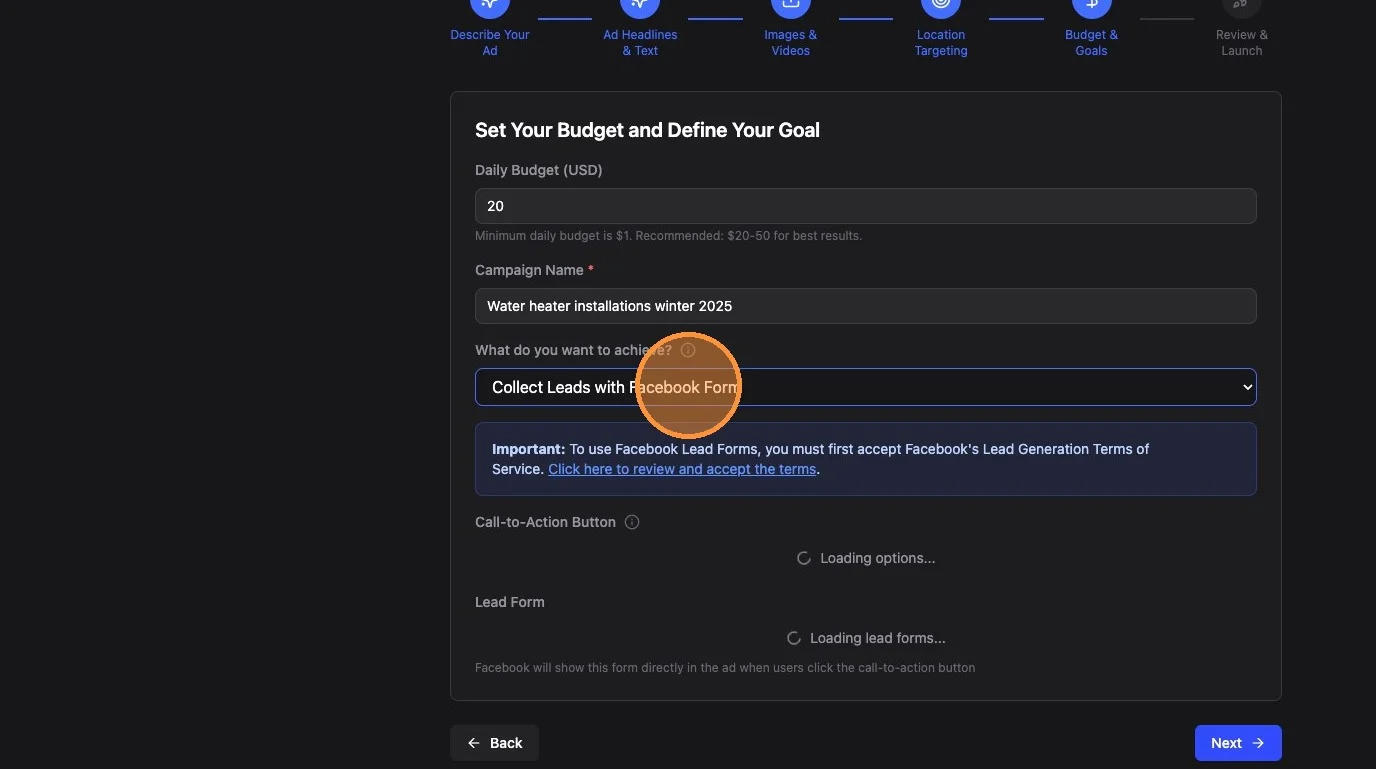
24. For Facebook Lead Forms: you must first accept Facebook's Lead Generation Terms of Service (follow the highlighted link). Then pick one of your existing forms or click "Create New Lead Form" to build one here. If your account doesn't have a website saved yet, you'll be asked for one - Facebook requires it for lead form ads.
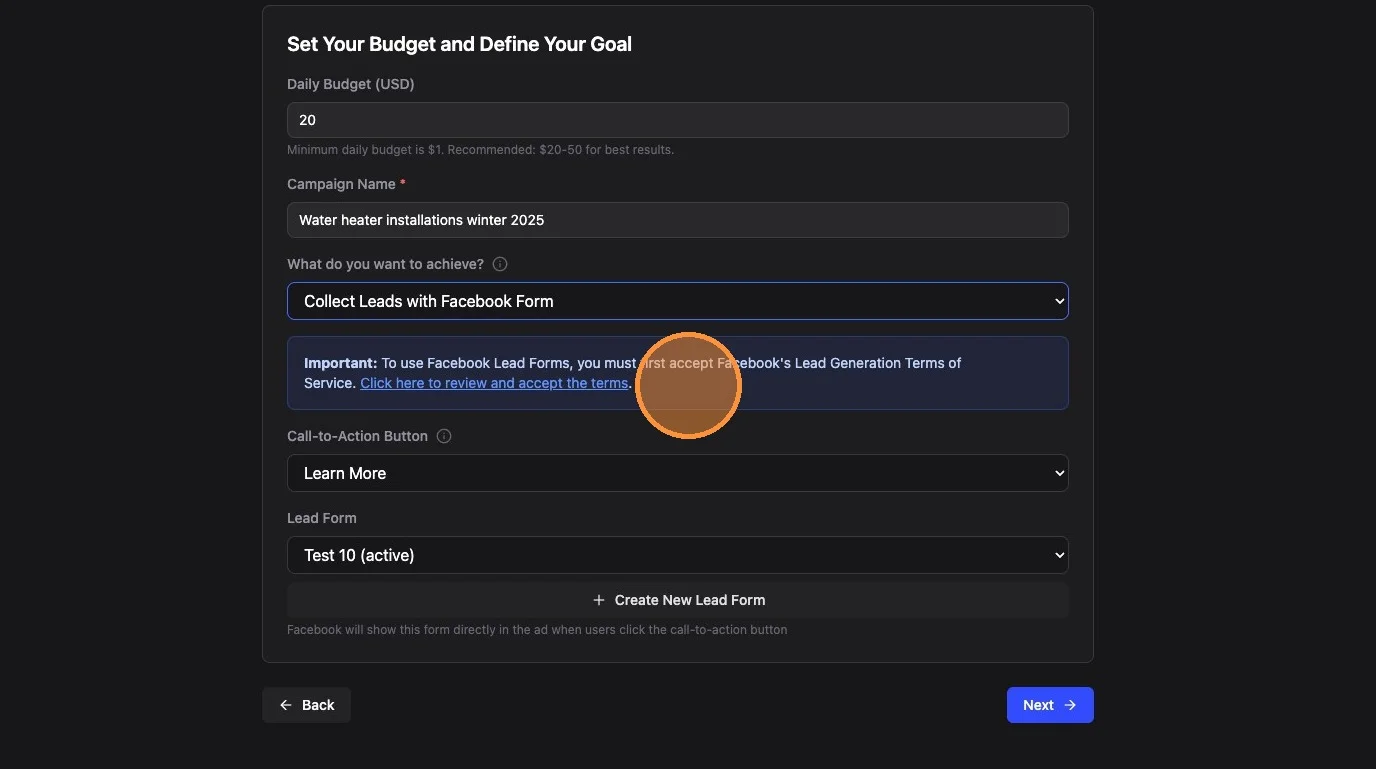
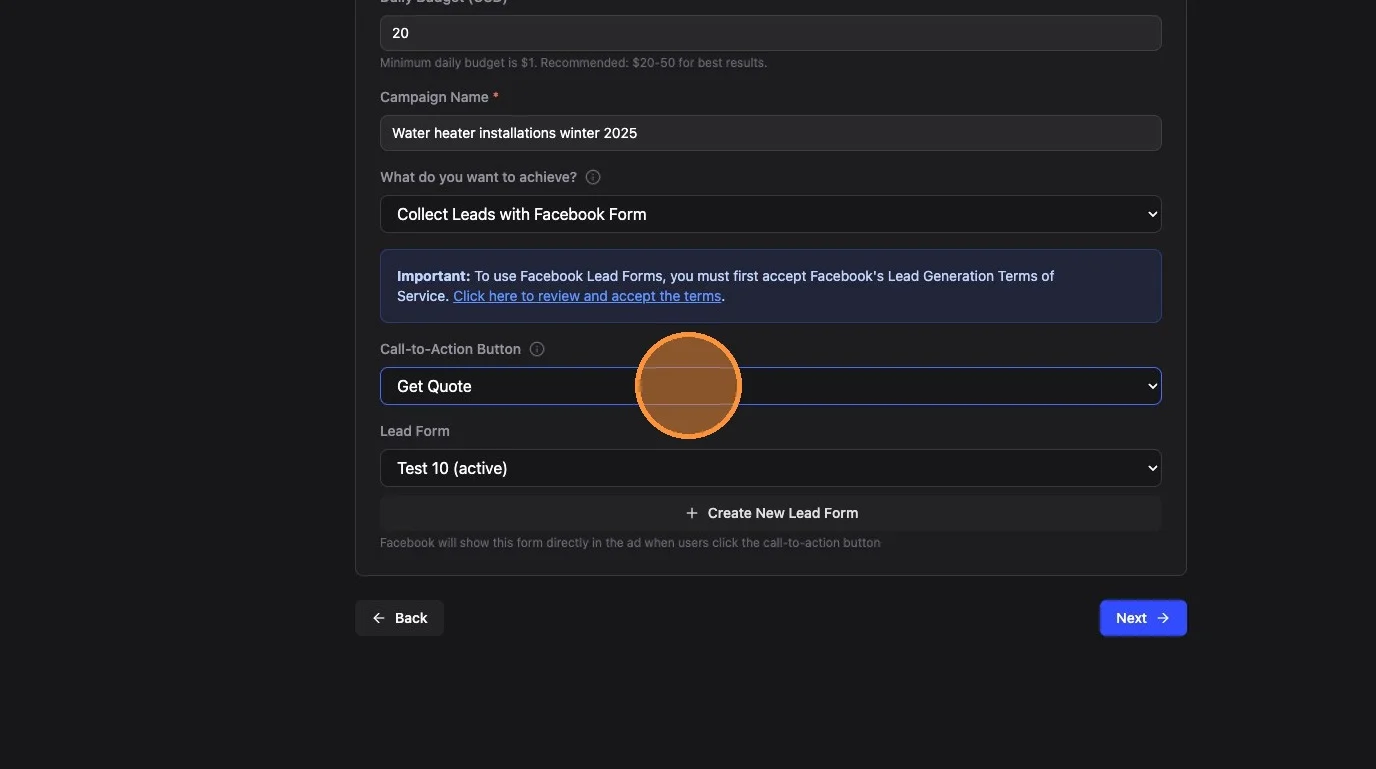
25. Choose a Facebook call to action for your ad button. "Learn More" is a good generic option. These are preset options from Facebook.
26. If you selected "Generate Leads on Website," choose the conversion event - what you're asking Facebook to find. "Lead" is the right choice for most accounts. "Schedule" asks Facebook for converted leads (leads that reach your journey's goal, like a booked appointment) and works best once your account already gets a steady number of them each month. The other options only work if your website's own Facebook pixel sends those events; brayv.ai reports leads and converted leads for you.
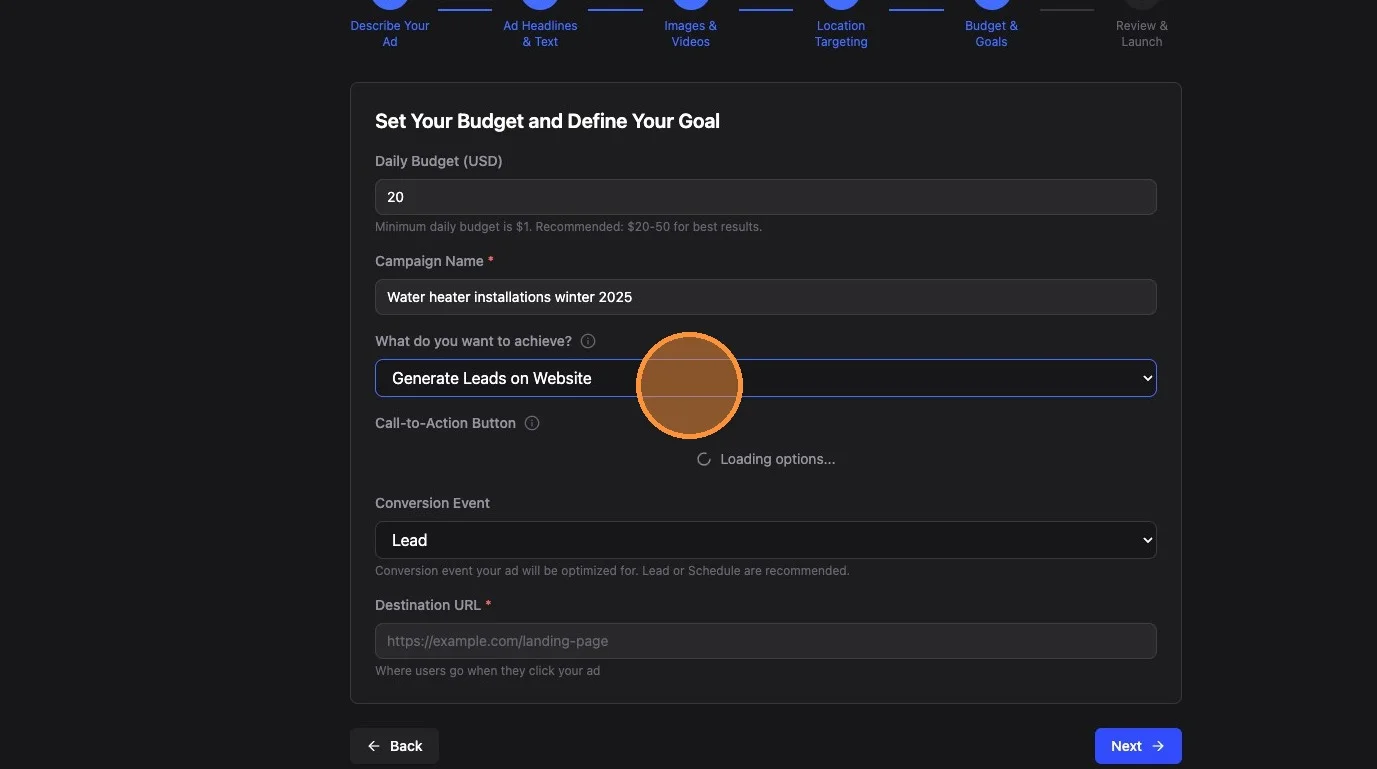
27. Enter the destination URL where leads should go. If you don't have a page designed for this, use Facebook Lead Forms instead.
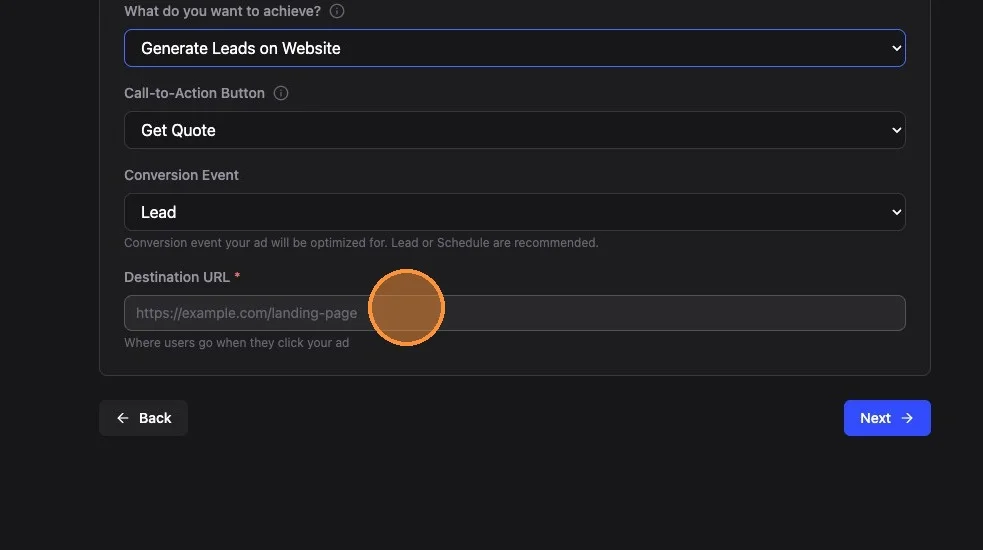
28. Click Next
Part 6: Review and Launch
29. Review your ad, all settings, and see a preview of how it will look.
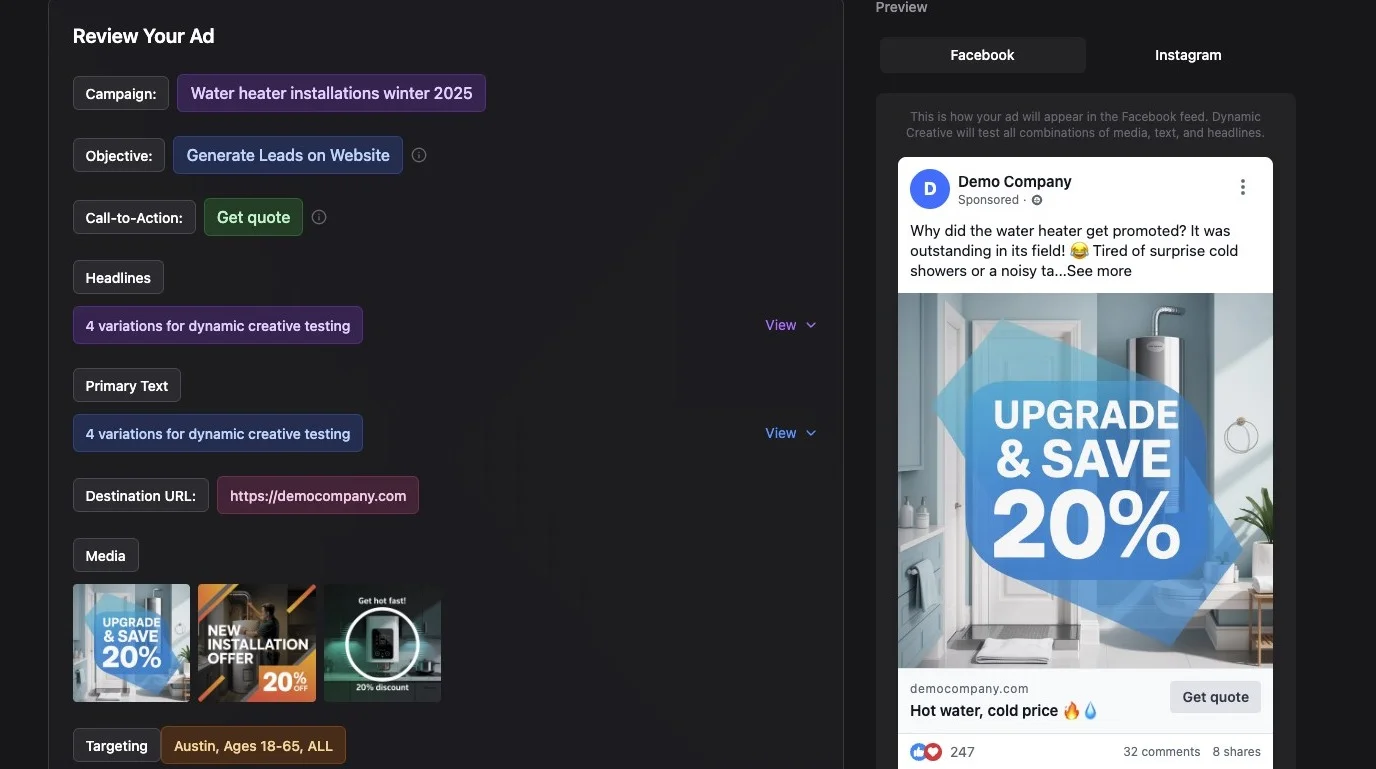
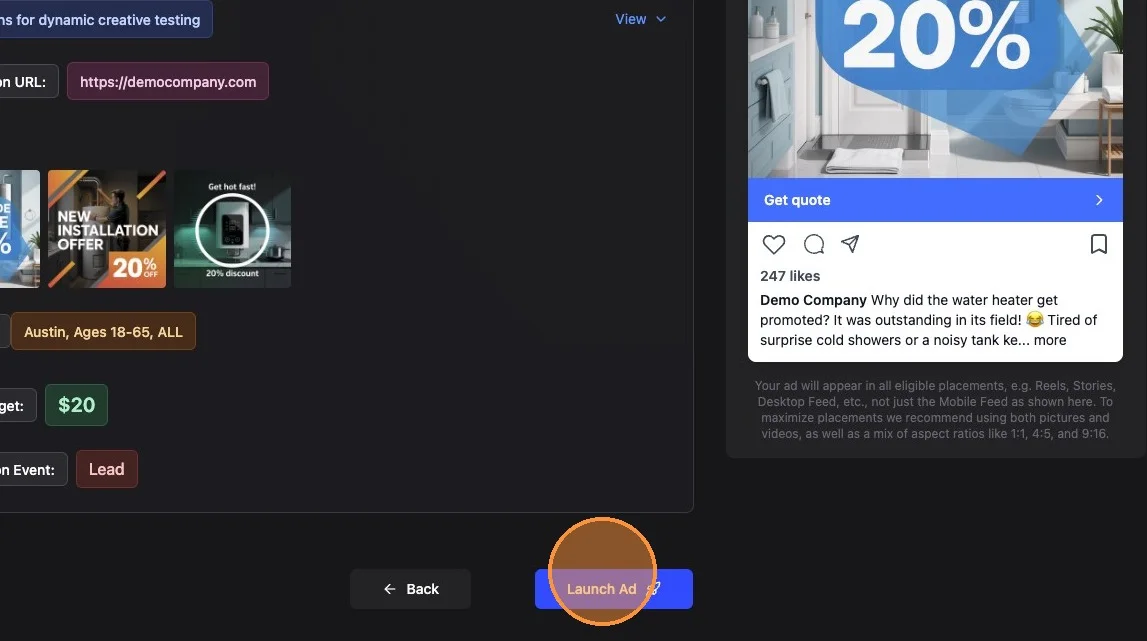
30. Click "Launch Ad" and wait for confirmation! Brayv builds the ad on Facebook and turns it on; Facebook reviews it before it starts showing. We automatically split test up to 160 combinations of text, headlines, and media, and keep Meta updated on lead quality behind the scenes so targeting improves over time.
After Launching: Connect Your Leads
Important: After launching, make sure your leads flow into brayv.ai properly:
If using Facebook Lead Forms: Right after launch you'll see a One more thing prompt. Click Set it up to map the form into brayv.ai and choose the AI journey its leads should enter. You can also finish this later under Settings > Lead Sources.
If sending leads to a website: Ensure the landing page has a form (brayv or 3rd party) displayed prominently, and that form is configured in Lead Sources to route leads into an AI journey.
Key Tips
Be Specific with Your Offer: "New water heater installations for 20% off" works much better than just "plumbing services." Specific offers drive higher engagement and allow AI to better understand who is likely to engage with your ad and actually turn into a customer which helps improve your targeting over time.
Use Multiple Media: Ads with a mix of images and videos perform best. Aim for 3-5 pieces of media minimum. AI-generated graphics work well alongside authentic videos from your team or customers talking about your work. Videos should be short - 15-30 seconds max.
Start with Facebook Lead Forms: Unless you have a dedicated landing page with a properly linked form, Facebook Lead Forms are the easiest way to capture leads and get them into brayv.ai.
Drafts Save as You Go: Your ad is saved as a draft each time you generate copy or click Next. Come back to it later from Drafts on the AI Ads page.
Do I need a Facebook Pixel? No setup needed. When you connect Facebook, brayv.ai picks your ad account's pixel (or creates one named "Brayv Conversions" if there isn't one) and adds its own tracking events to it. brayv.ai then automatically sends every lead, first reply, converted lead (a lead that reached your journey's goal, like a booked appointment), and opportunity won back to Meta behind the scenes, teaching its algorithm who your best customers are. Over time, Meta gets smarter about who it shows your ads to, which improves your results and lowers your cost per lead. If your ad account already has a pixel, brayv.ai will use it; you can change the selection in Settings > Integrations. Installing the pixel on your website is optional and only adds site-visit tracking.
Related Features
- Build a Meta Ad with Siren - The guided AI chat builder (recommended)
- Facebook Lead Forms - Connect Facebook lead forms to brayv.ai
- Form Lead Sources - Set up web forms for lead capture
- Customer Journeys - Route ad leads into automated AI journeys
Summary
Creating a Meta ad in brayv.ai:
- Connect Facebook in Settings > Integrations
- Set up your ad - category, offer, target audience, tone
- Generate copy with AI - review and edit headlines and text
- Add media - AI-generated images, library uploads, or videos
- Configure targeting - location, audience size, budget
- Choose lead capture - Facebook Lead Form (recommended) or website
- Review and launch - Brayv auto-optimizes with 160+ split test combinations
Don't forget: If you used a Facebook lead form, click Set it up in the prompt after launch (or connect it in Settings > Lead Sources) so its leads flow into an AI journey automatically!