
Related Articles
Lead Assignment at Lead Source
Quick Reference Keywords: Assigning contacts at lead ingestion · Round robin lead distribution · Lead routing by zip code · User lead counts · Assignment scripts
Overview
Lead assignment at the lead source level lets you automatically assign incoming contacts to specific team members the moment they arrive. This is an advanced feature - most businesses find it easier to manage assignment when the AI reaches its goal (e.g., booking an appointment or qualifying a lead). However, if you need to assign leads immediately upon receipt, you can build assignment logic that ranges from simple to highly complex.
Estimated time to complete: 3-5 minutes
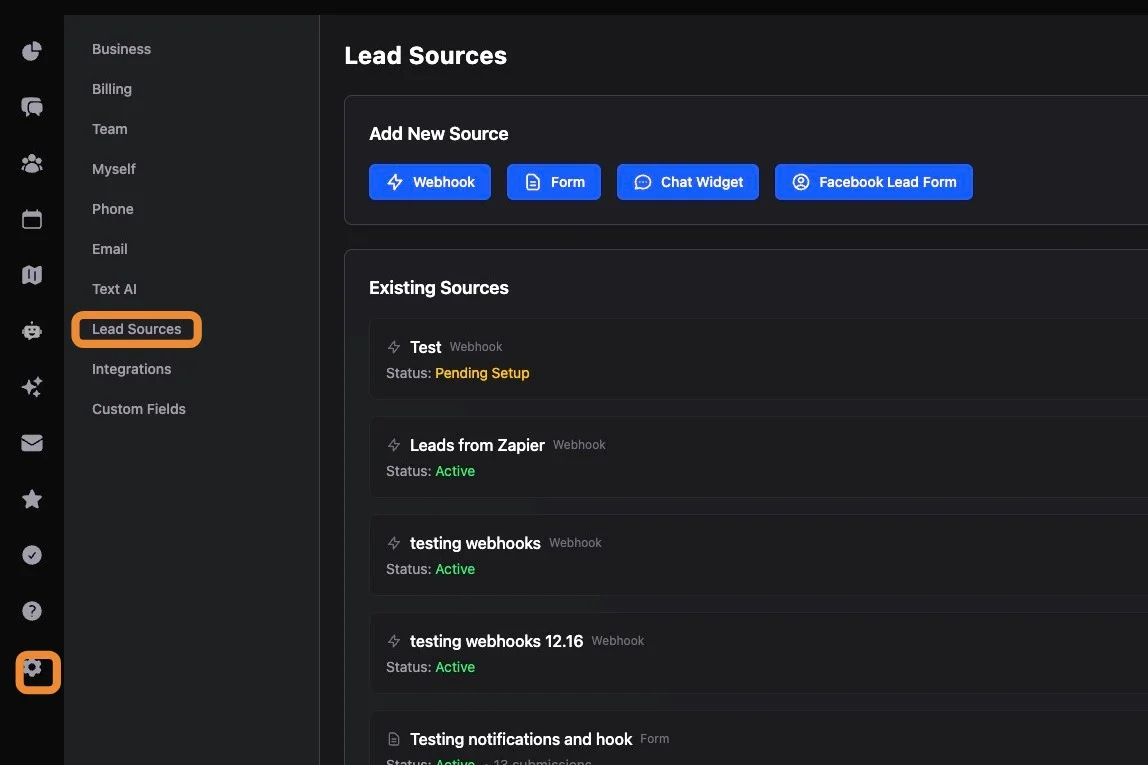
1. Navigate to Settings (gear icon, main left menu) > Lead Sources
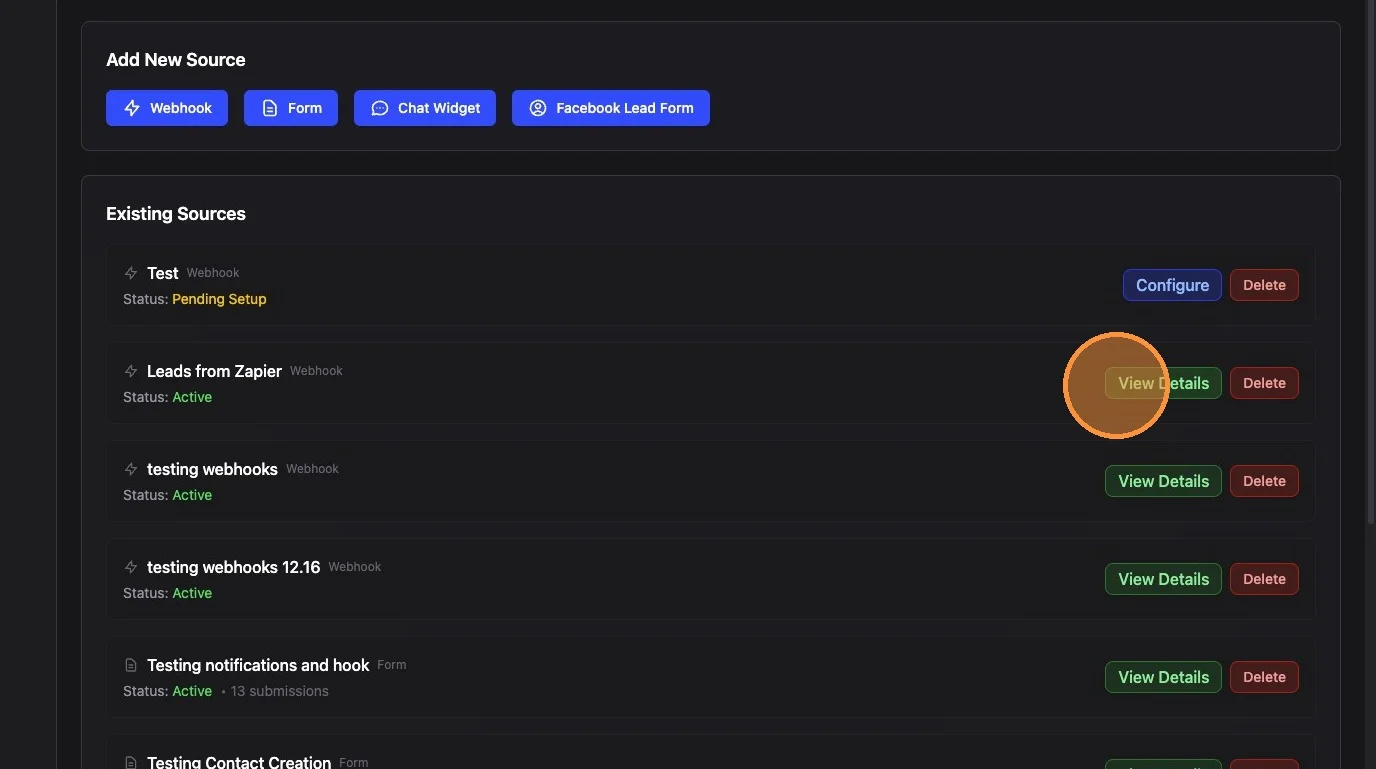
2. Click "View Details" on the Lead Source you wish to edit/view
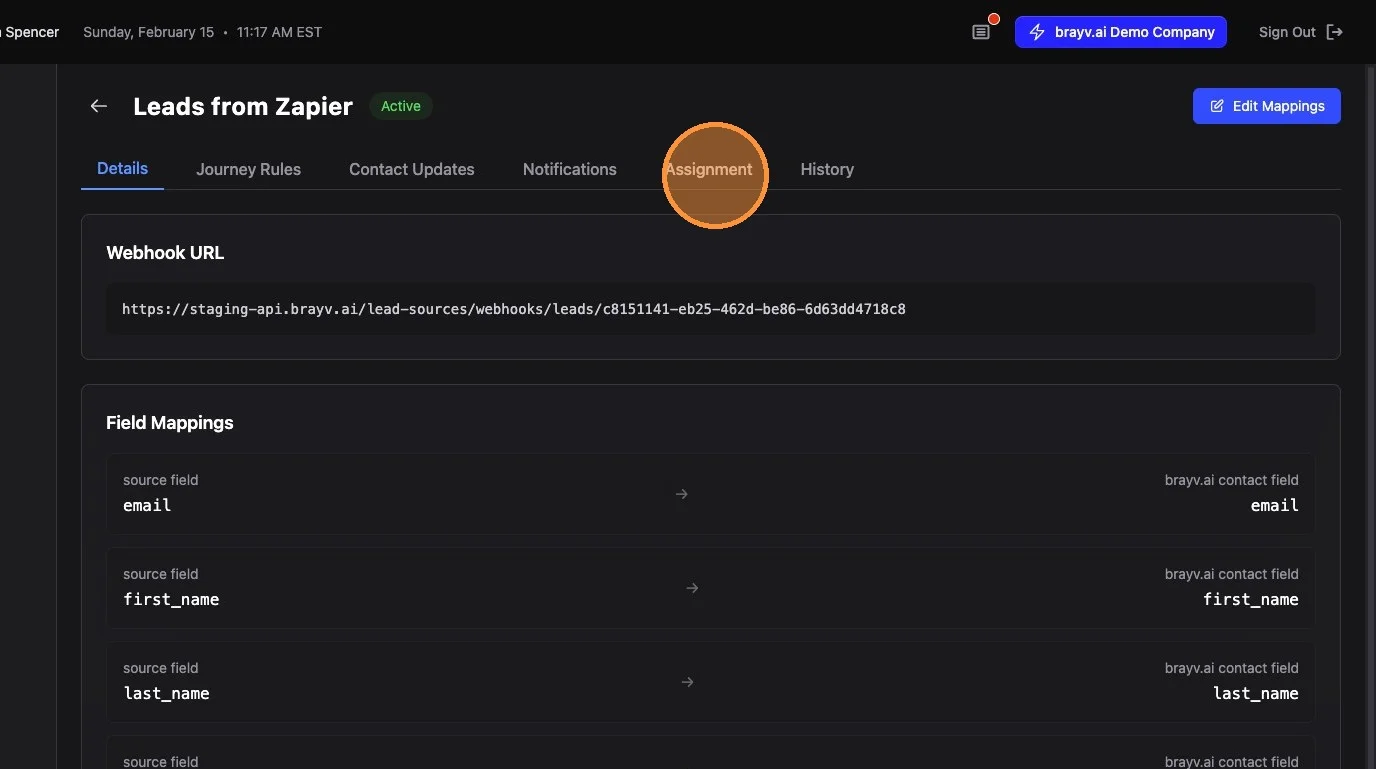
3. Click "Assignment"
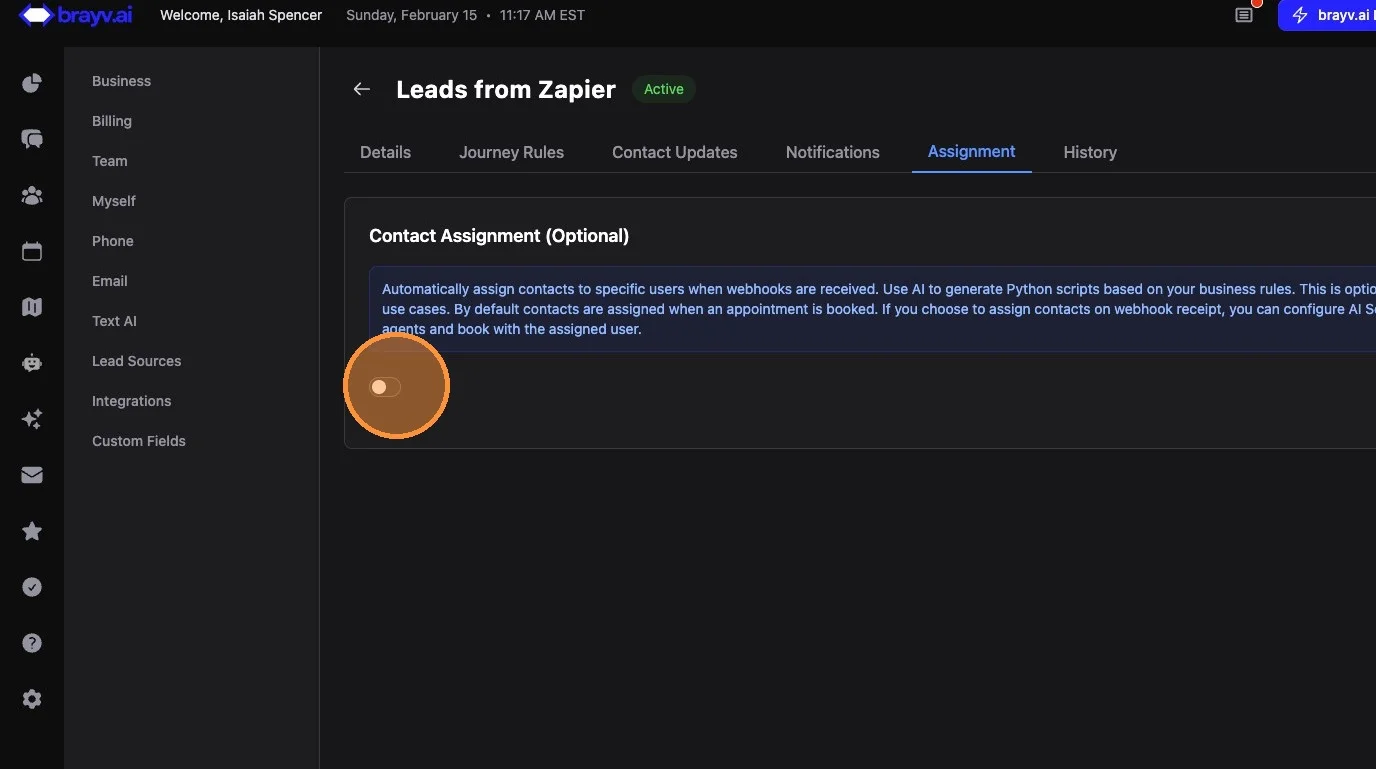
4. Click the toggle to the right to turn on Contact Assignment
5. Type your desired lead distribution logic into the assignment instructions field.
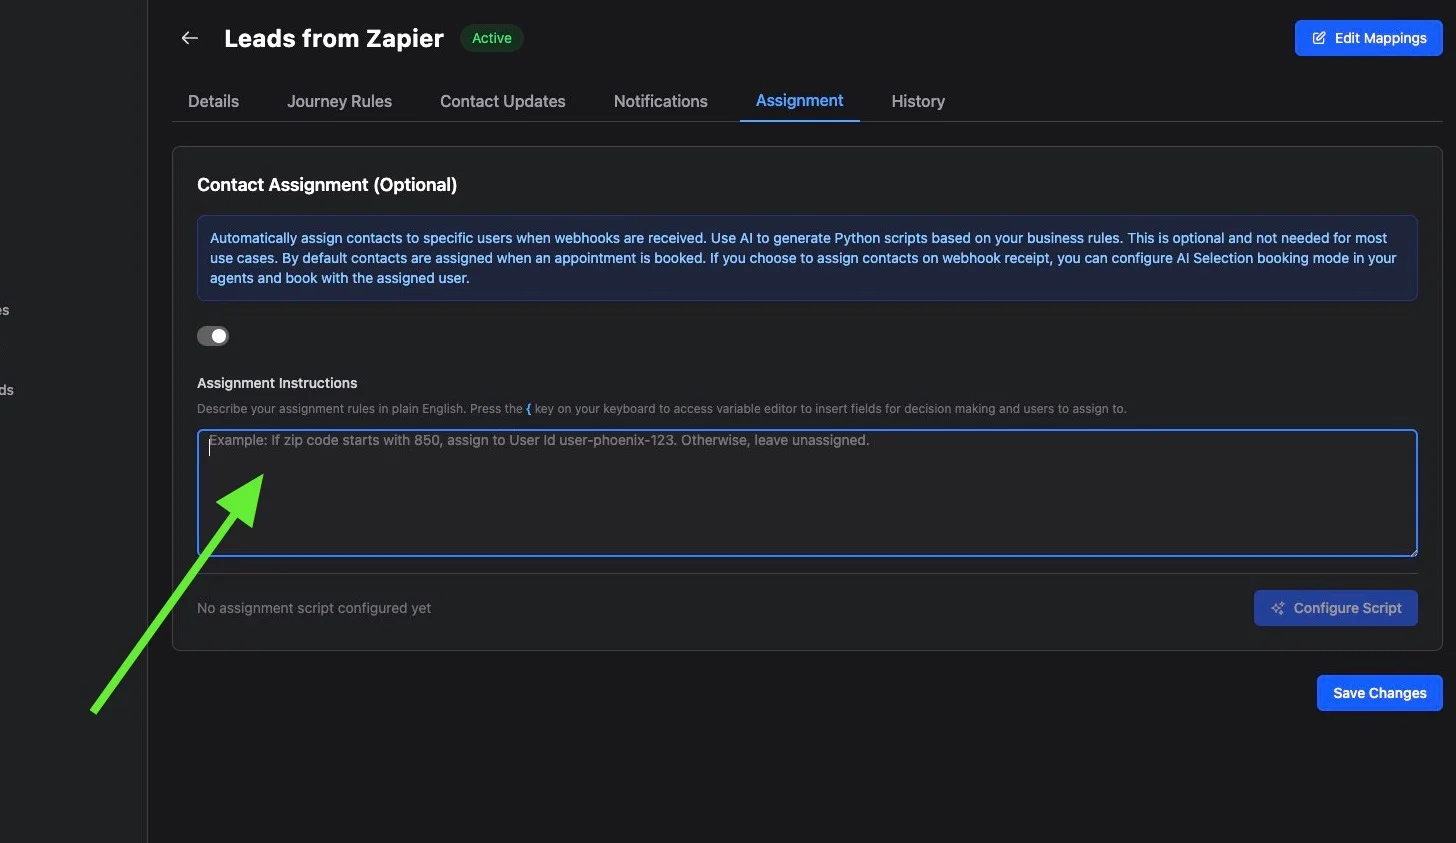
6. Press the curly bracket key to access variables like:
- Contact owner ID
- Contact zip code
- Other contact fields
- Specific users and user data like last assigned dates (for round robin)
- User lead counts (for distribution against overall lead counts on a rolling 30-day basis)
- User lead counts by zip code (for territory-specific load distribution)
- Recent assignments (for a fixed rotation order, like 2-2-1)
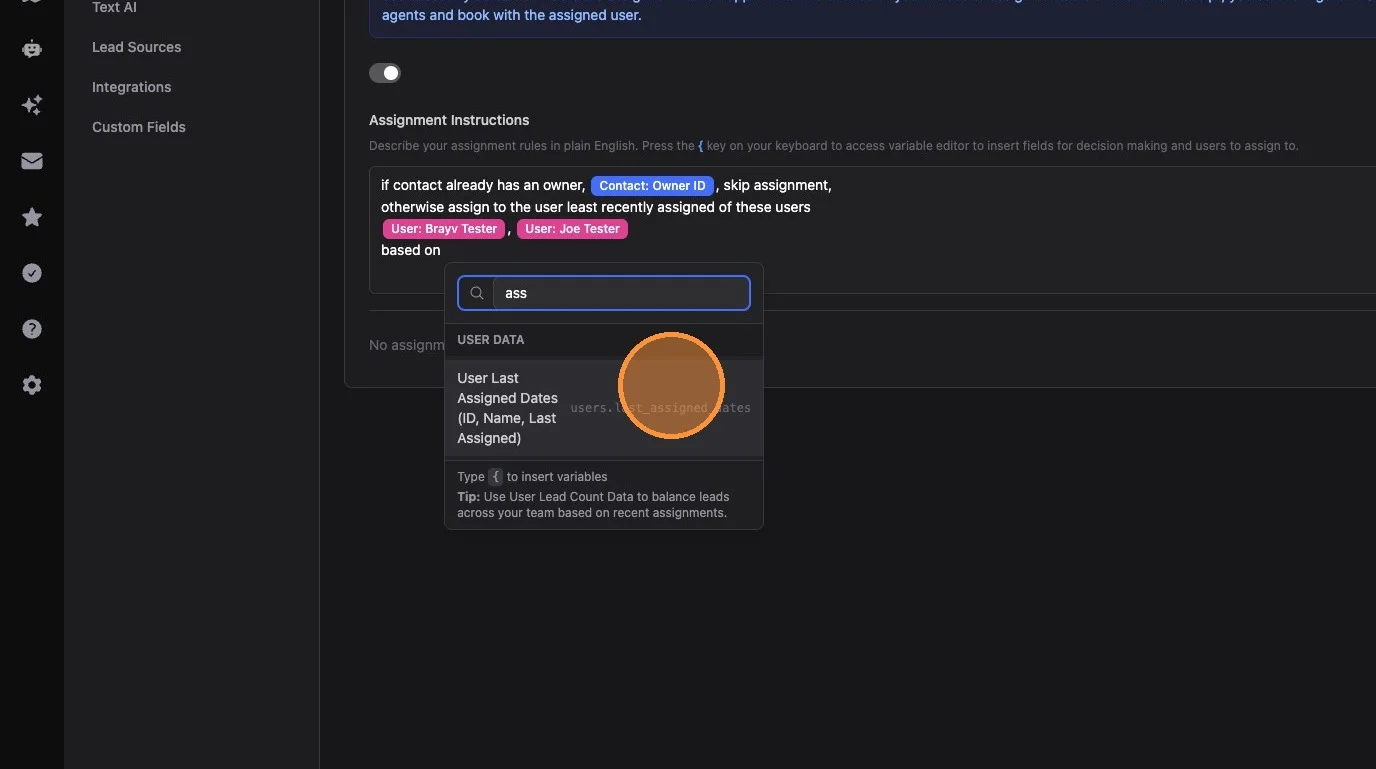
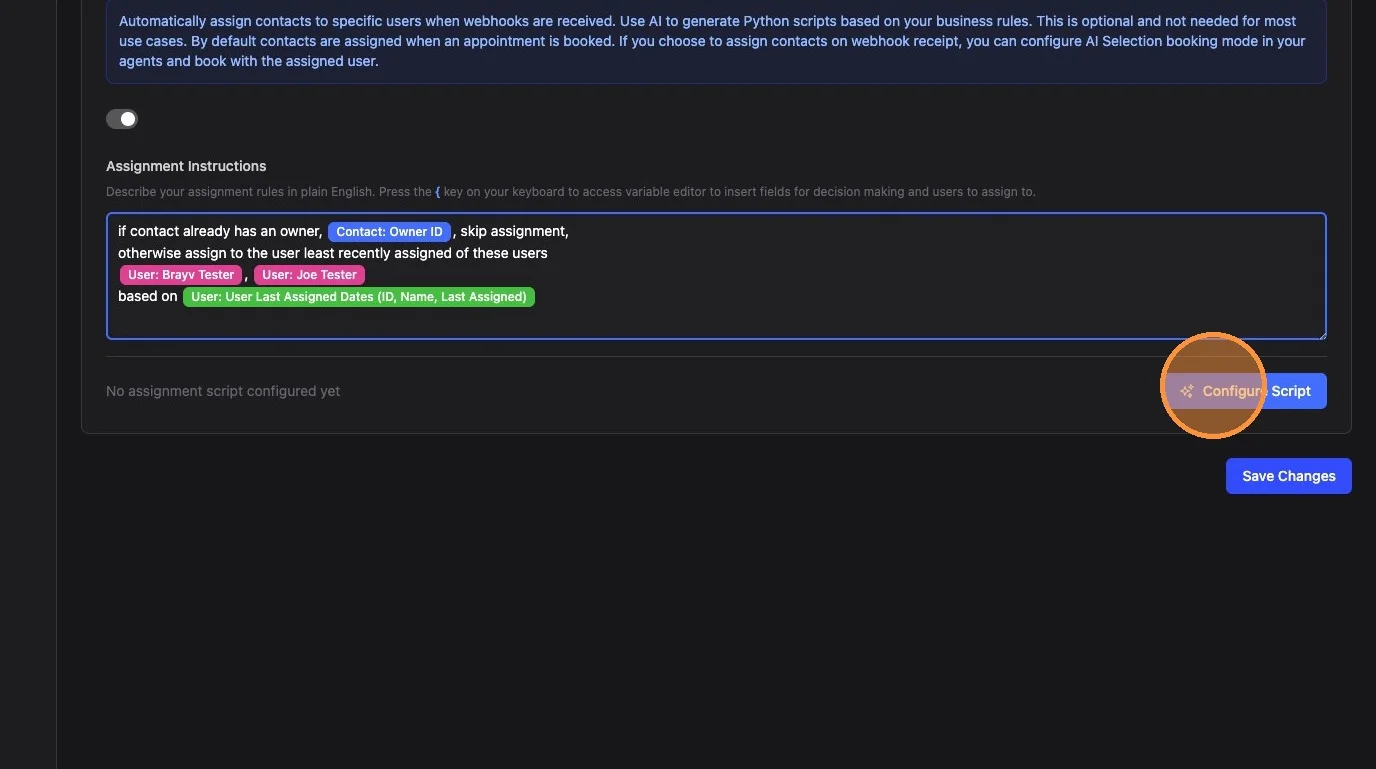
7. When your instructions are fully typed out, click "Configure Script"
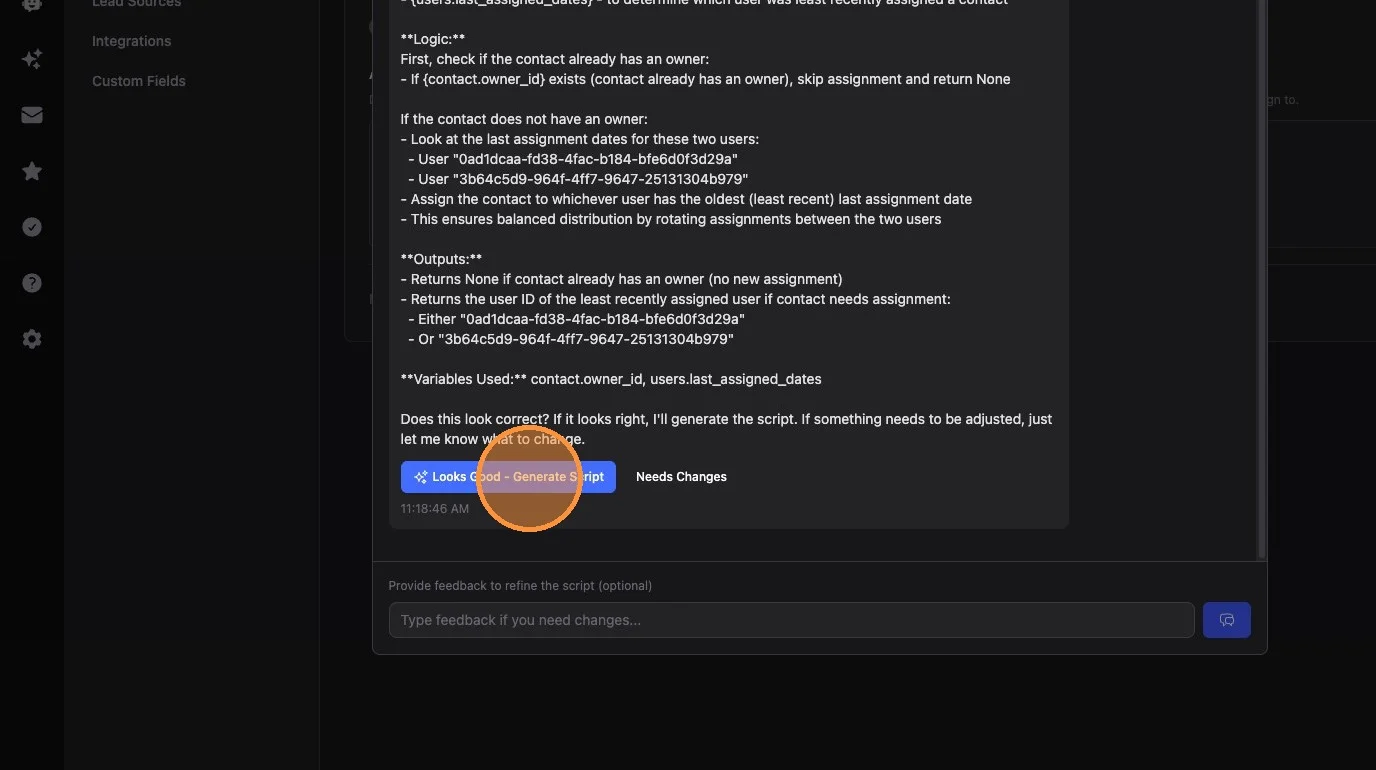
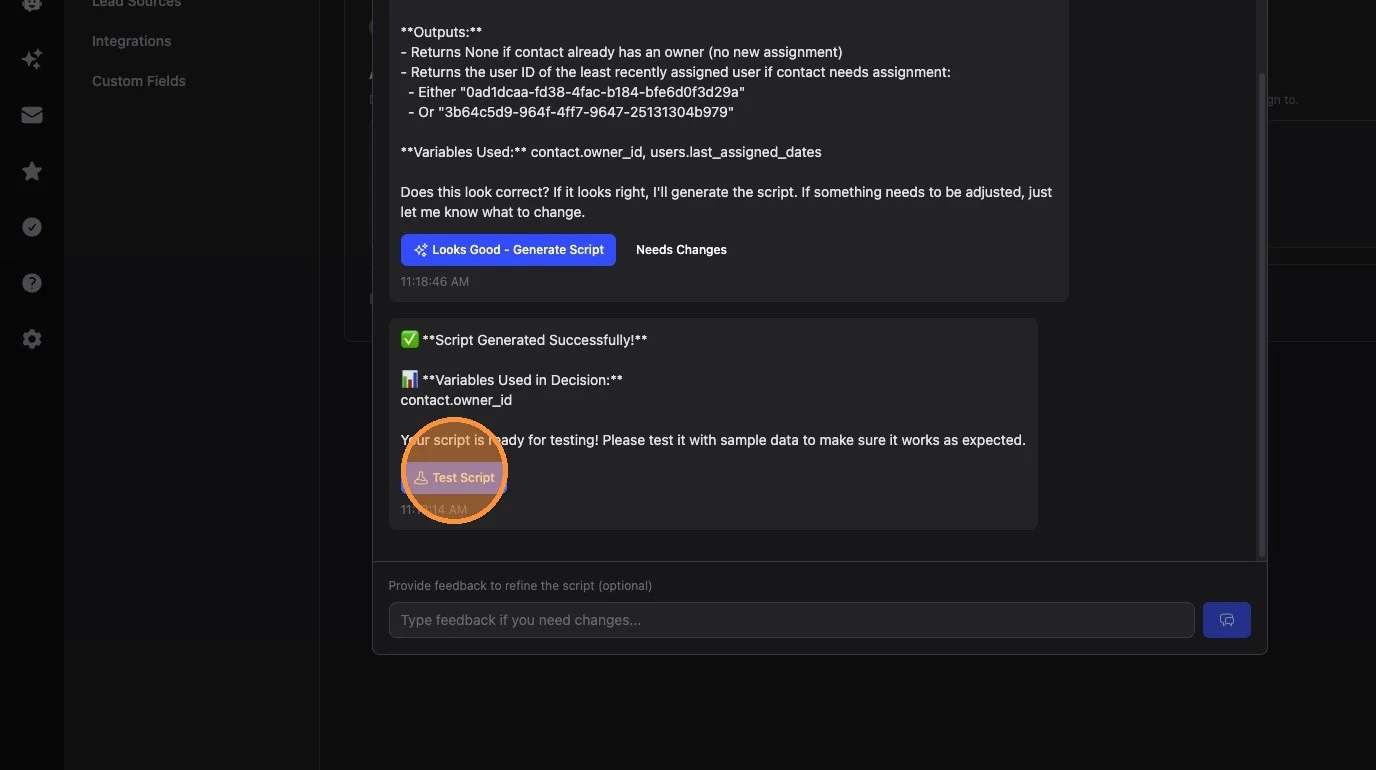
8. Ava will organize your instructions logically and show them to you again. Click "Looks Good - Generate Script"
9. When the script is finished generating, click "Test Script"
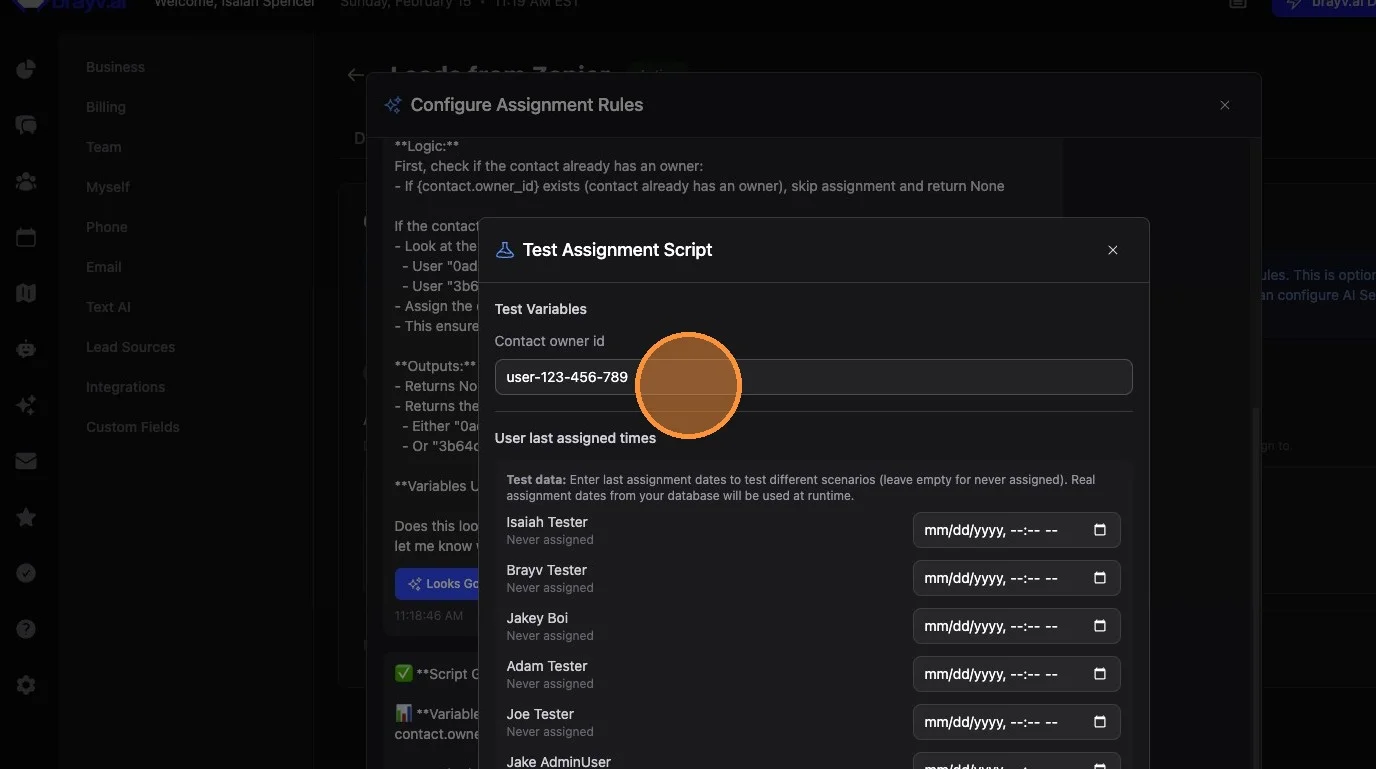
10. The variables used in the decision for who to assign the lead to will show up in the testing interface.
If you are using a rule like "If the contact already has an owner, skip assignment," go ahead and clear the contact owner ID field. Otherwise, the test will always just result in saying it assigned to that dummy user ID. You can run the test once with that in there to make sure that logic is working correctly. Otherwise, clear that field and enter values into the other fields that you are trying to test to make sure the more complex parts of your logic are working the way you expect them to.
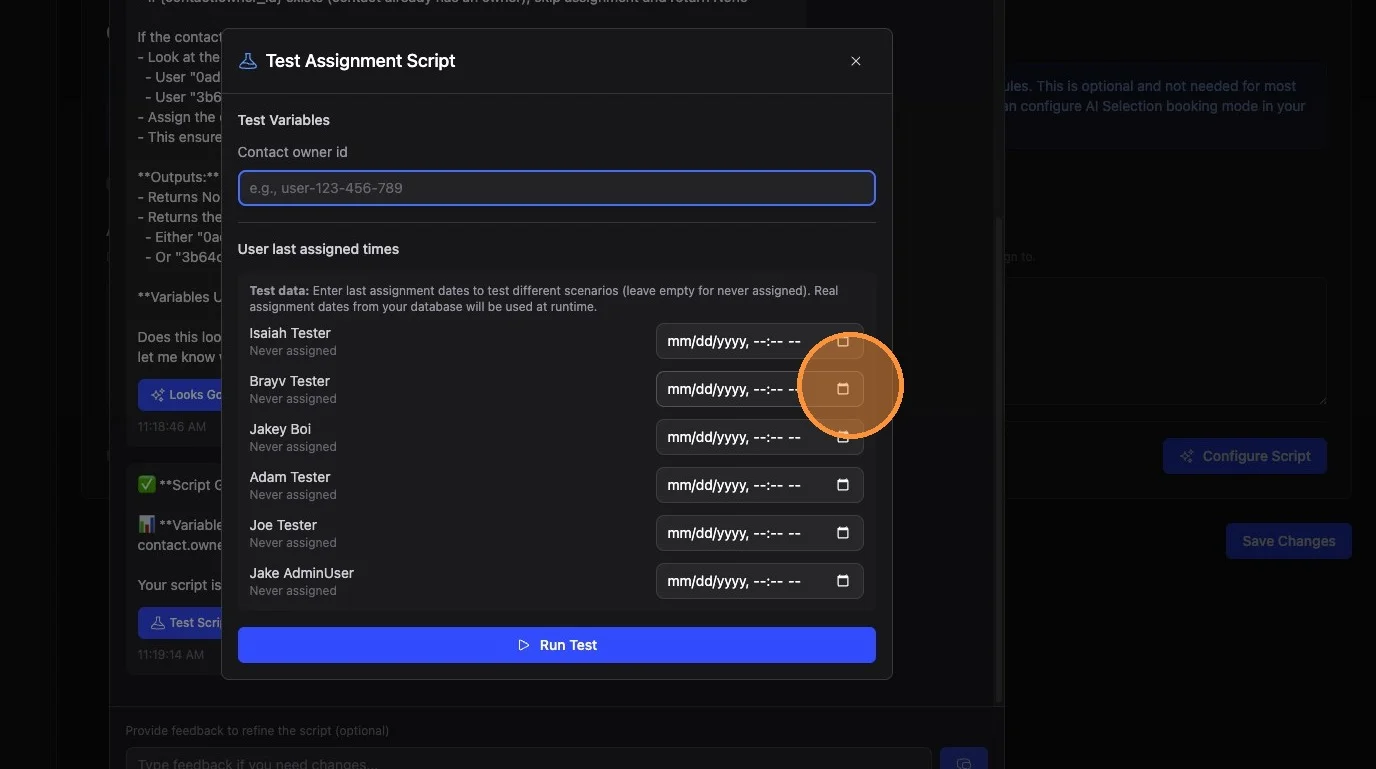
11. When testing scripts that involve user last assigned times, select times for the users in question.
For example, select yesterday for one of your users and the day before yesterday for another one of the users to ensure that the logic based on who was most or least recently assigned a lead is working the way you intend.
Important: All of your users will show up in this list in the test interface. If, in your instructions, you explicitly direct Ava which users to choose from, the script will only ever result in those users being chosen. If you just give instructions like "assign to the least recently assigned user" and you do not include a list of users, this assignment script would rotate through all your users, some of which might not be team members that should actually ever be assigned leads. Ensure that you are explicitly listing which users to pick from when assigning.
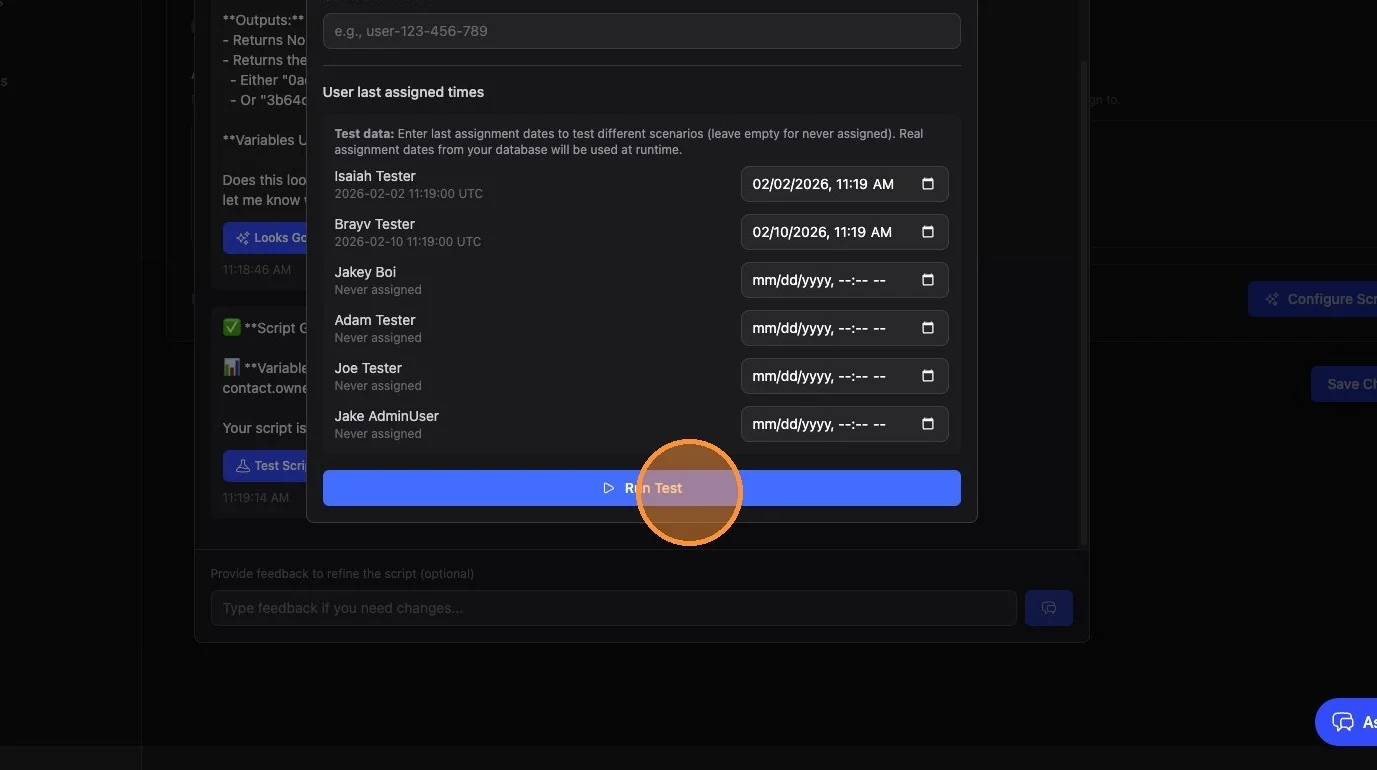
12. When you have all the values in place that you want to run a test against, click "Run Test". To check a rotation, click "Preview next 10 leads" instead.
The preview runs your script ten times in a row with the same test values, counting each pick before the next lead, the same way real assignments are counted. It shows who would get each of the next ten leads, so you can confirm a rotation actually rotates before you save it.
13. The test results will show up below the Run Test button. Scroll down to see them.
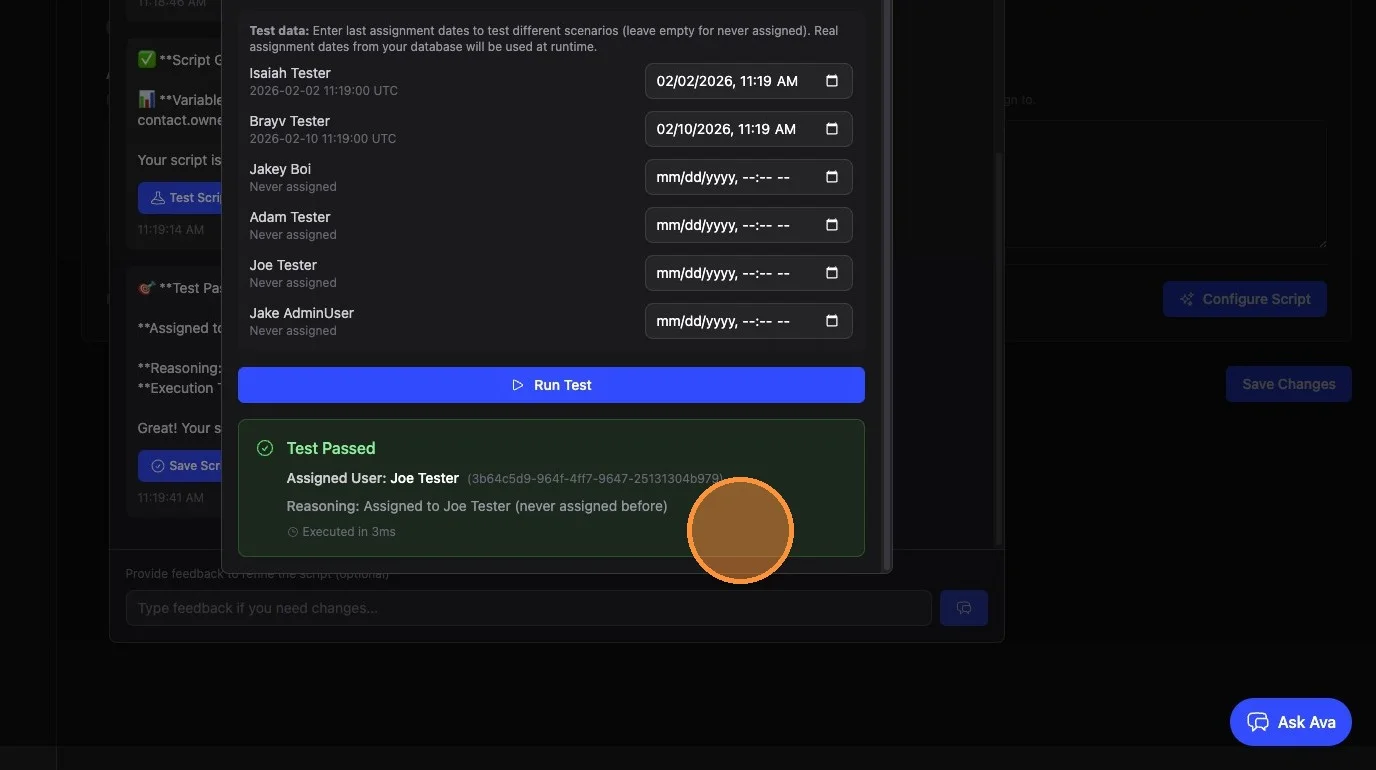
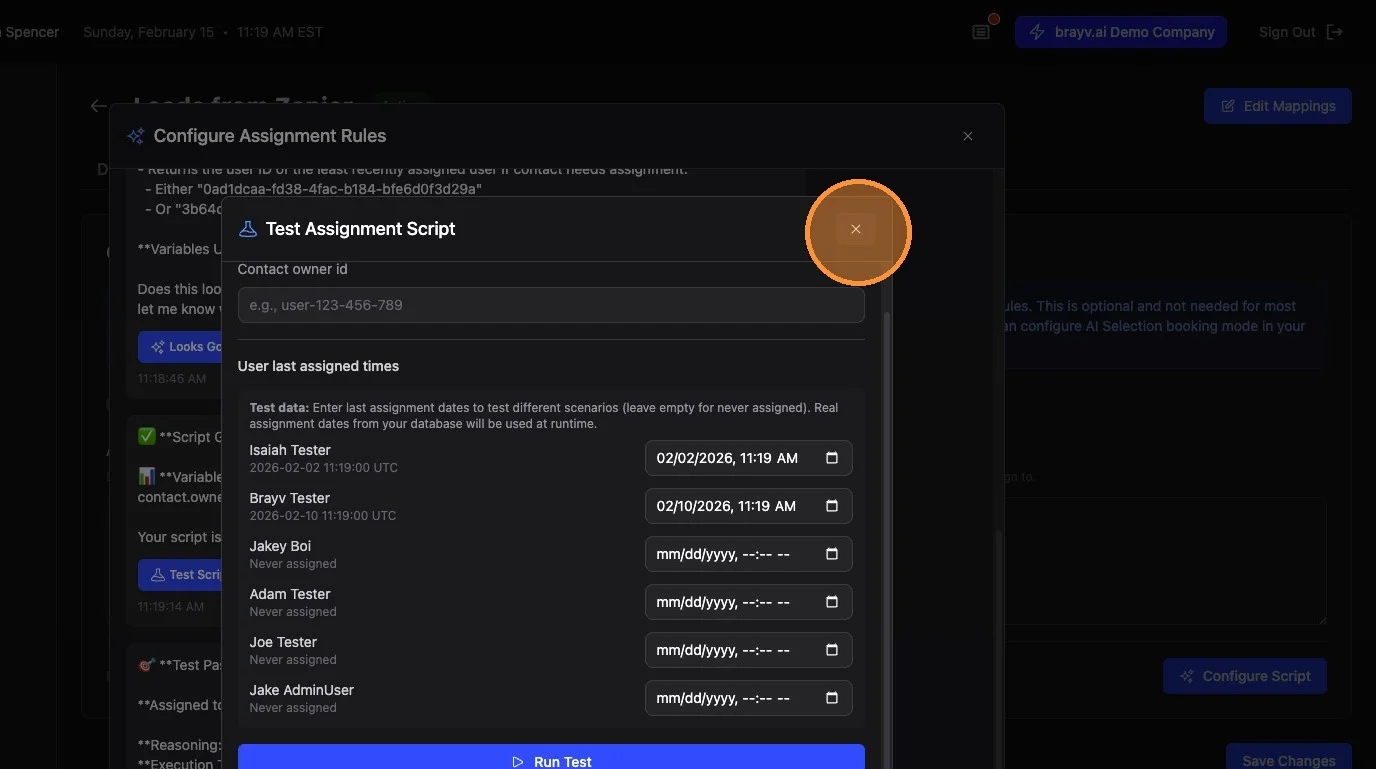
14. Run as many tests as you would like with different combinations of values. When you are satisfied with the test results, click the X button to exit the testing interface.
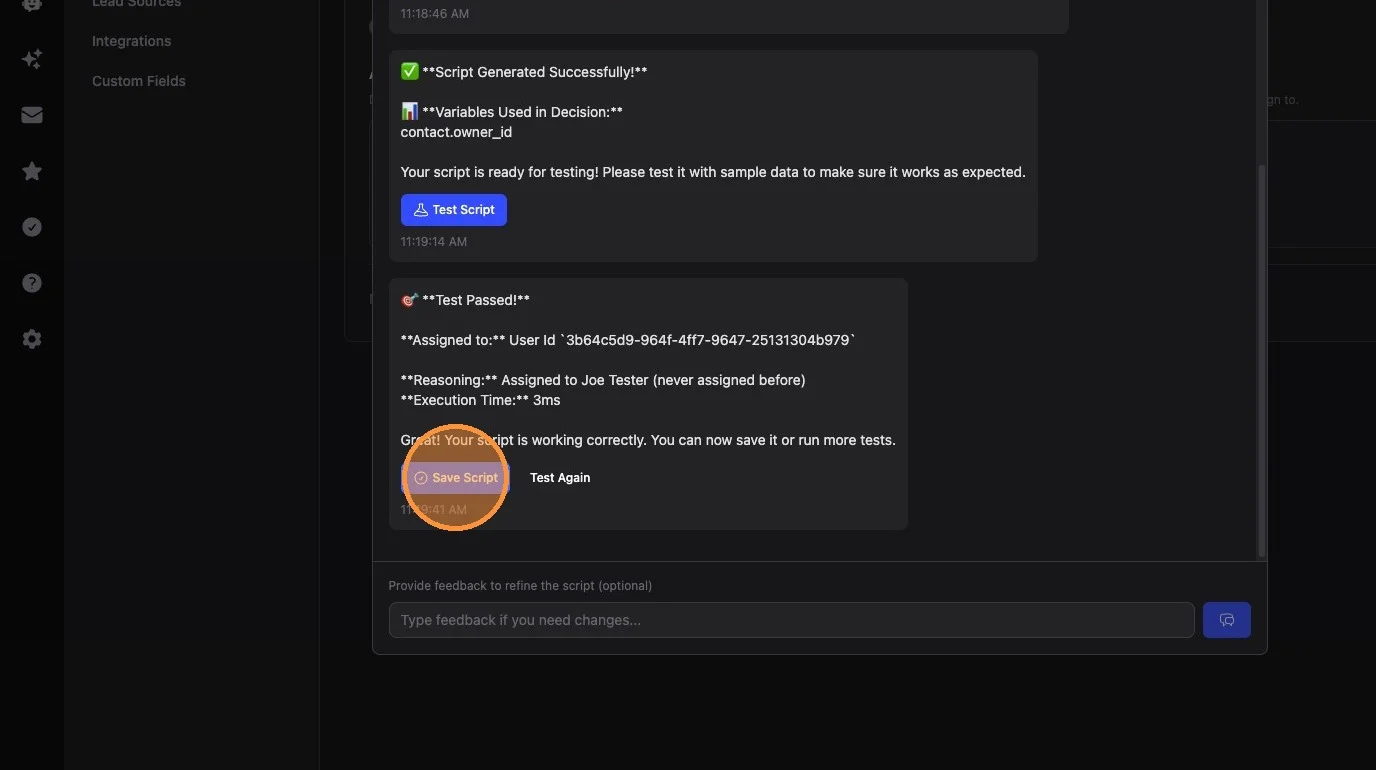
15. Click "Save Script"
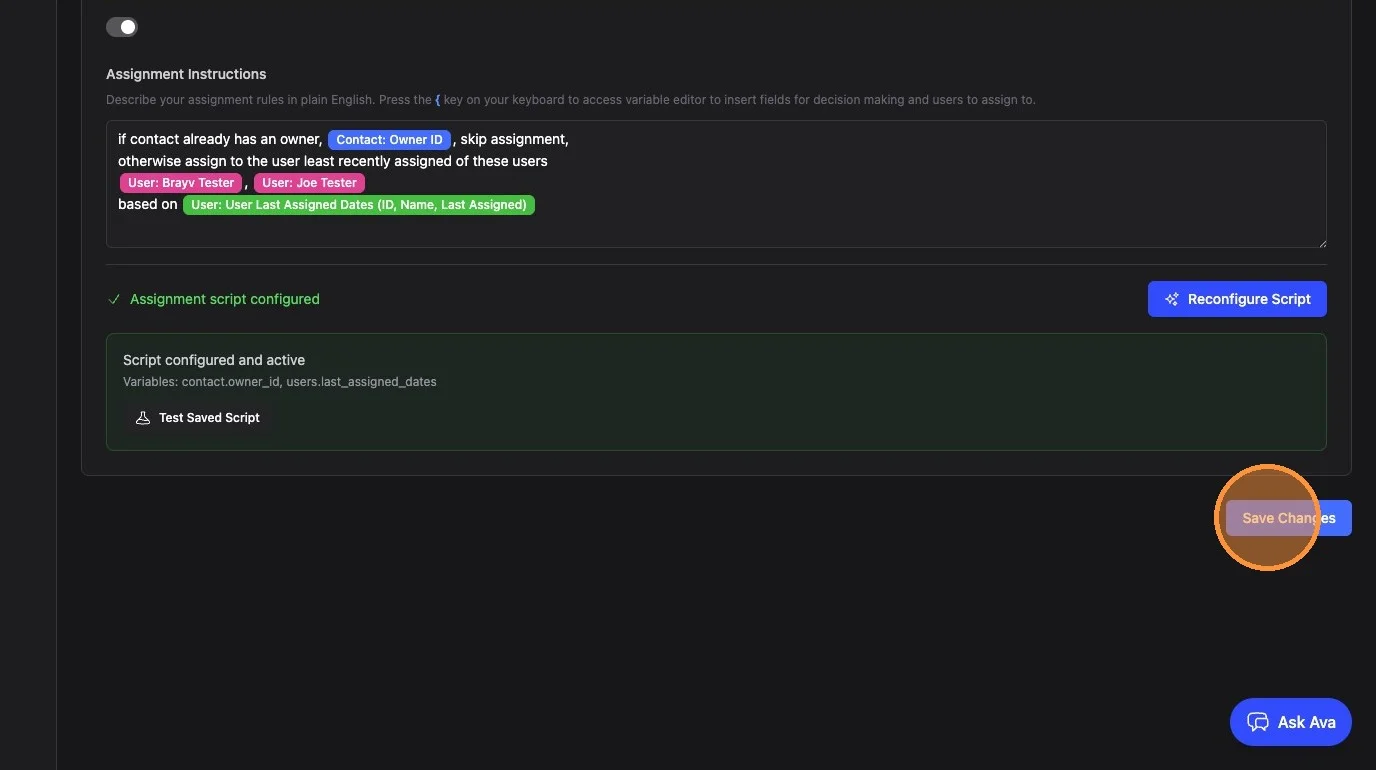
16. Click "Save Changes" button that is below the assignment instructions and the area that shows the currently saved script
Alternative Example: Using Lead Count Data
Steps 17-20 show an alternative approach using user lead count data instead of last assigned times. User lead count data allows you to make routing decisions based on the total number of leads assigned to each particular user over a rolling 30-day period.
Load Distribution Variables
Lead assignment scripts can use these user data variables when deciding which team member should receive a lead:
{users.lead_counts}: Each team member's total lead count over the last 30 days. Use this for general load balancing across all leads in the account.{users.lead_counts_by_zip}: Each team member's rolling 30-day lead counts broken down by contact zip code. Use this when territory or zone rules should balance only against leads from the zip codes in that territory.{users.last_assigned_dates}: When each team member most recently received a lead. Use this for round-robin logic where the person who has gone longest without a lead should receive the next one.{users.recent_assignments}: Every assignment from the last 30 days, in order, with each contact's zip code. Use this for a fixed rotation where someone gets more than one lead in a row, like "2-2-1: Stephen, Stephen, James, James, Dan, then repeat". Write out the full order in your instructions.
For example, if all leads in zip codes 11706, 11707, and 11708 should rotate between John and Mary based only on leads in those zip codes, use {users.lead_counts_by_zip}. If you simply want the user with the fewest leads overall, use {users.lead_counts}.
What counts as an assignment: every change of a contact's owner counts toward these variables, including assignment scripts, owner changes made by your team, task assignments, and appointment bookings. Bulk uploads and bulk reassignments from the contacts list never count. A rotation that has had no assignments in the last 30 days starts over at the first person.
If you want a rotation to count only leads handed out by assignment rules (and not appointment bookings, task assignments, or owner changes made by your team), say so in your instructions. A rotation can't count only one lead source's or one rule's assignments: a lead assigned by any lead source's rules counts the same.
17. Here is an example using user lead count data. This approach distributes leads based on total assignments over a rolling 30-day period.
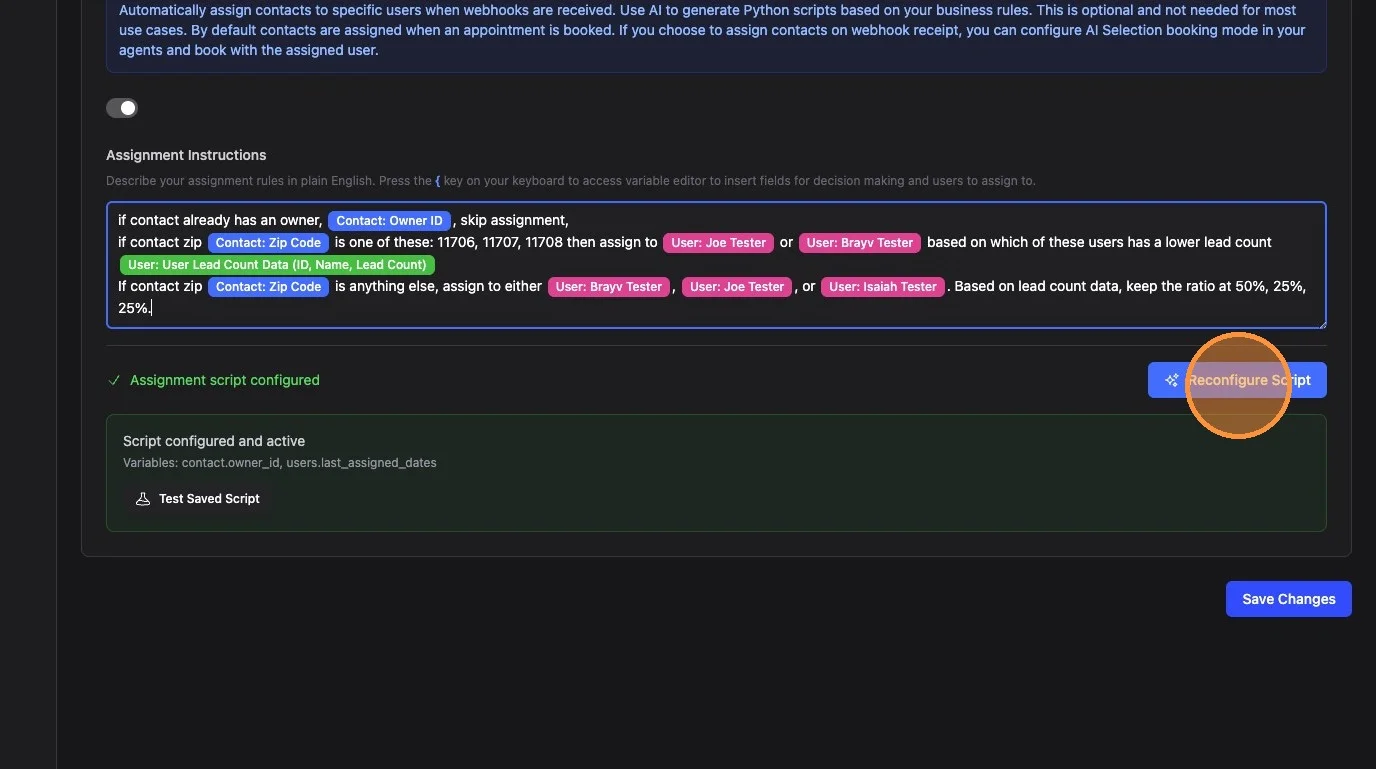
18. Click "Looks Good - Generate Script"
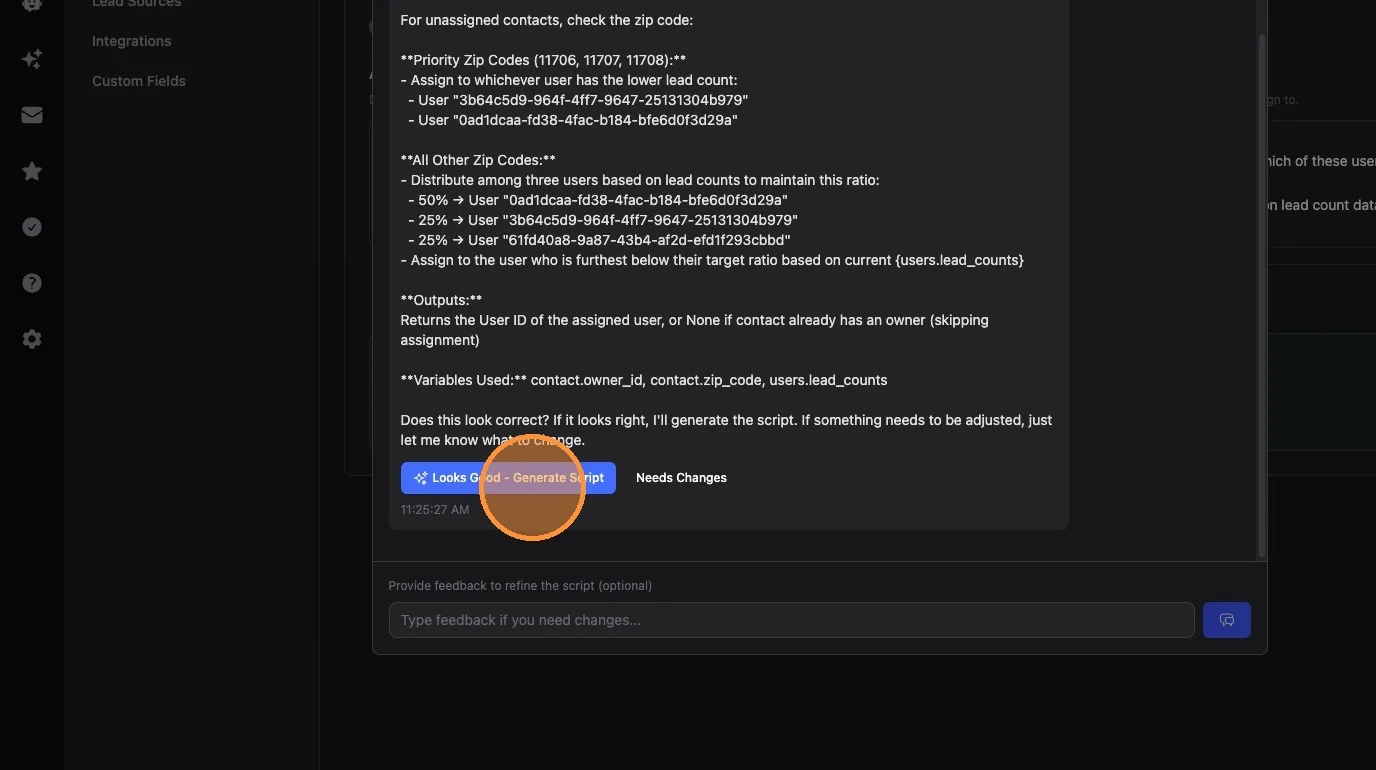
19. Click "Test Script"
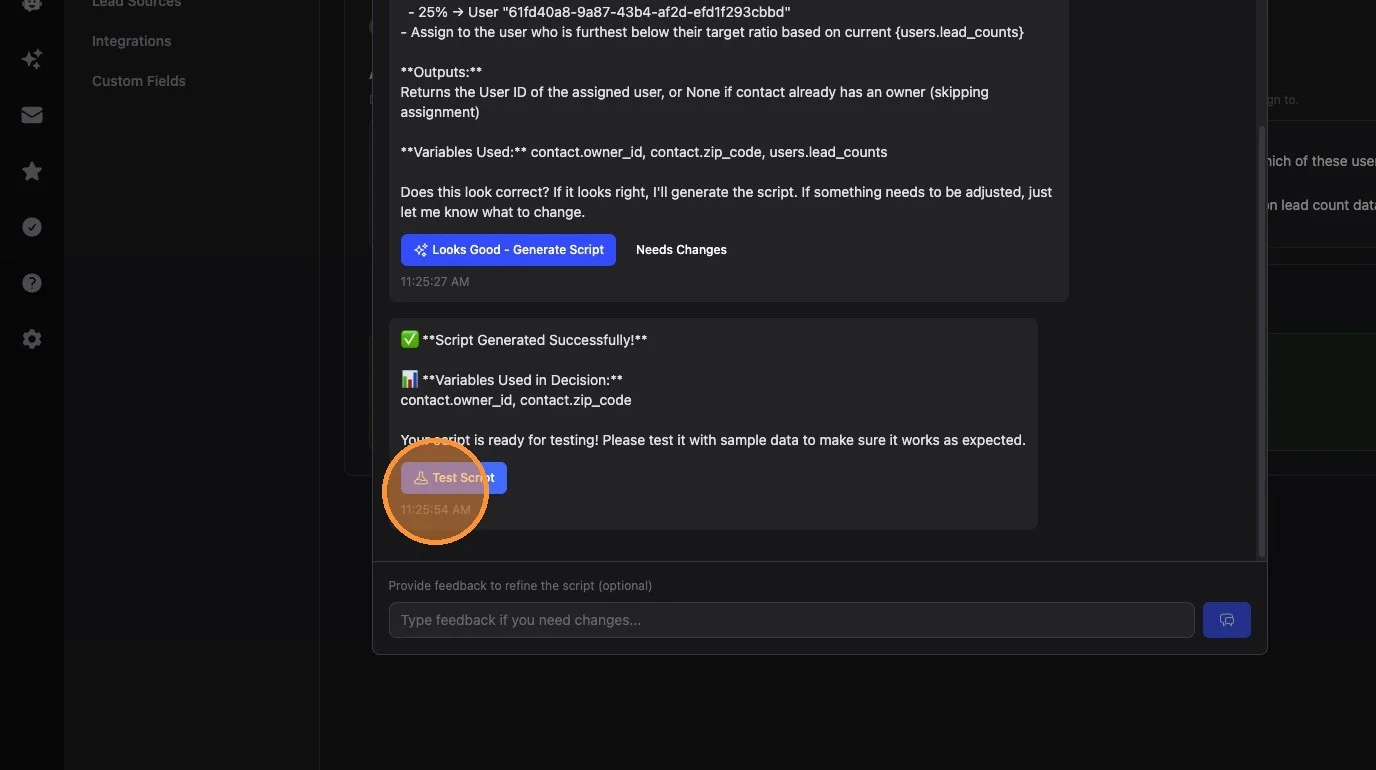
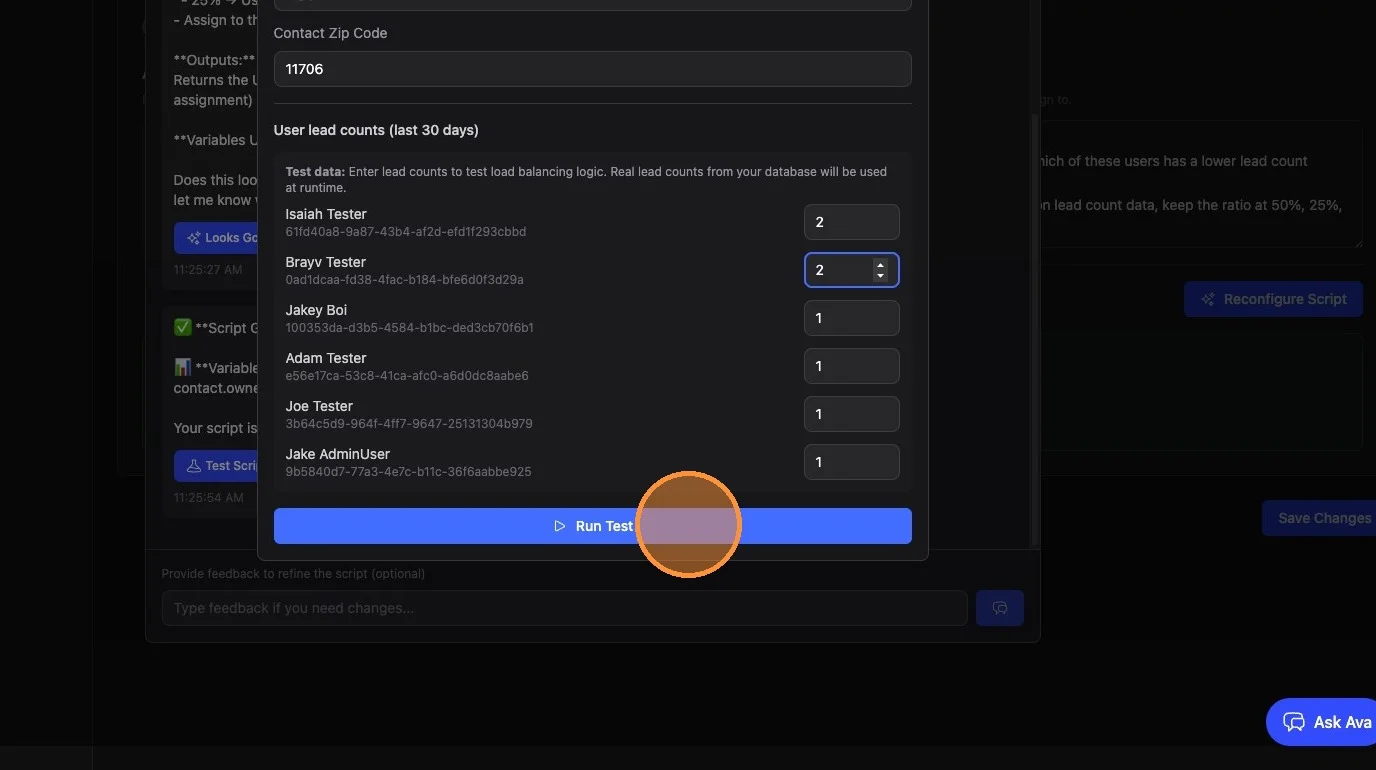
20. When testing scripts that involve user lead count data, adjust lead counts as necessary in the testing interface to simulate different situations and ensure your ratios are being respected.
All the users in your account will show up as available, but only the users you specifically select for in your instructions would be actual outputs in your live environment.
Key Tips
Always Save Twice: Make sure to save the script when done testing, and also save the overall assignment settings for the lead source when you are satisfied.
Test Saved Scripts Later: You can always come back to this lead source to review and test the currently saved script without regenerating a new one. Just click the "Test Saved Script" button.
Be Explicit About Users: When writing assignment instructions, always explicitly list which users to include. If you don't, the script could rotate through all users in your account, including those who shouldn't receive leads.
Common Assignment Patterns
- Round Robin by Last Assigned: Distribute leads evenly by always assigning to the user who was least recently assigned
- Fixed Rotation Order: Assign in a set repeating order, such as 2-2-1, using recent assignments
- Lead Count Balancing: Distribute based on 30-day rolling lead counts to maintain target ratios
- Zip Code Routing: Assign leads to specific team members based on the contact's zip code/territory
- Owner Preservation: Skip assignment if the contact already has an owner. Without this rule, a contact who submits again goes through your rules like a new lead and can be reassigned.
- Hybrid Logic: Combine multiple rules (e.g., check owner first, then route by territory, then round robin)
Related Features
- Form Lead Sources - Set up web forms to capture leads
- Webhook Lead Sources - Ingest leads from external systems
- Facebook Lead Forms - Connect Facebook ad leads
- Customer Journeys - Automate follow-up after lead assignment
- Managing Contacts - Contact records and custom fields
Summary
Lead assignment at the lead source level provides powerful, customizable routing:
- Enable assignment on any lead source in Settings
- Write instructions in plain language using available variables
- Let Ava configure the script from your instructions
- Test thoroughly with different variable combinations
- Save both the script and the lead source settings
Key variables available:
- Contact fields (owner ID, zip code, etc.)
- User last assigned timestamps (for round robin)
- User lead counts over rolling 30 days (for balanced distribution)
- User lead counts by zip code over rolling 30 days (for territory-specific distribution)
- Recent assignments in order over the last 30 days (for fixed rotation orders)
Remember: Most businesses handle assignment at the goal stage (appointment booking, lead qualification). Use lead source assignment only when you need immediate routing upon lead receipt.