
Related Articles
Global Text AI Agents 101
Quick Reference Keywords: Global agent · Default text agent · Customer service agent · Journey routing · Recent opportunity routing · Inbound text handling
Overview
Global agents handle inbound text messages from contacts who are not currently enrolled in a journey (and therefore have no assigned journey-scoped agent). They're great for general customer service and for intelligently routing contacts into more specific journeys based on what they need. Global agents are responsive only (they do not proactively follow up, they only answer incoming messages/take actions based on those messages and their configuration).
This guide covers three key setups:
- Creating and assigning your default global agent
- Letting your global agent enroll contacts into journeys
- Handling contacts that recently went through a journey differently
Part 1: Setting Up Your Default Global Agent
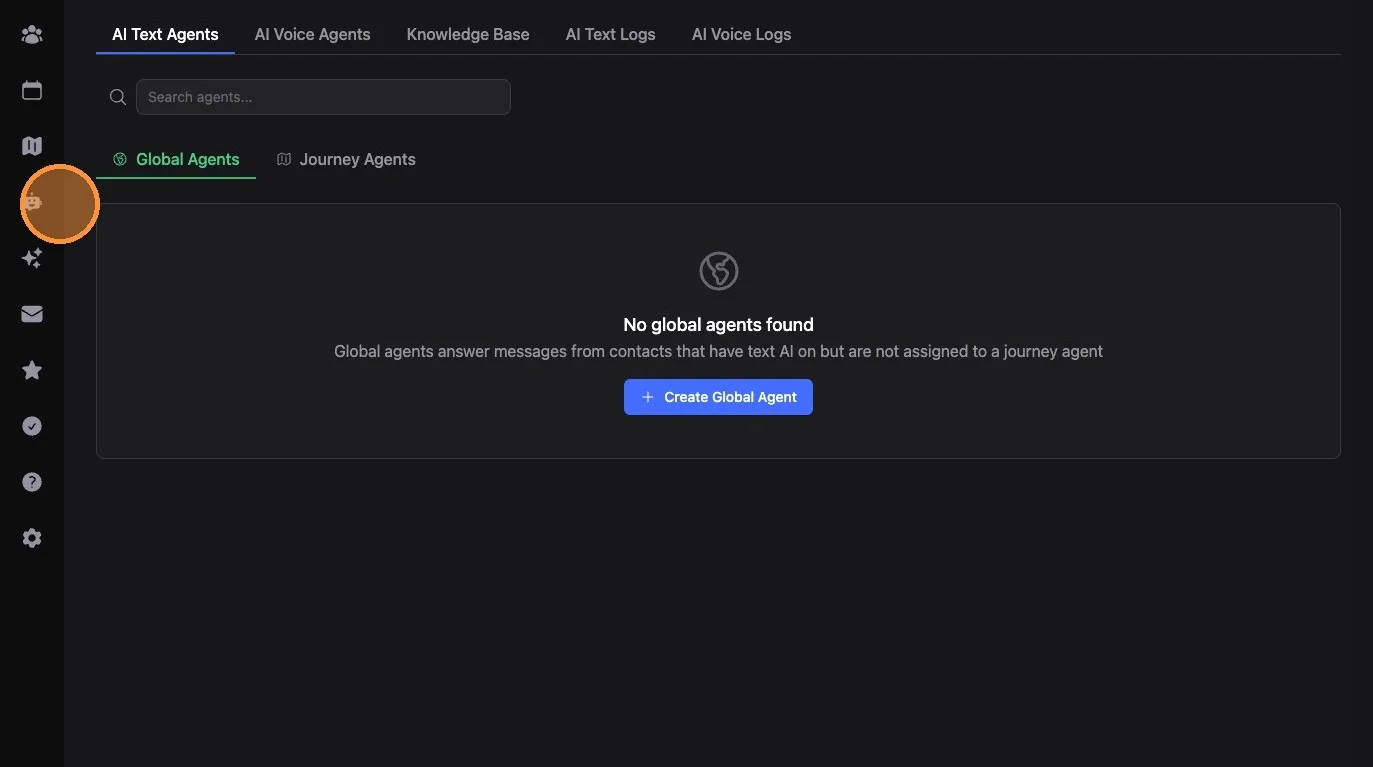
1. Navigate to AI Agents (robot icon, main left-hand menu)
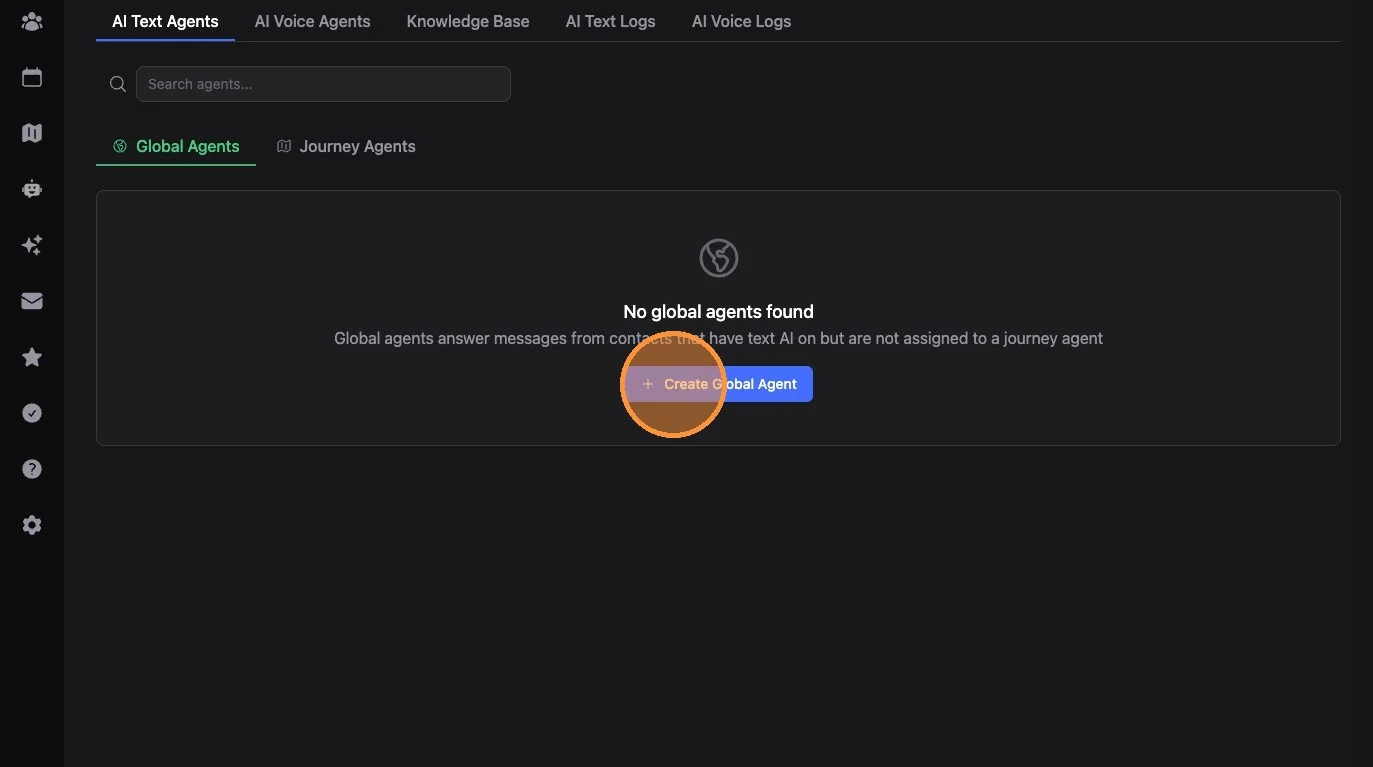
2. Make sure you're on the "AI Text Agents" tab and "Global Agents" sub-tab. Click "Create Global Agent"
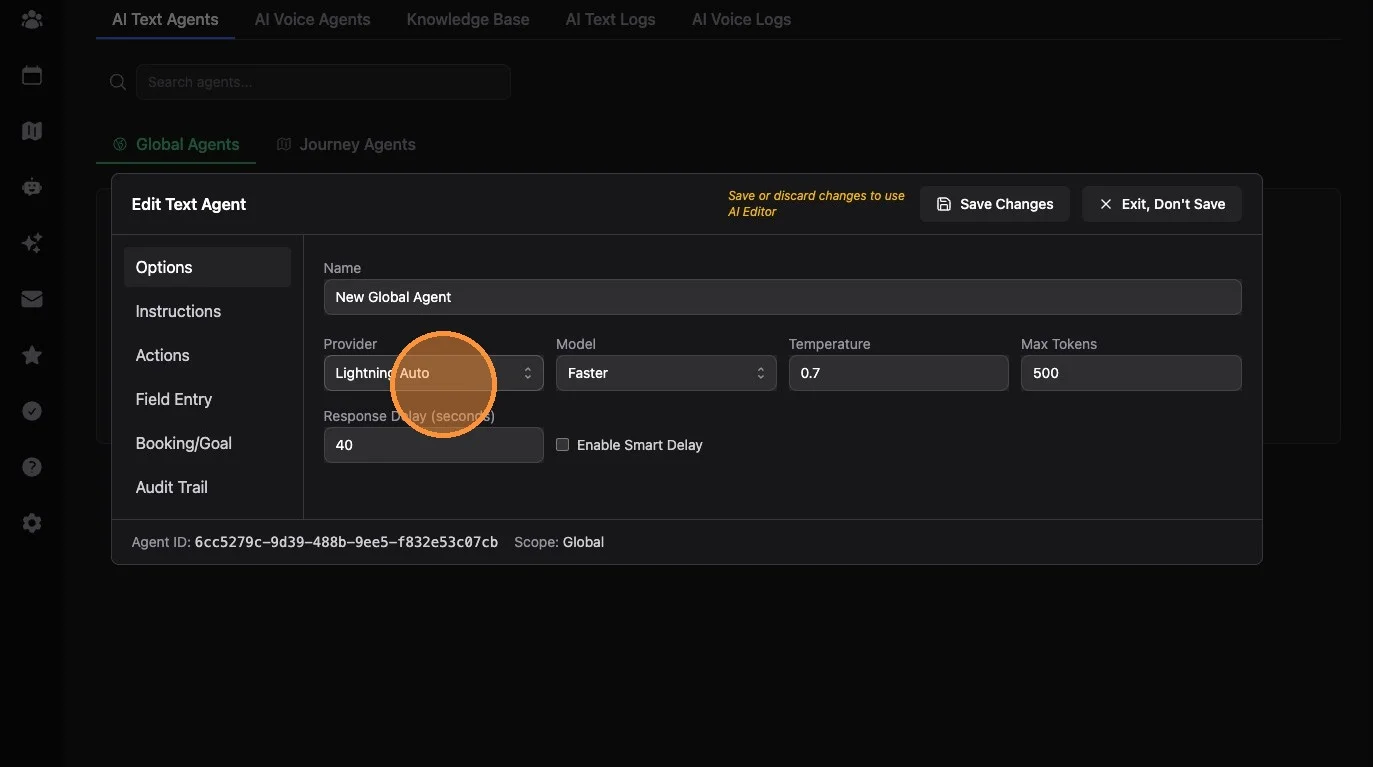
3. Make at least one change to save the agent. "Lightning Auto" is a good provider choice. "Faster" model is a good default for this type of agent unless you intend to allow it to book appointments (in that case, select "Optimized" or use OpenAI with GPT 4o or above - not a mini model).
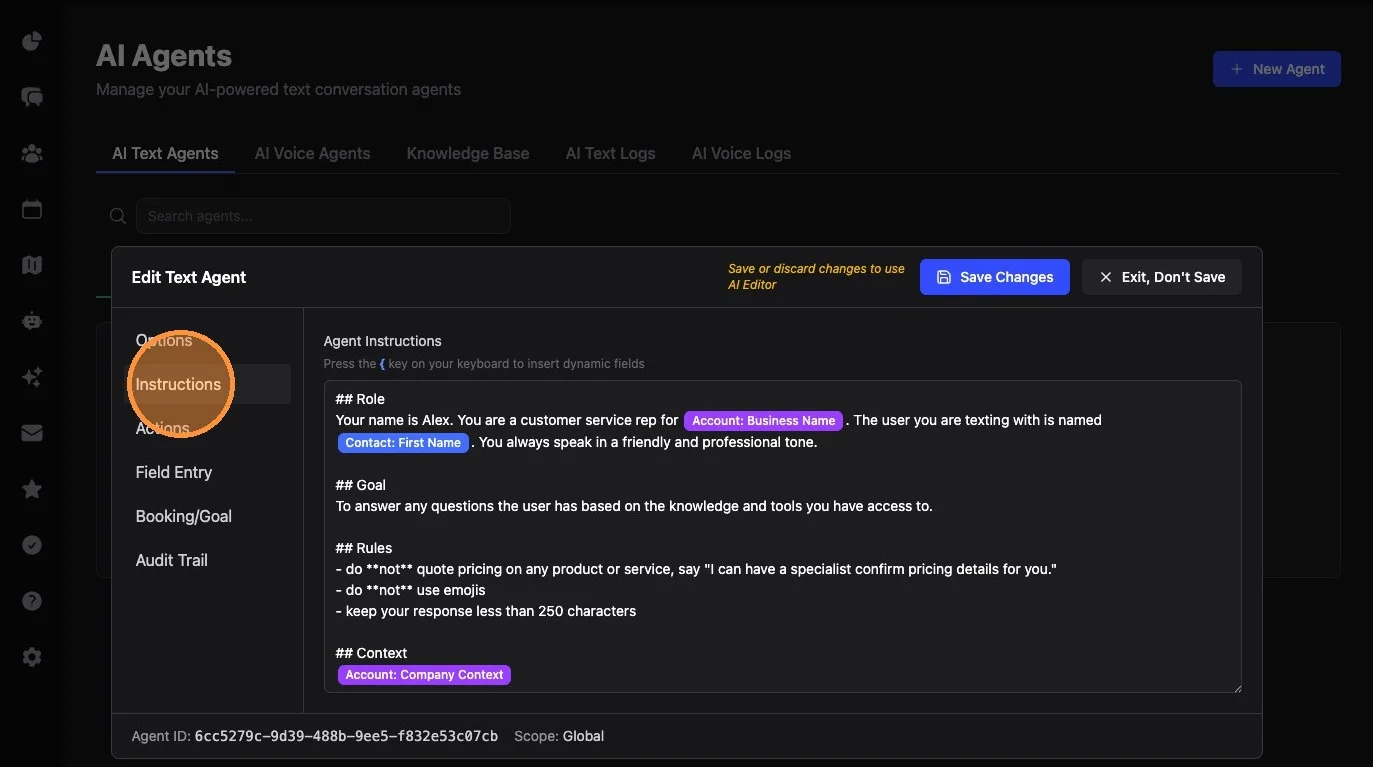
4. Click "Instructions" and review the templated instructions. Add any specific conversational instructions you want. Remember, this agent has access to the Knowledge Base for answering contact questions.
Adding Recommended Tools
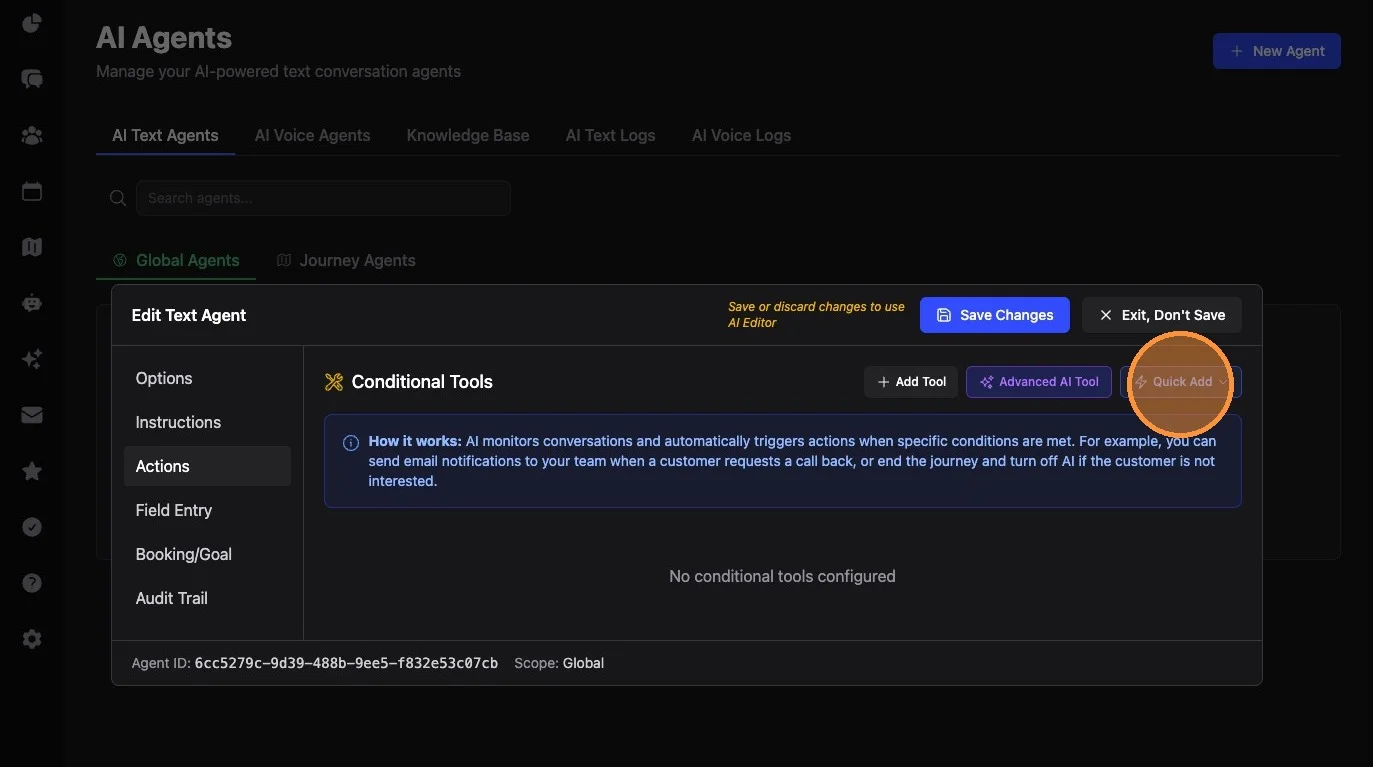
5. Click "Quick Add"
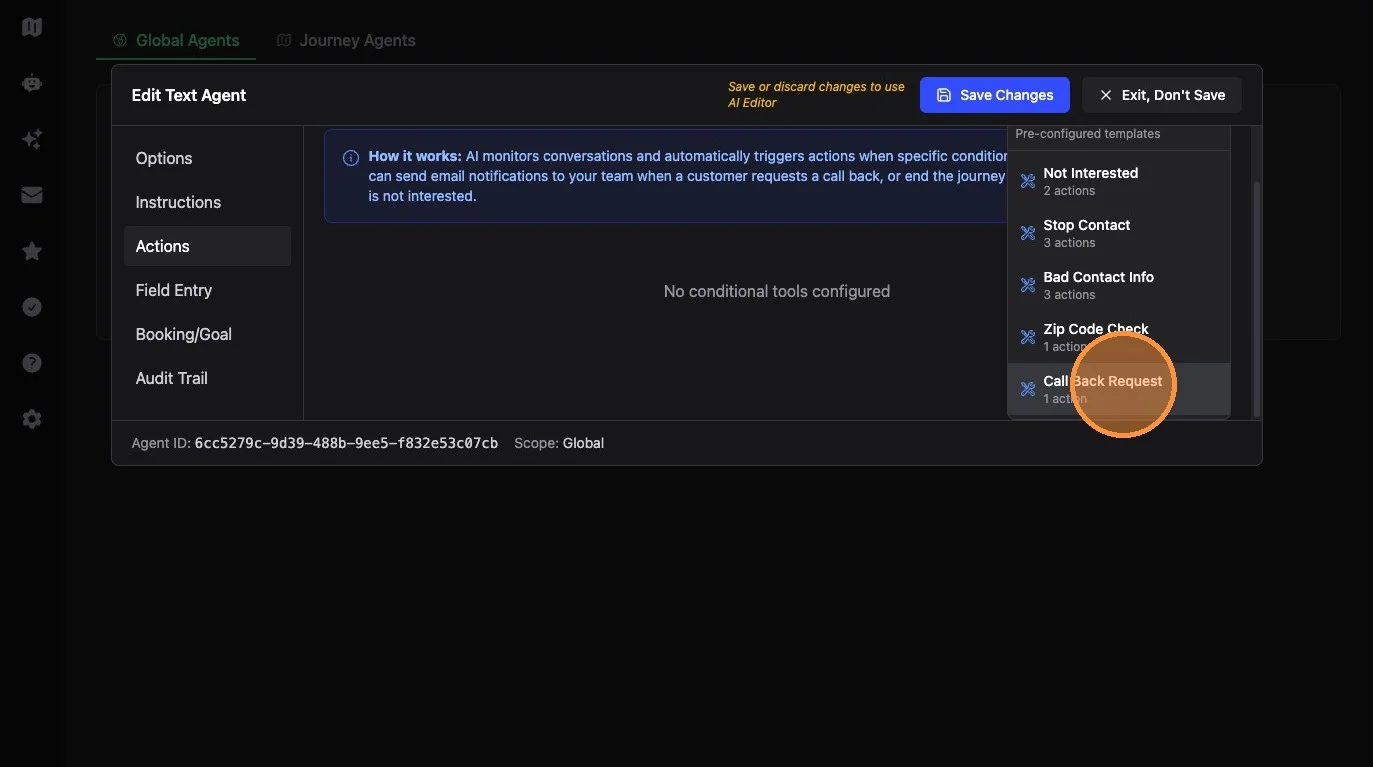
6. Click "Call Back Request"
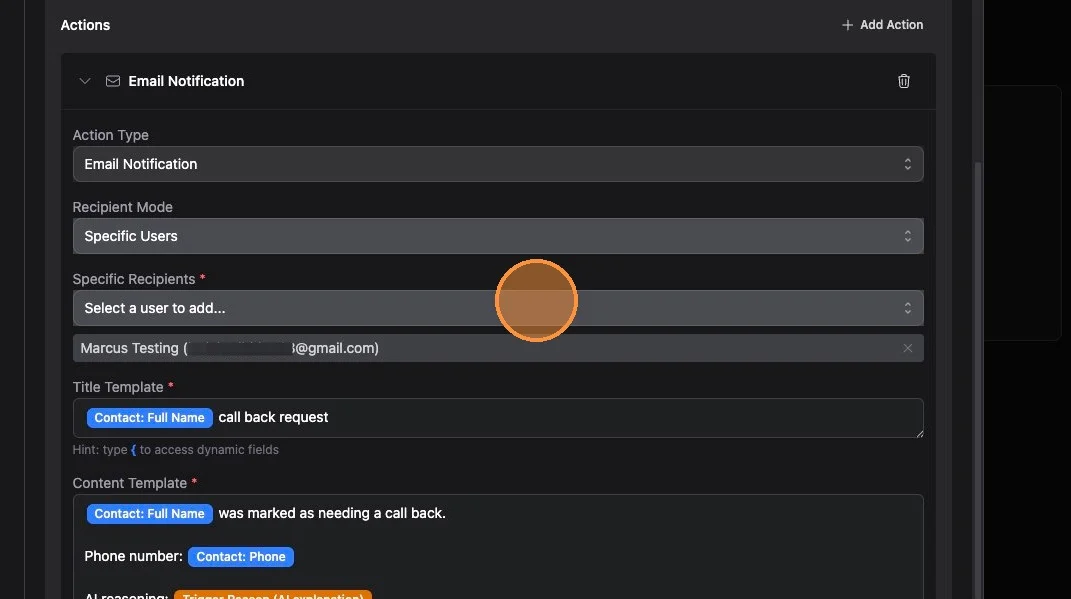
7. Select a user to receive callback notifications
Adding Field Extractors
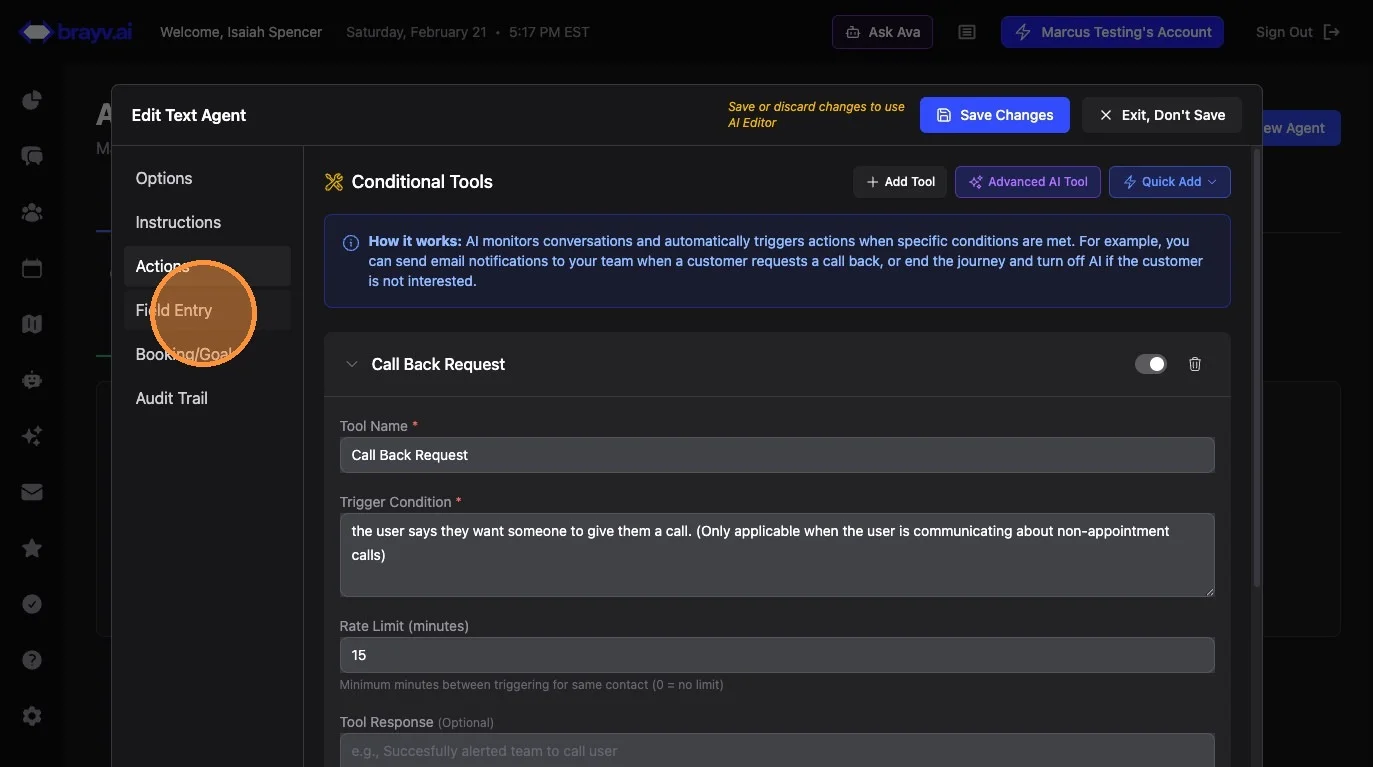
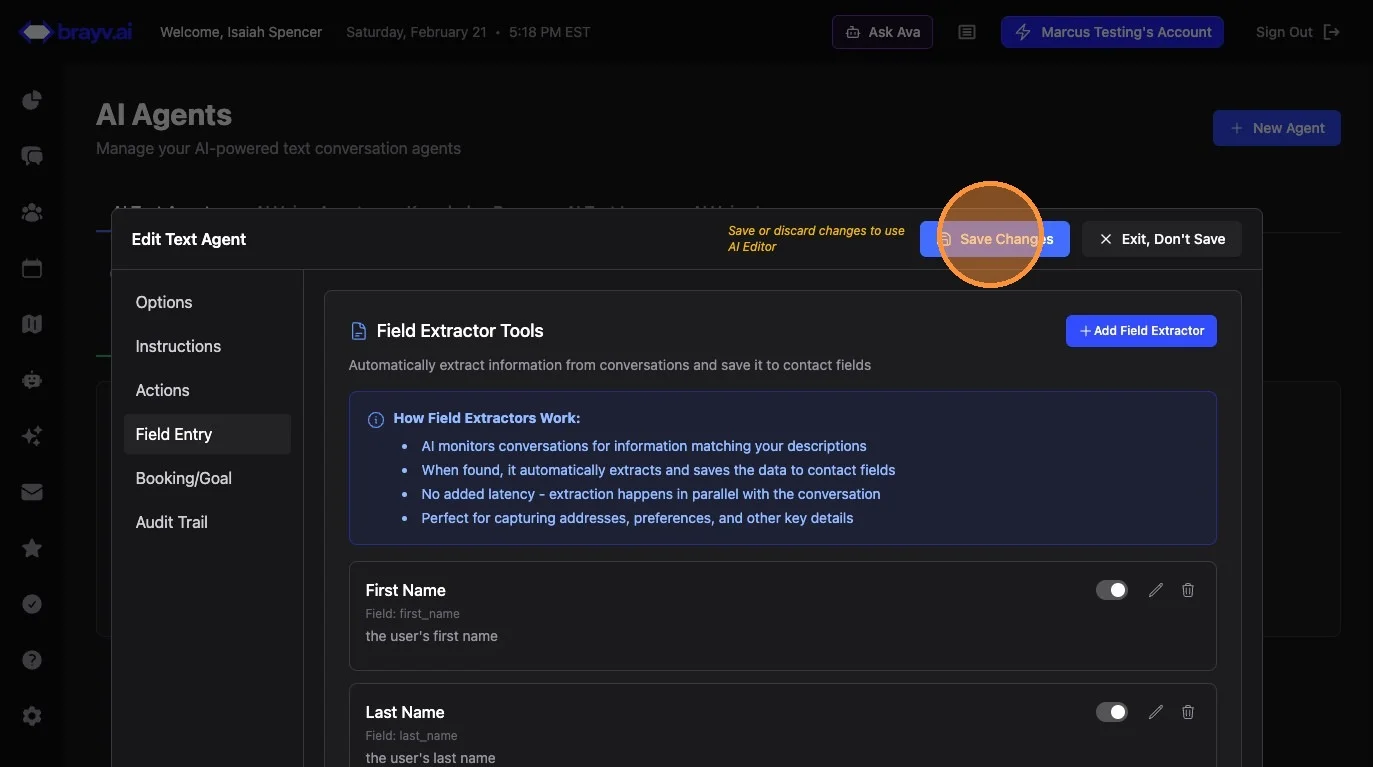
8. Click "Field Entry"
9. Click "Add Field Extractor"
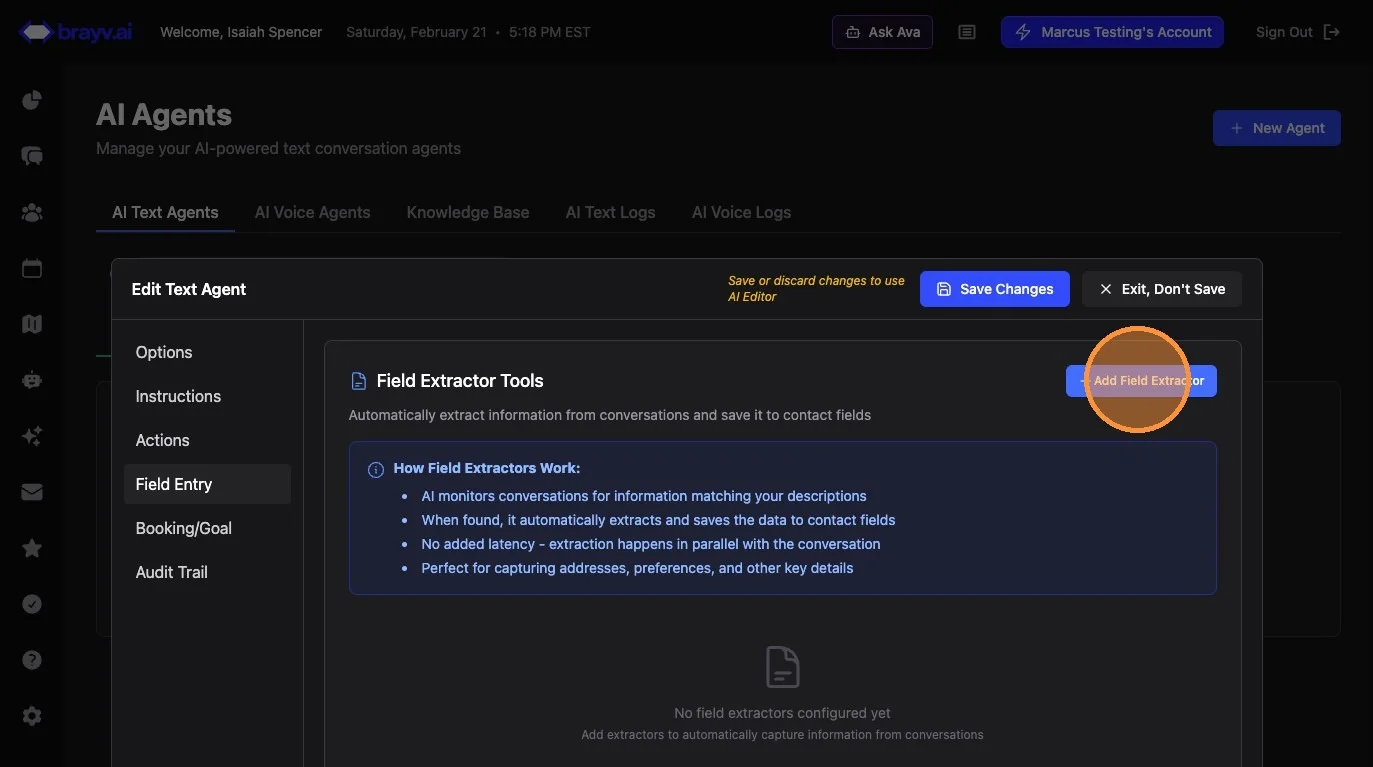
10. Select "First Name"
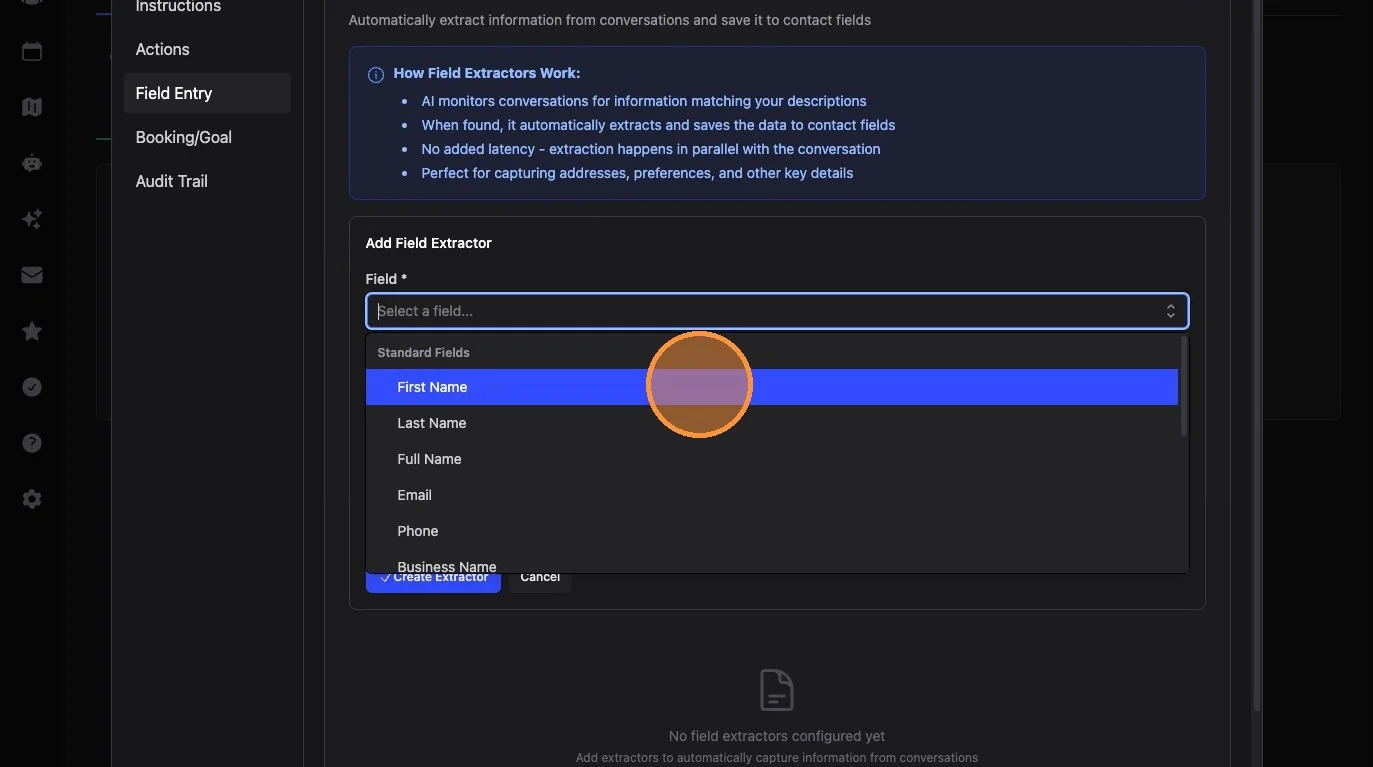
11. Click "Create Extractor"
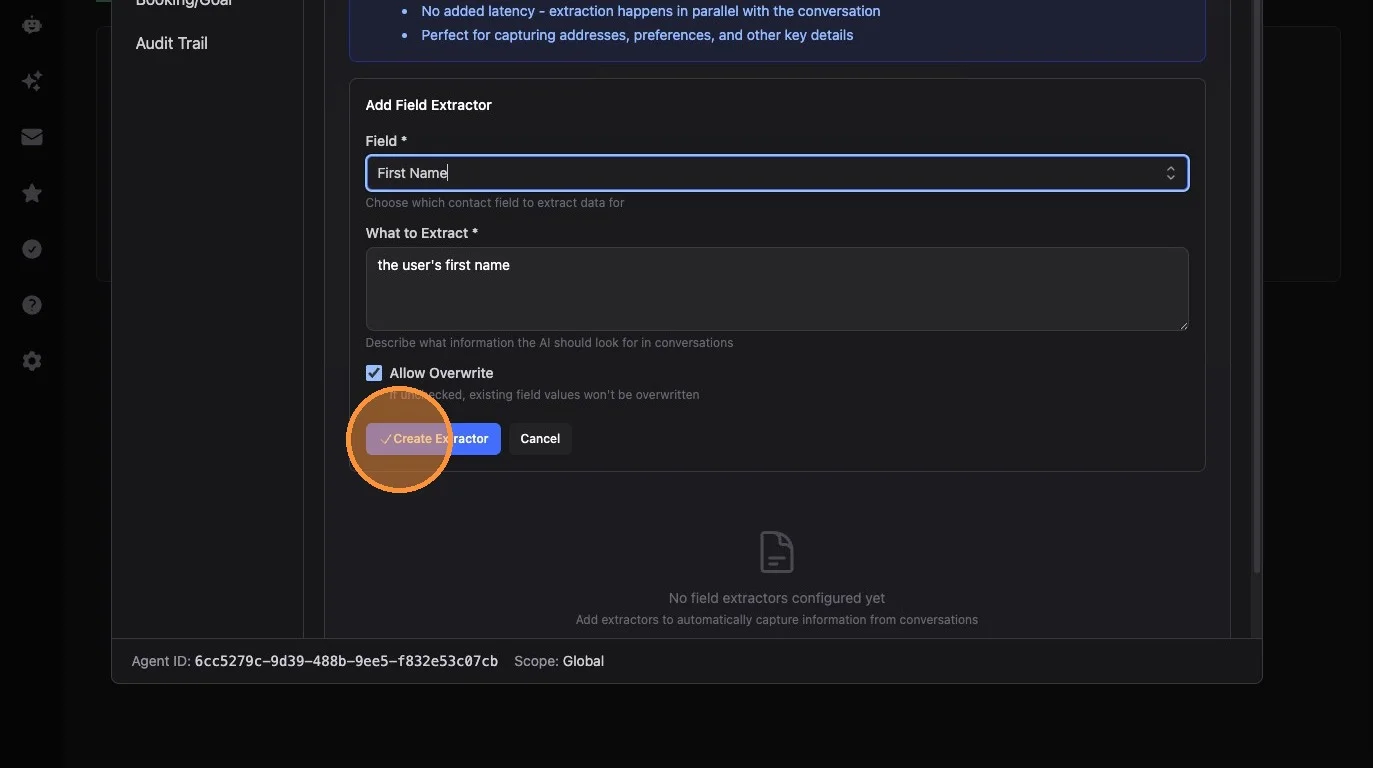
12. Repeat for Last Name. This lets the agent record contact names - important for cold texts where you may not know who's messaging.
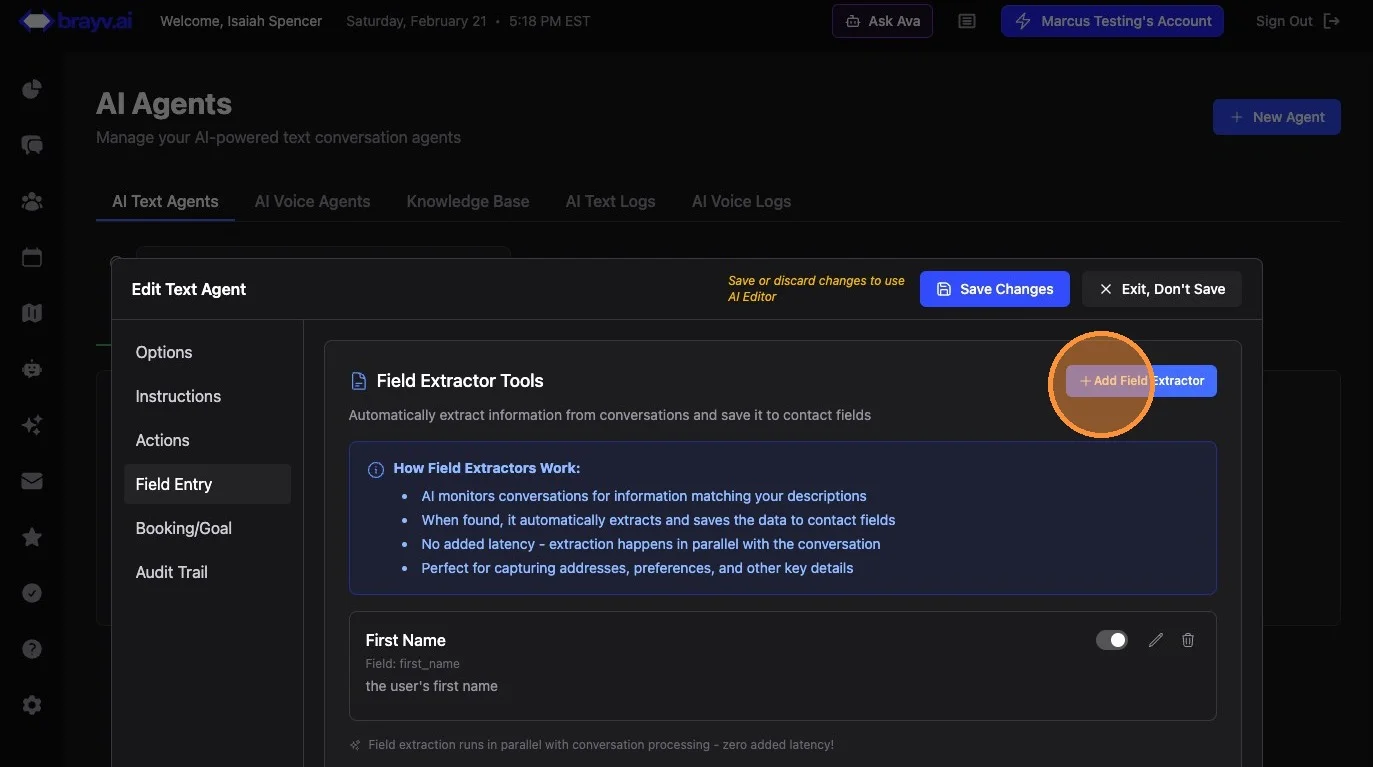
13. Click "Save Changes"
Important: You now have a global agent, but there's one more step to make it work - you need to assign it as the default in settings!
Assigning as Default Global Agent
14. Navigate to Settings (gear icon, main left-hand menu)

15. Click "Text AI"
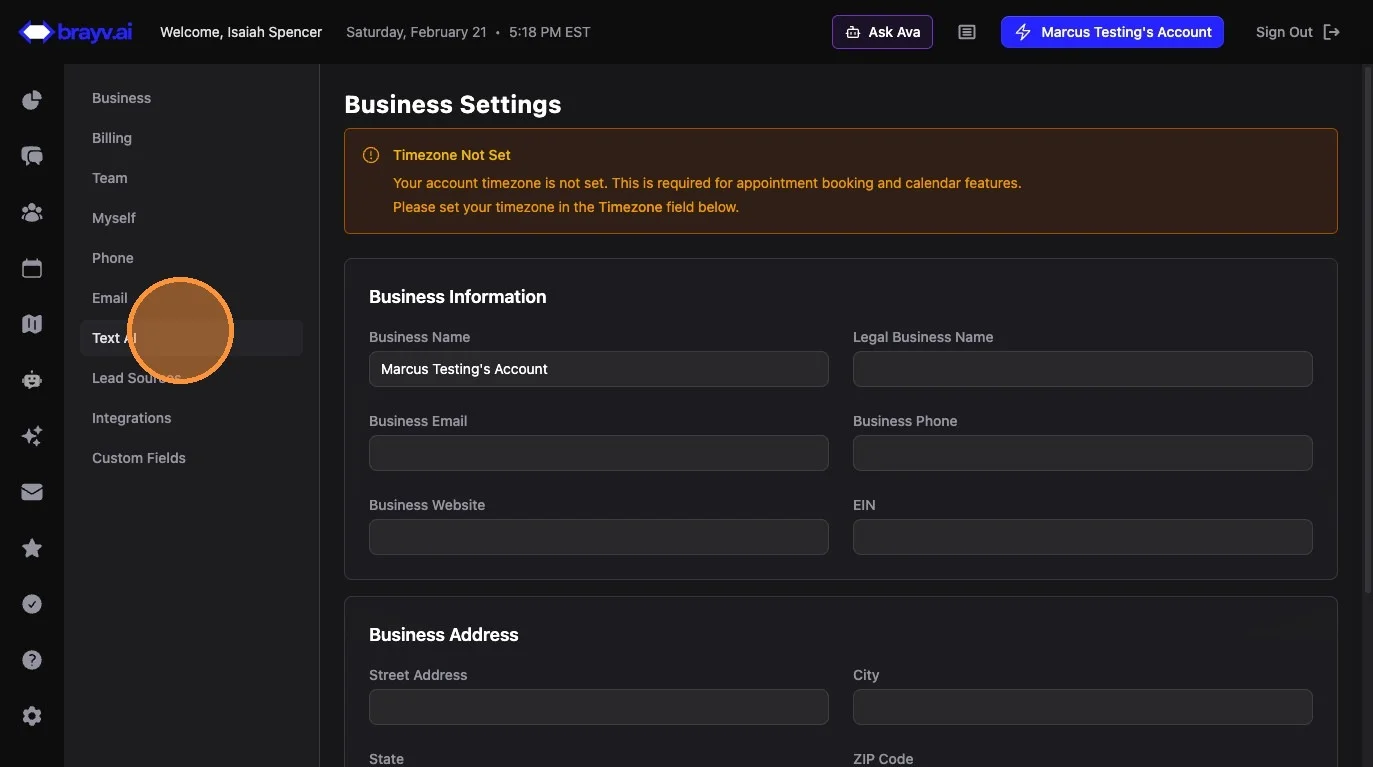
16. Under "Default Text Agent," select the agent you just created
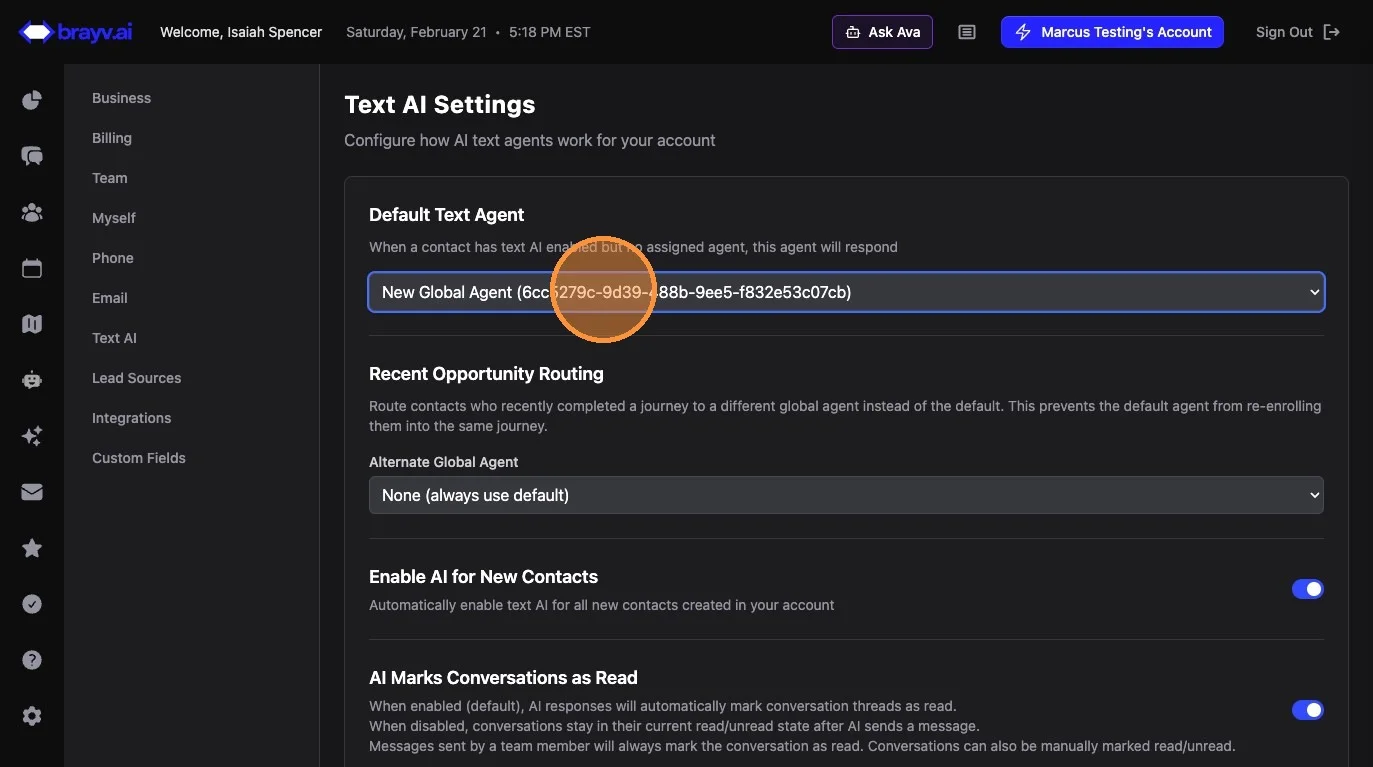
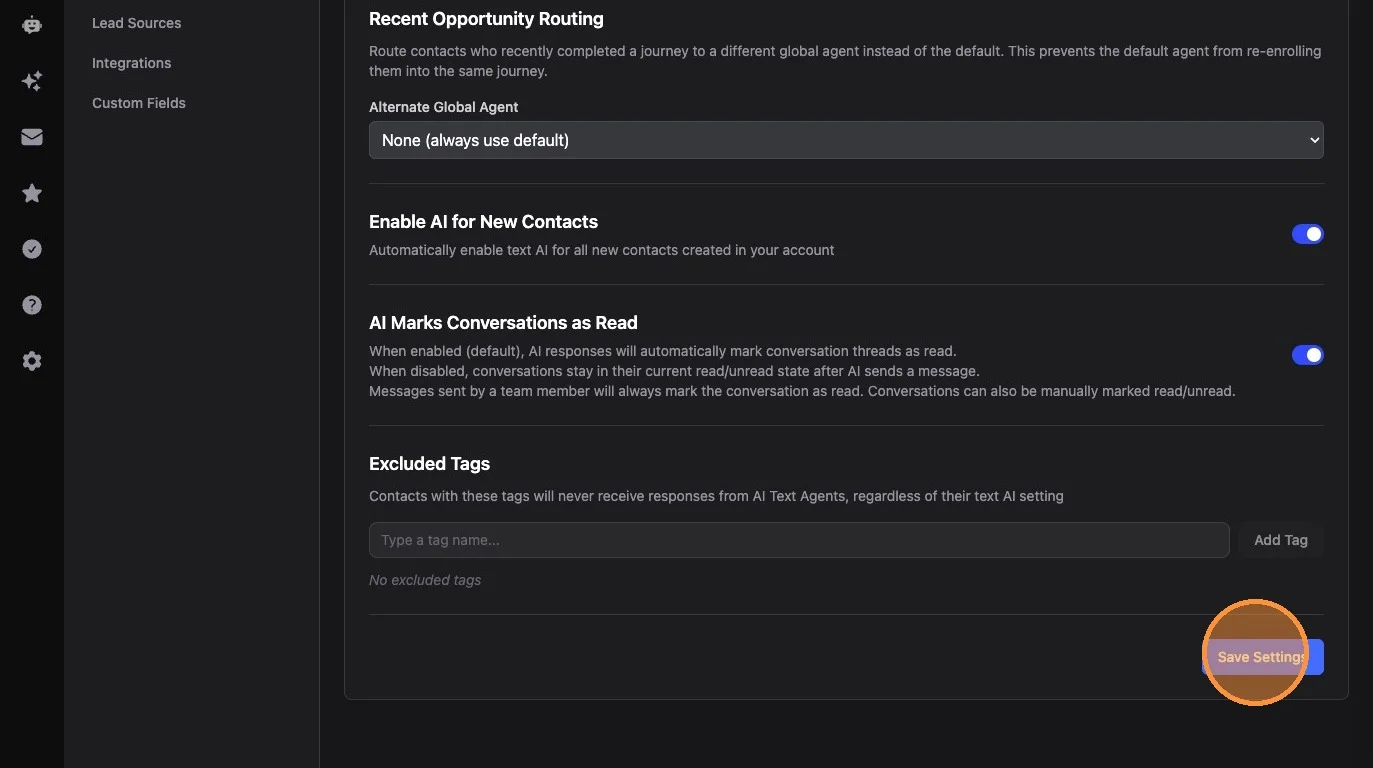
17. Click "Save Settings"
Part 2: Letting Global Agents Enroll Contacts in Journeys
You can give your global agent the ability to route contacts into specific journeys based on what they're looking for. For example, if someone texts in asking about an HVAC repair, the agent can automatically enroll them into your HVAC leads journey.
18. Go to AI Agents and click "Edit" on your global agent

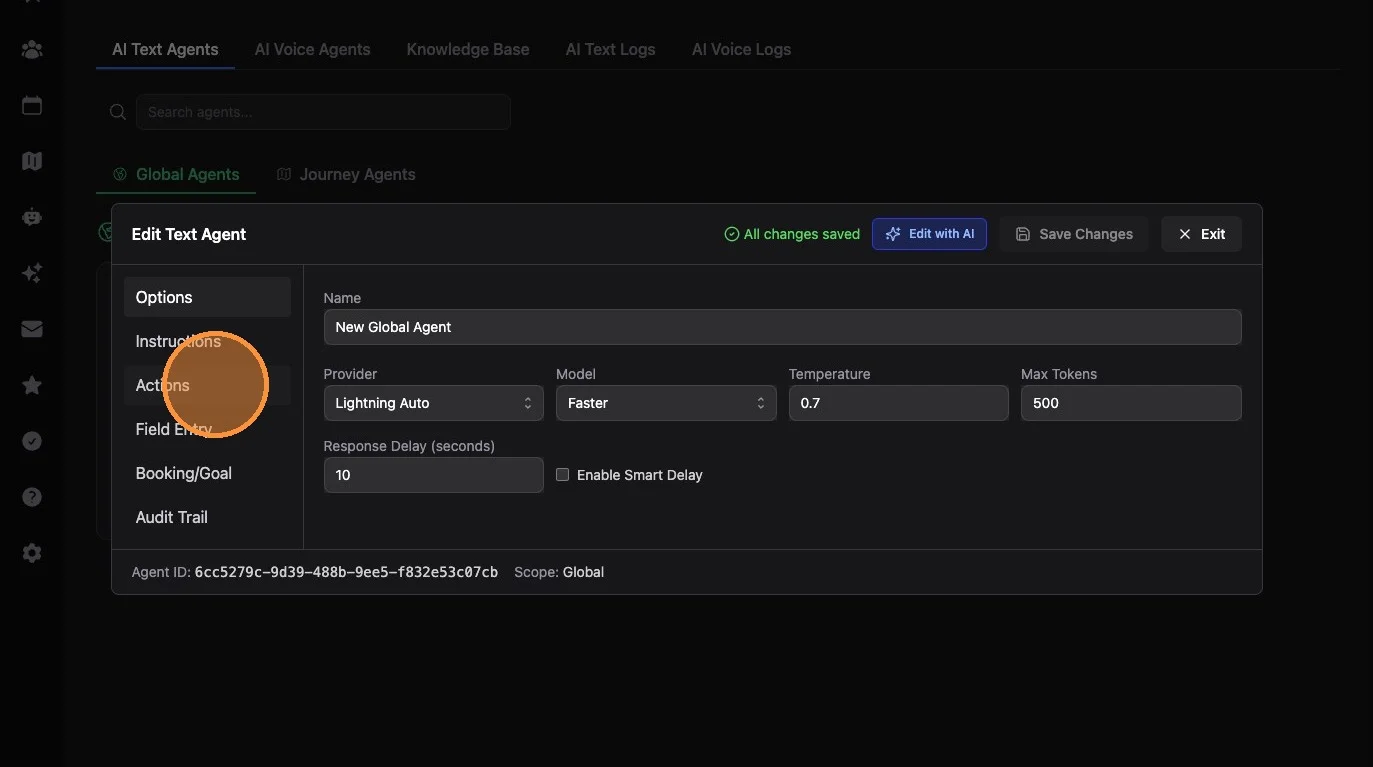
19. Click "Actions"
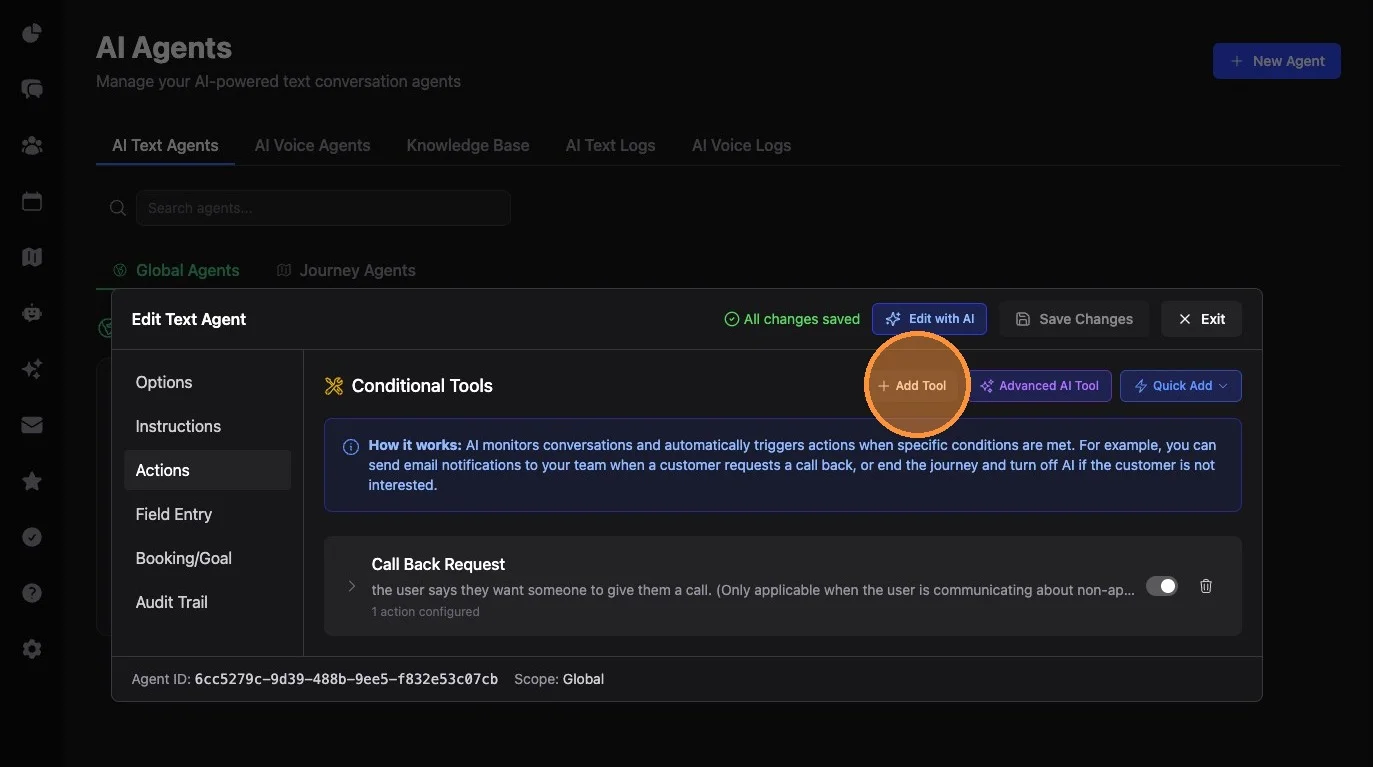
20. Click "Add Tool"
21. Name the tool something descriptive, like "Add to HVAC Journey"
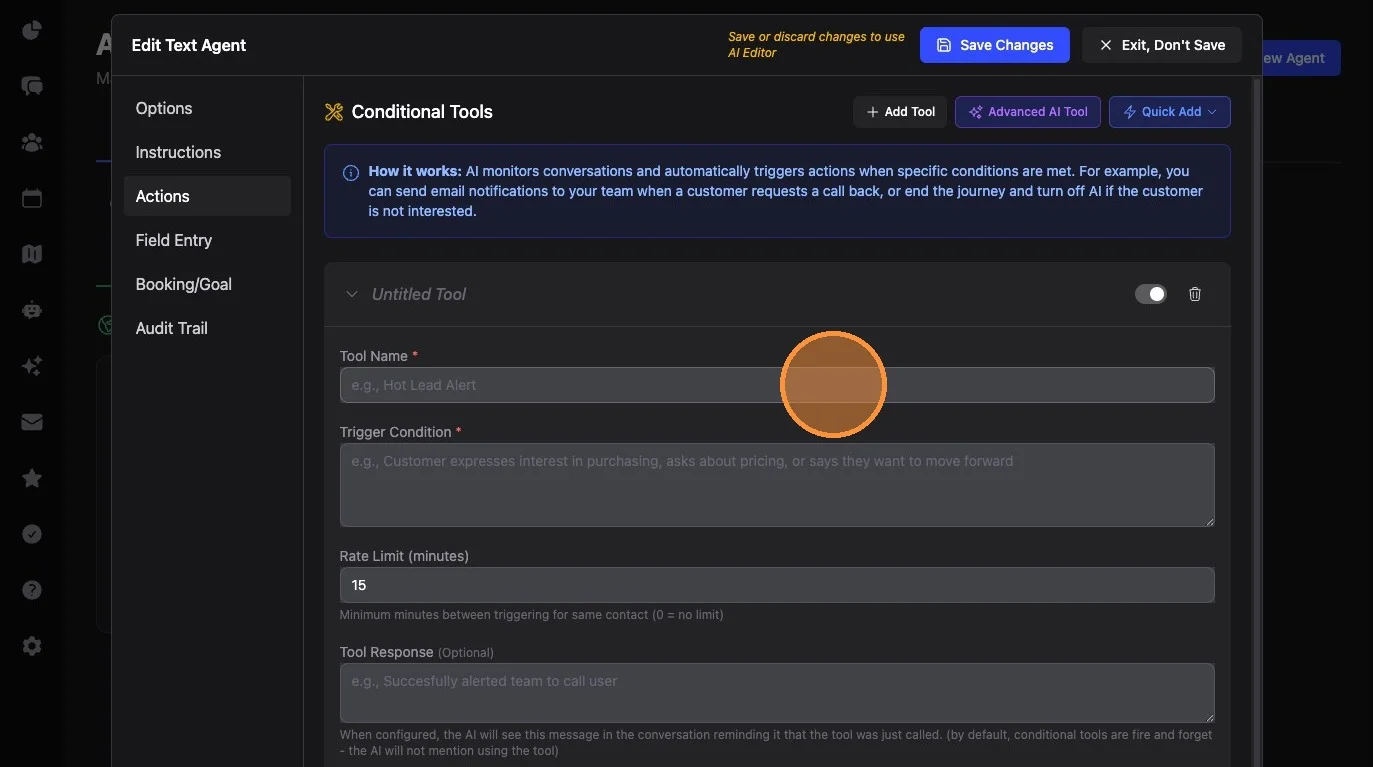
22. Fill out the trigger condition describing when the agent should use this tool. Example: "the user indicates they want an estimate or need an HVAC repair"
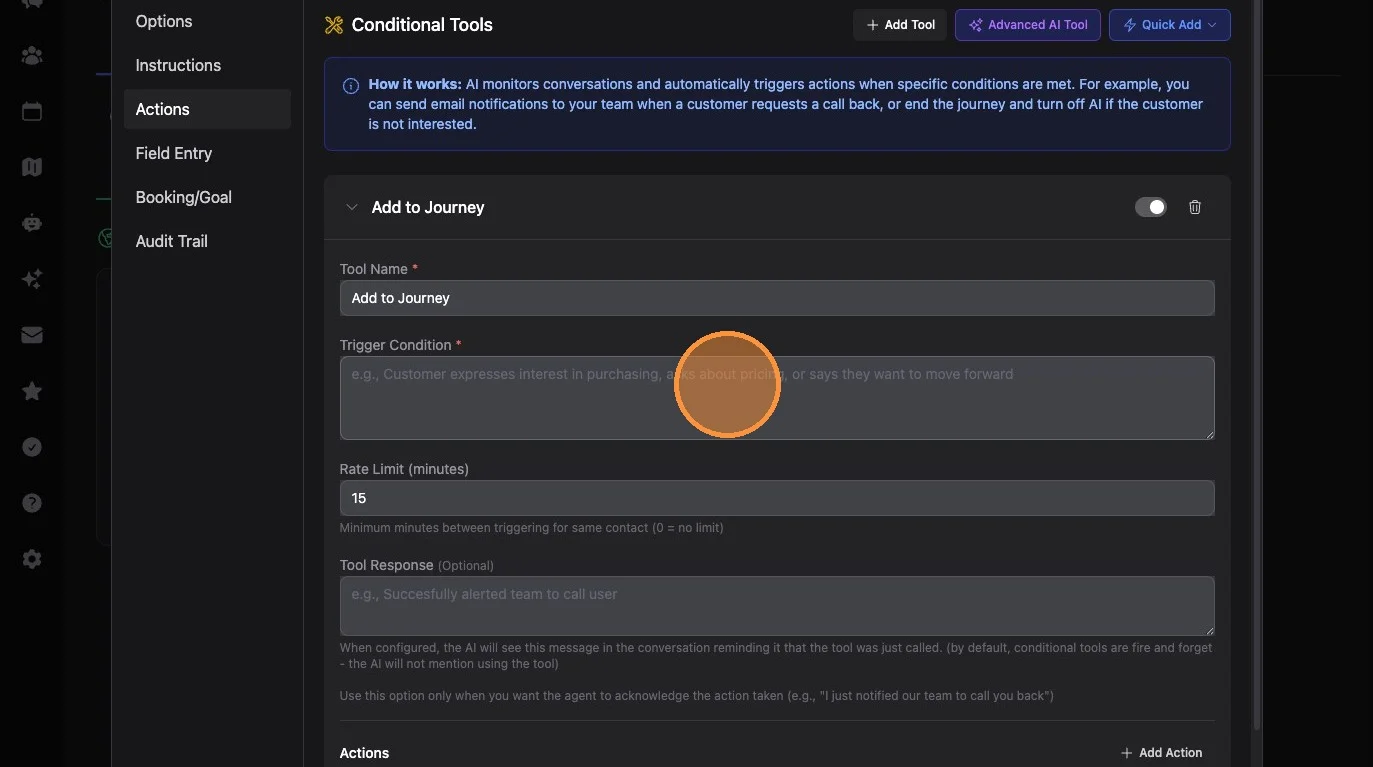
23. Click "Add Action"
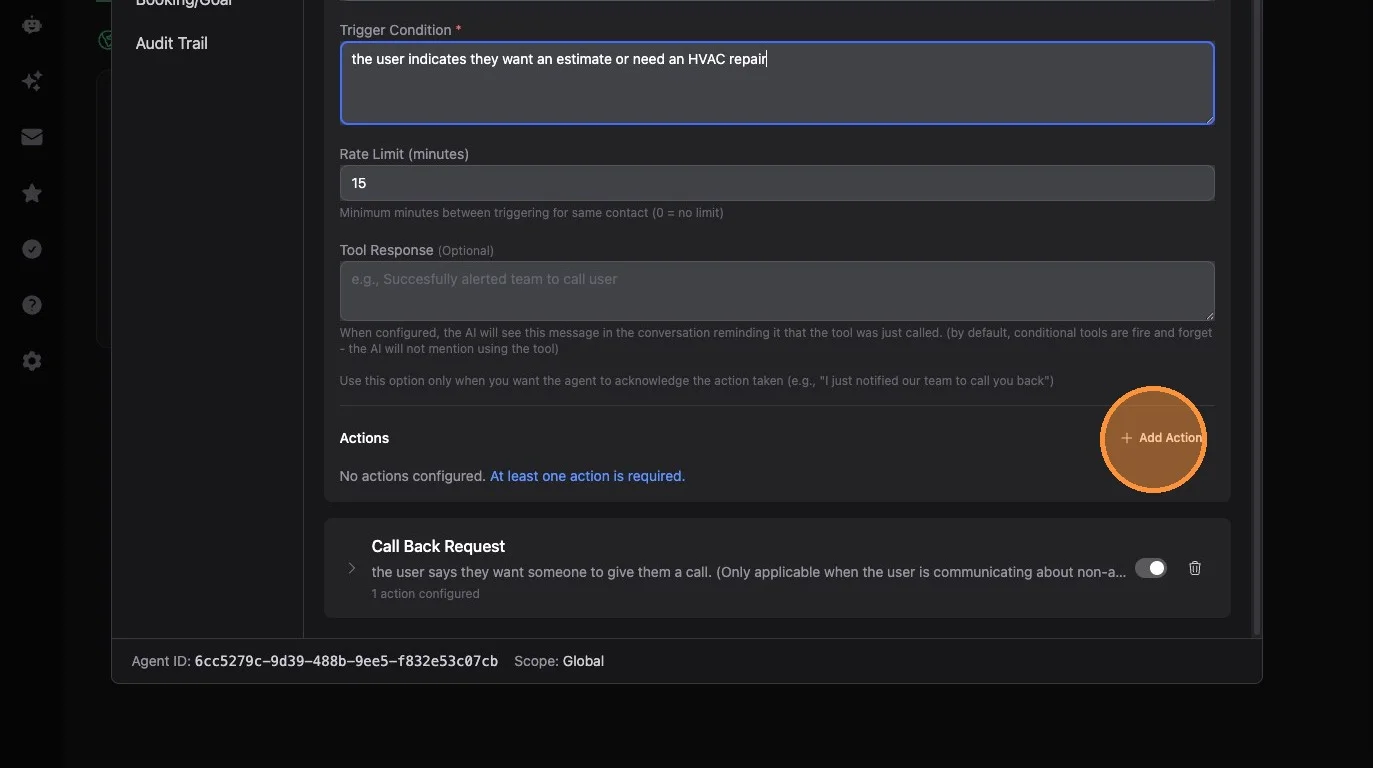
24. Select the "Add to Journey" action type
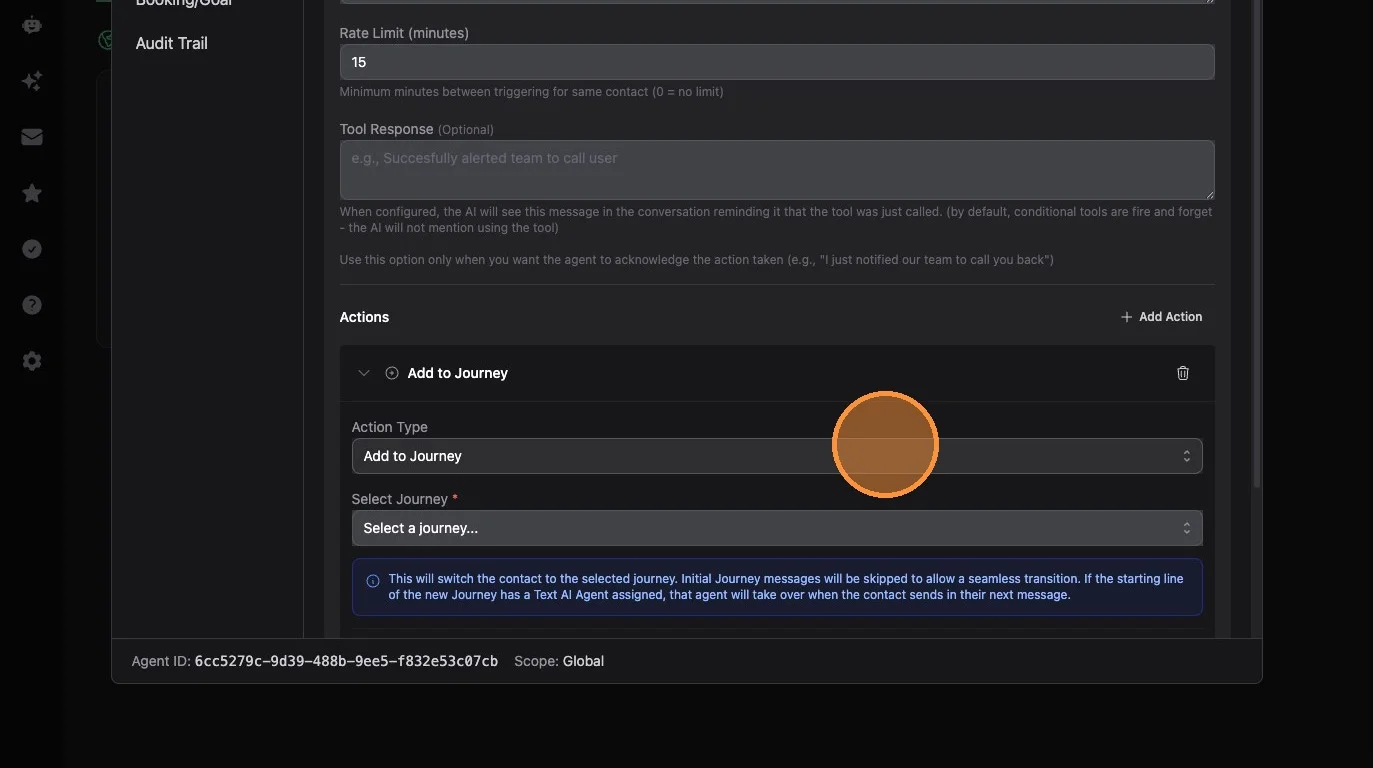
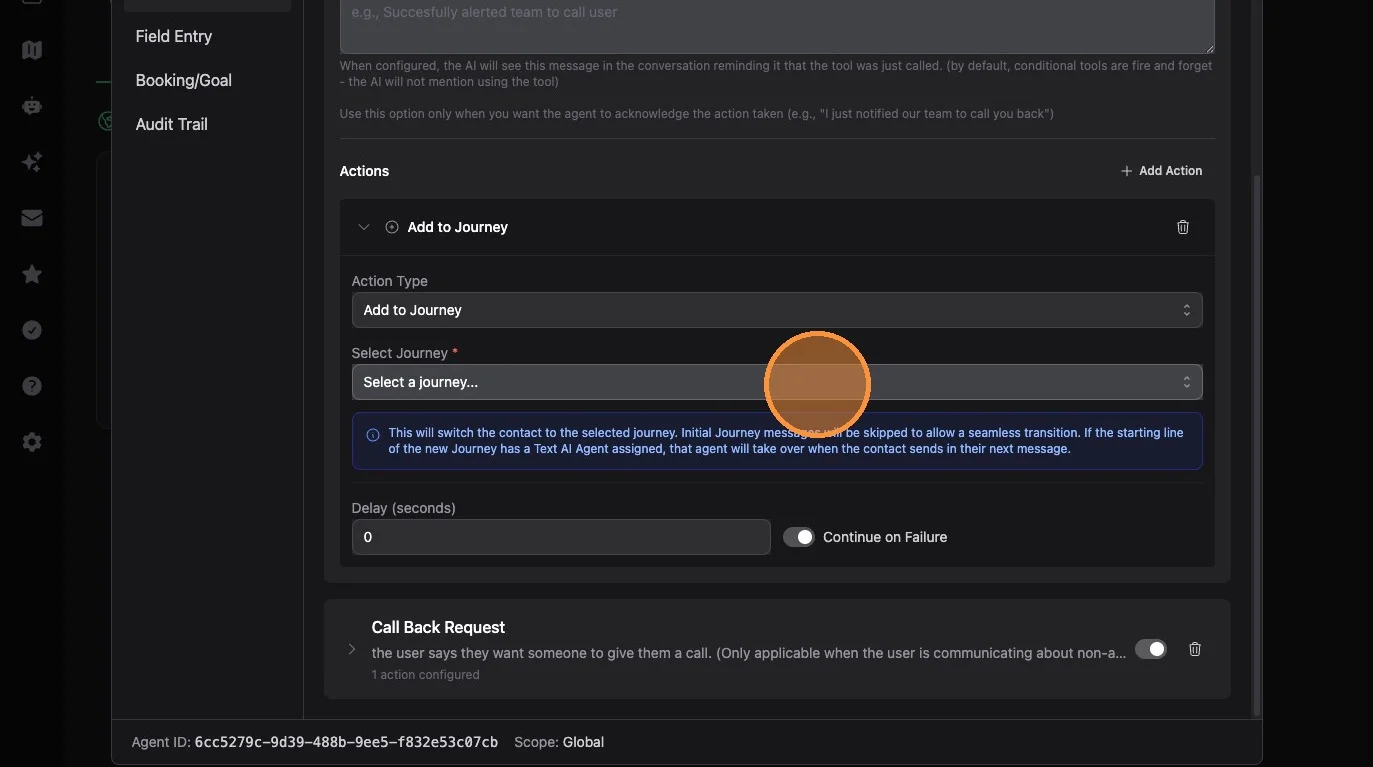
25. Select the appropriate journey from the dropdown
26. Click "Save Changes"
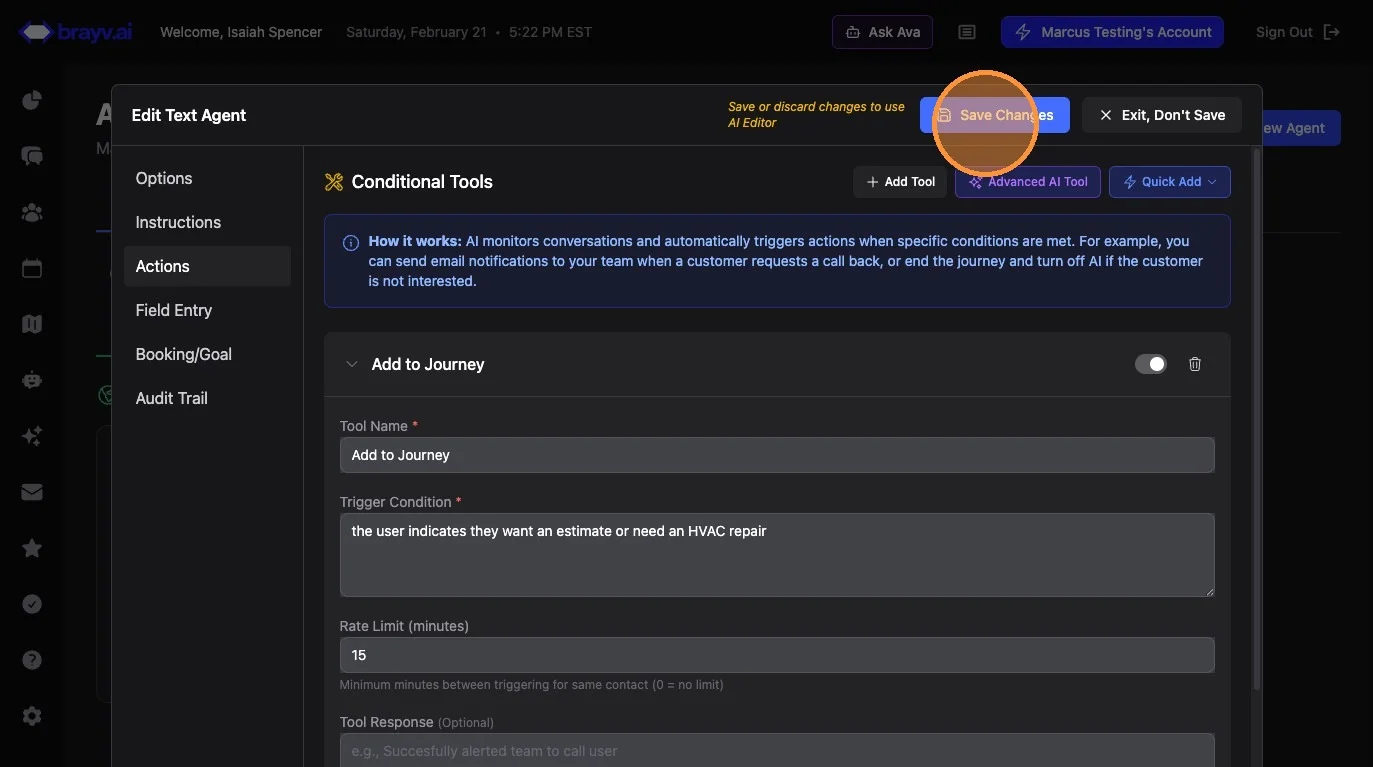
Pro Tip: You can also click "Edit with AI" and tell Ava something like "I want my agent to add contacts to Journey X if they indicate they need an HVAC repair or estimate." Ava will set up the entire tool for you.
Part 3: Handling Contacts That Recently Went Through a Journey
You might not want contacts who recently exited a journey to chat with a global agent that could add them back into that same journey. For example, if someone just went through your new leads journey and texts back in a week later saying "I'm checking on my estimate," the default global agent might re-enroll them (depending on how dialed in your trigger condition was for the add to journey tool), which would result in them starting the Journey over - AI agent asking them questions they recently answered, following up multiple times, attempting to book an appointment etc. which could be frustrating.
To handle this, you can set up a second global agent specifically for contacts who exited a journey within a recent time window (e.g., 30 days). This agent can be conversational, send alerts to your team, and answer questions - but without tools to re-enroll the contact into a journey they just left.
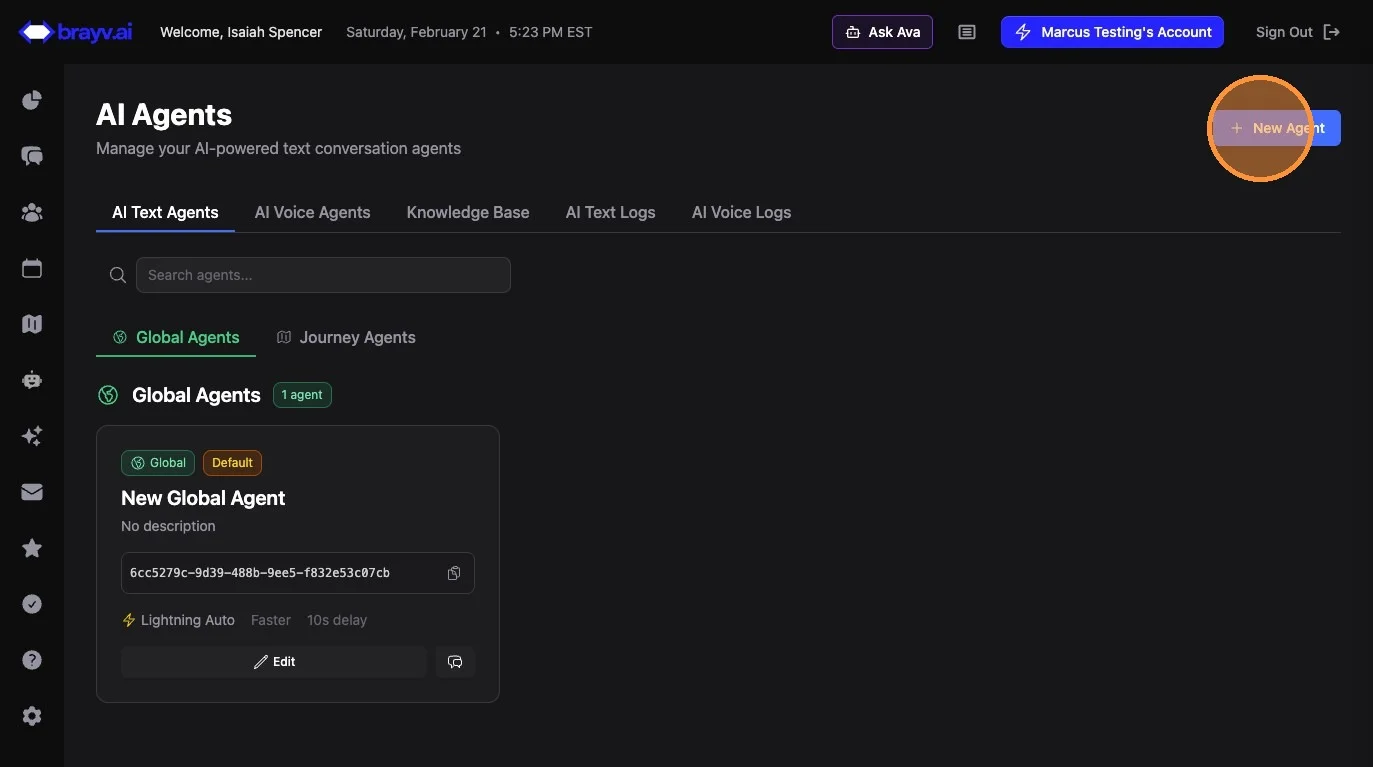
27. Go to AI Agents > AI Text Agents > Global Agents. Click "New Agent"
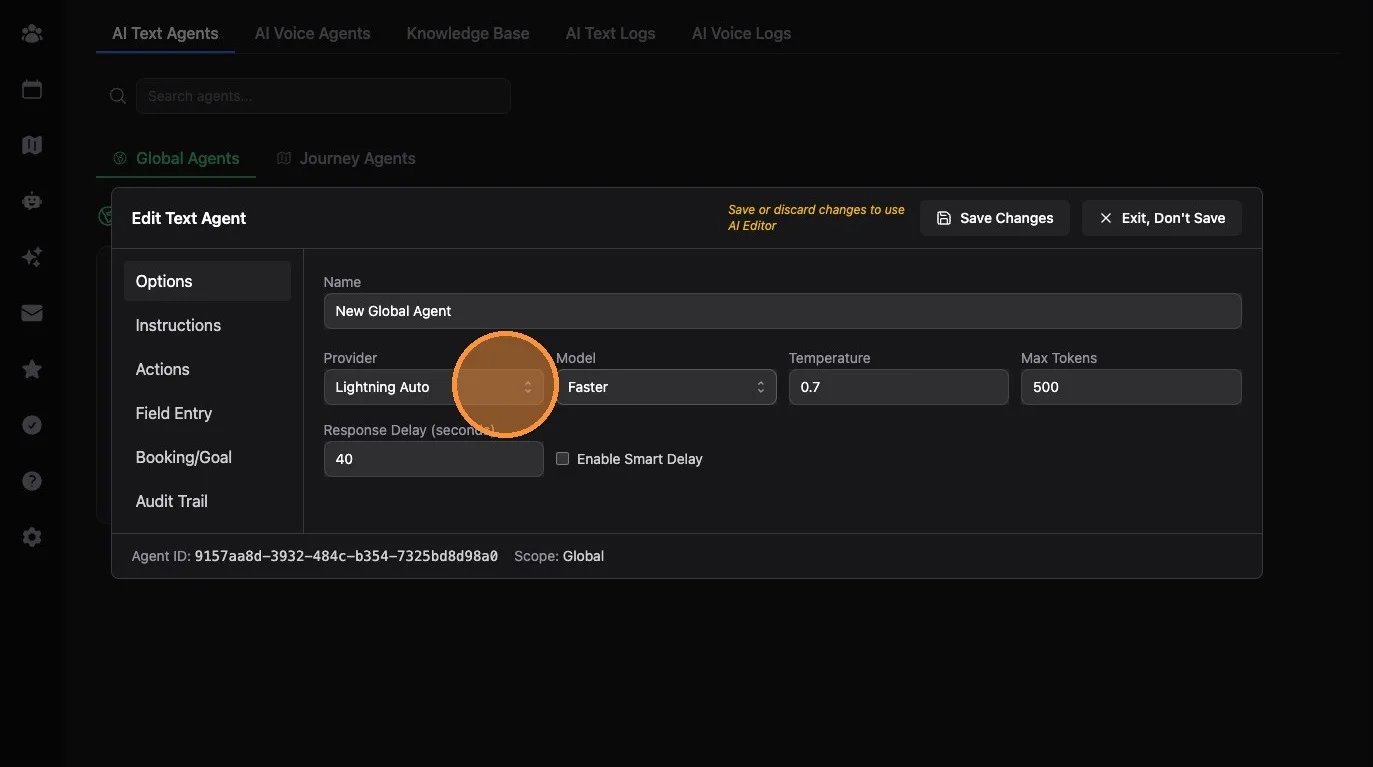
28. Make at least one change to save. "Lightning Auto" is a good provider choice.
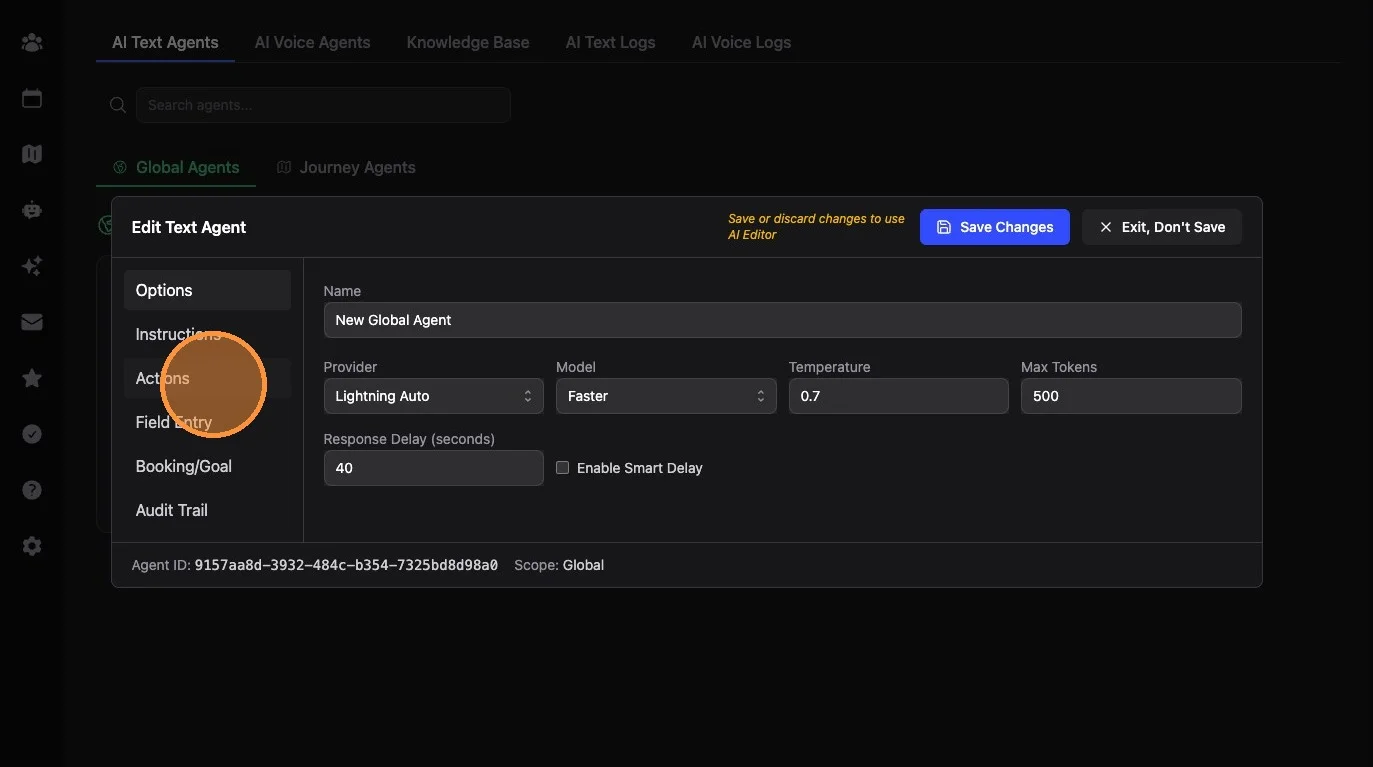
29. Click "Actions"
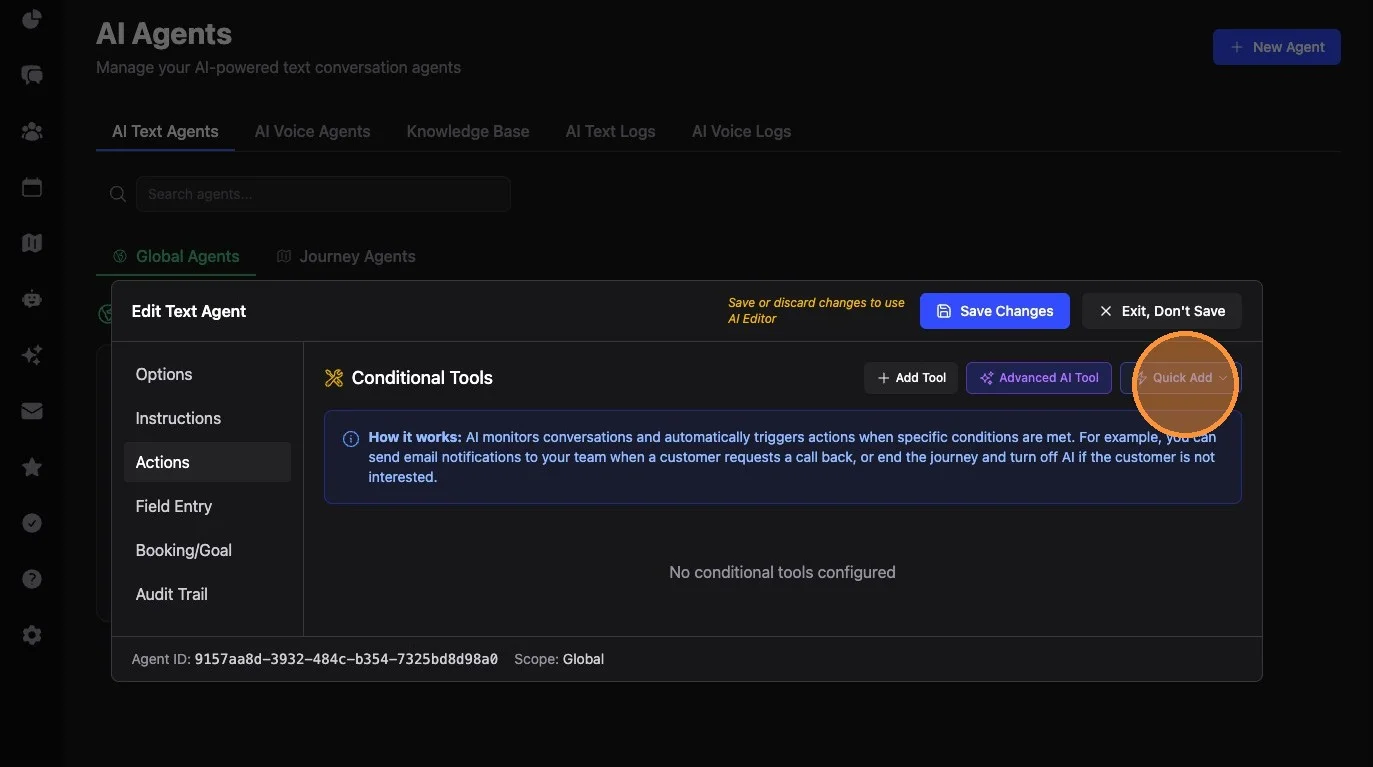
30. Click "Quick Add"
31. Click "Call Back Request"
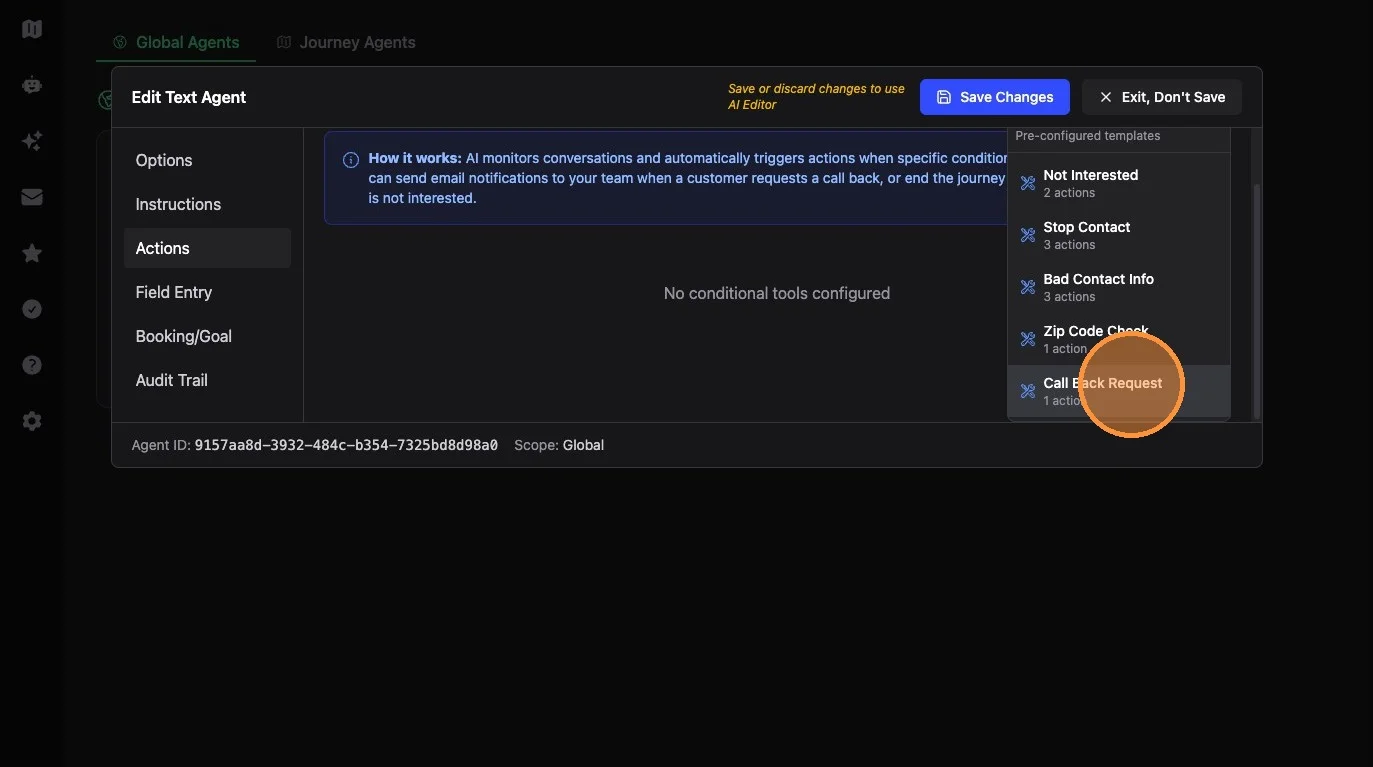
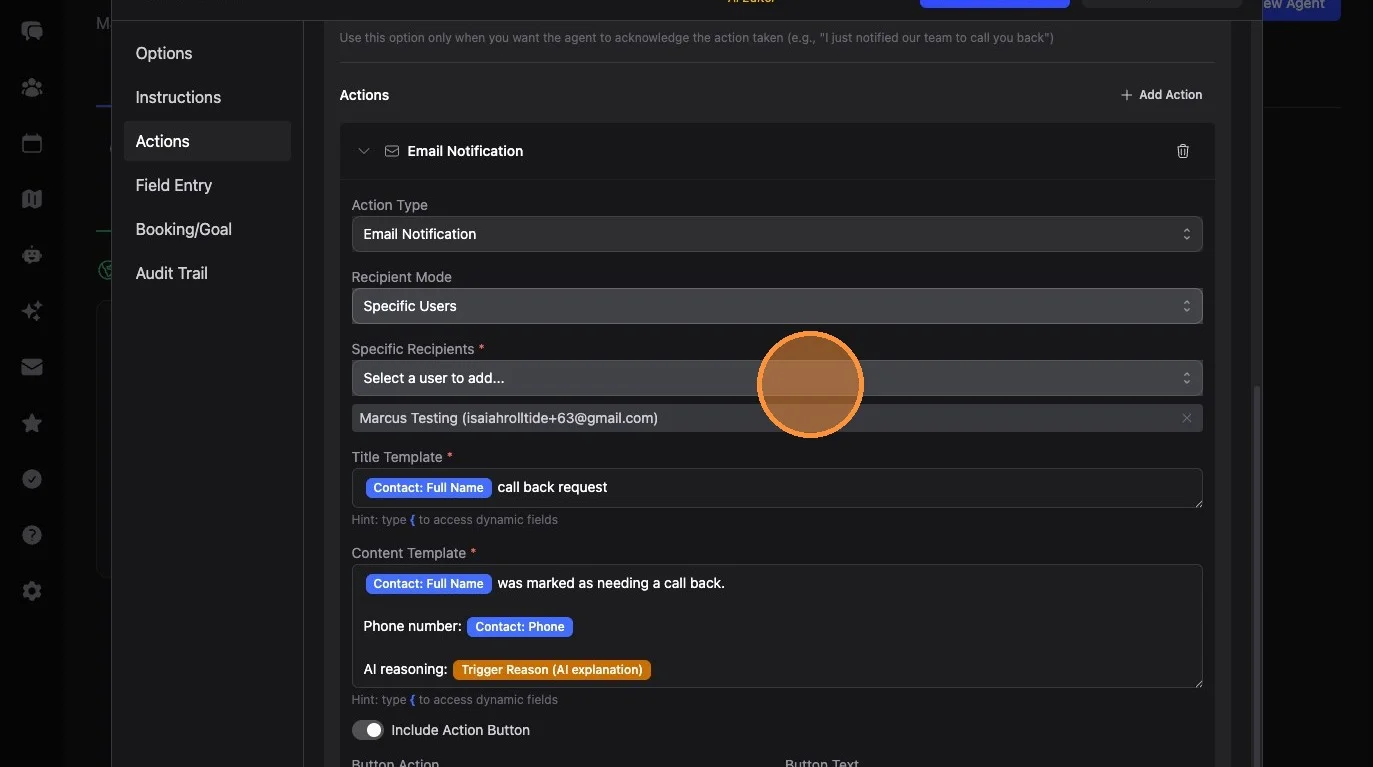
32. Select a user to receive the notification (you can also add other actions for SMS notifications, etc.)
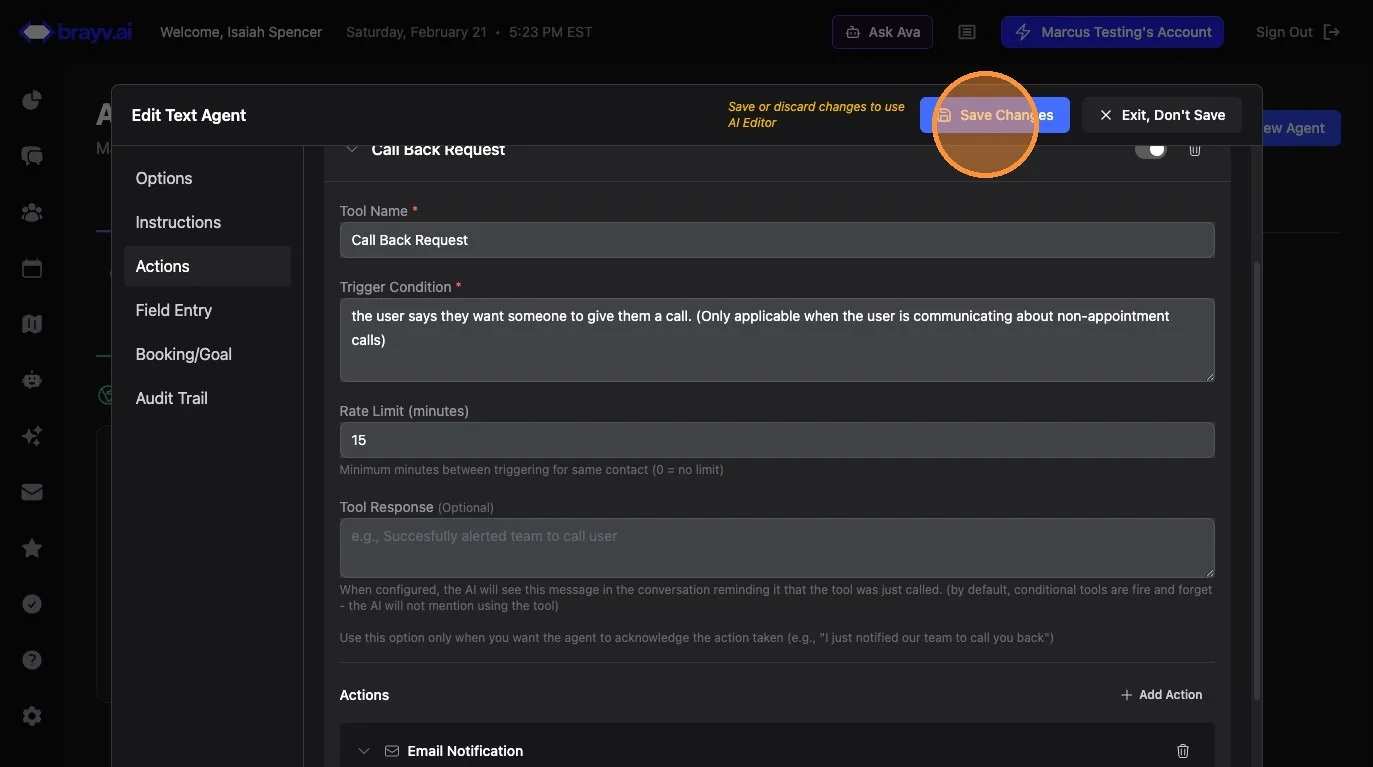
33. Click "Save Changes"
Assigning as Recent Opportunity Agent
34. Navigate to Settings (gear icon, main left-hand menu)
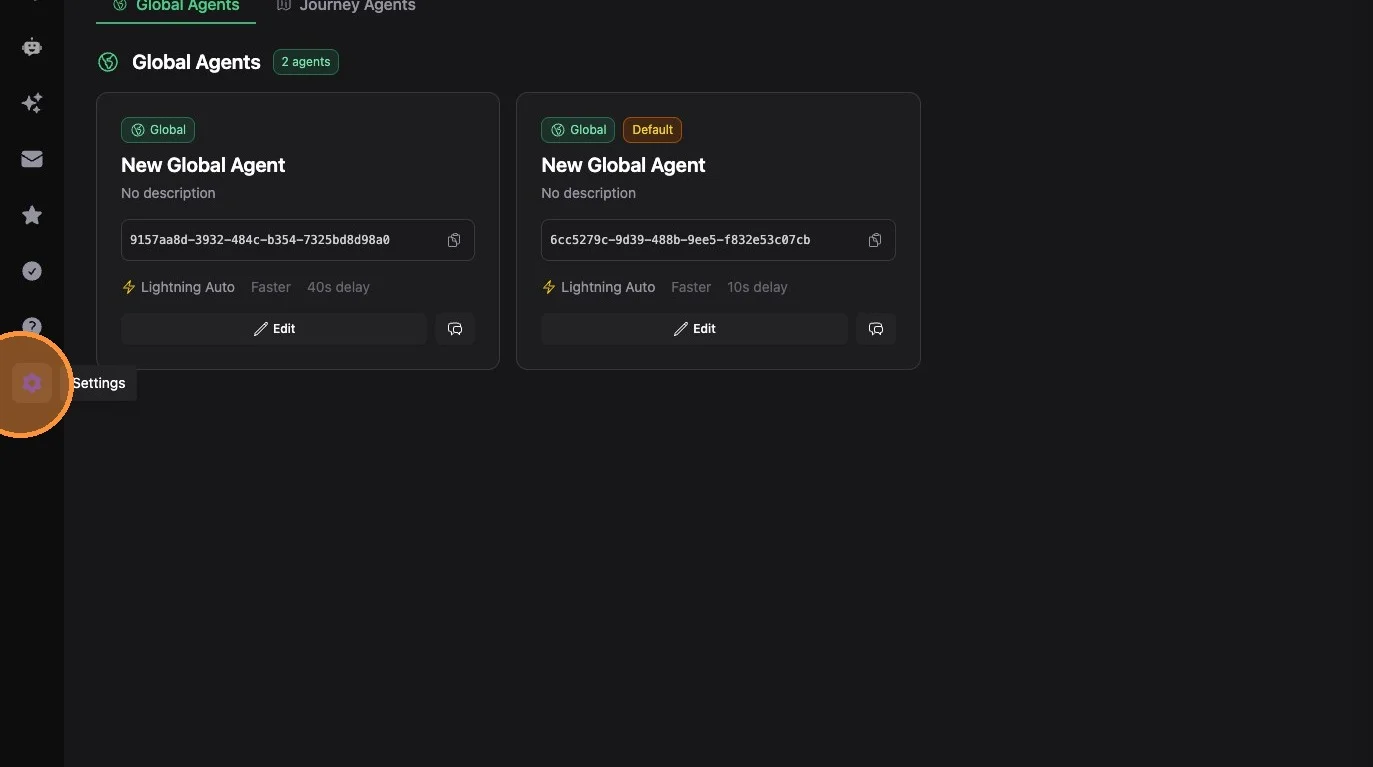
35. Click "Text AI"
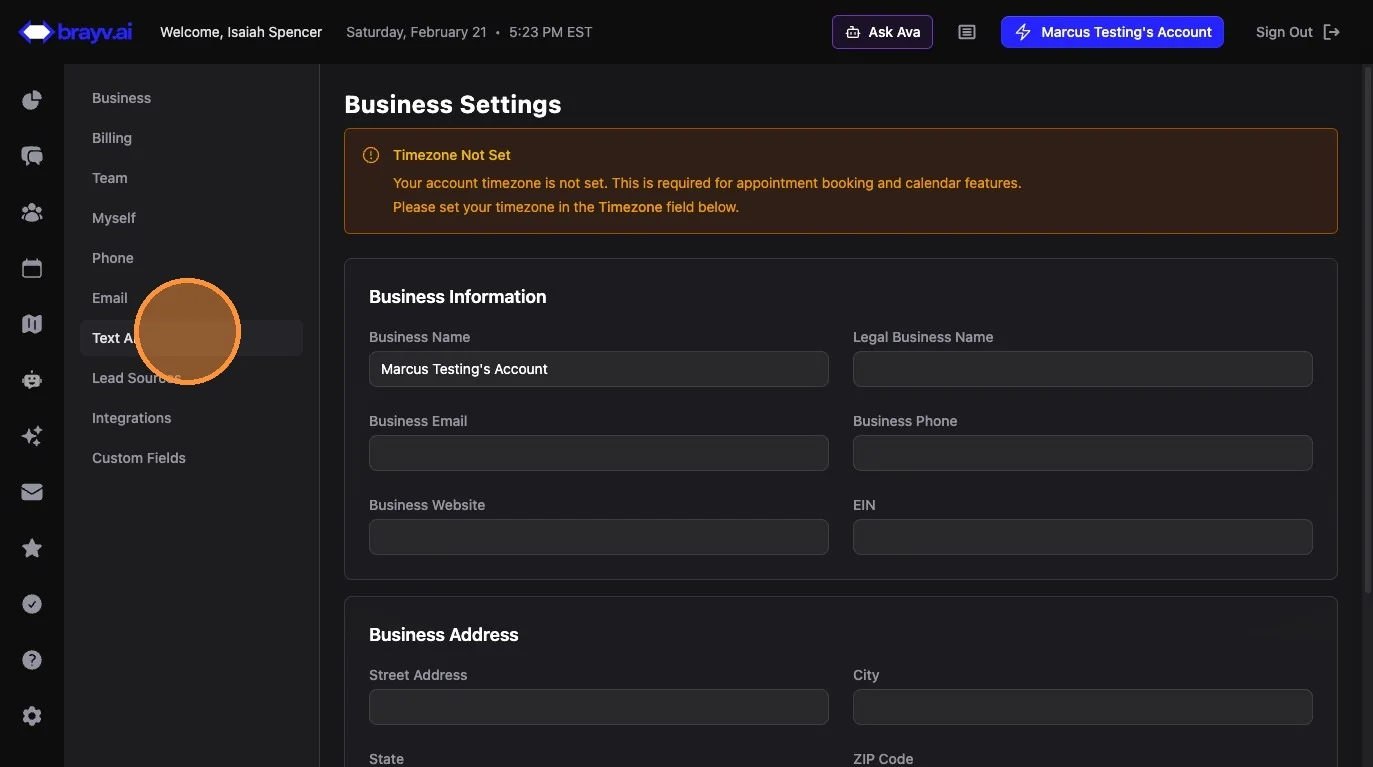
36. Under "Recent Opportunity Routing," select the agent you just created
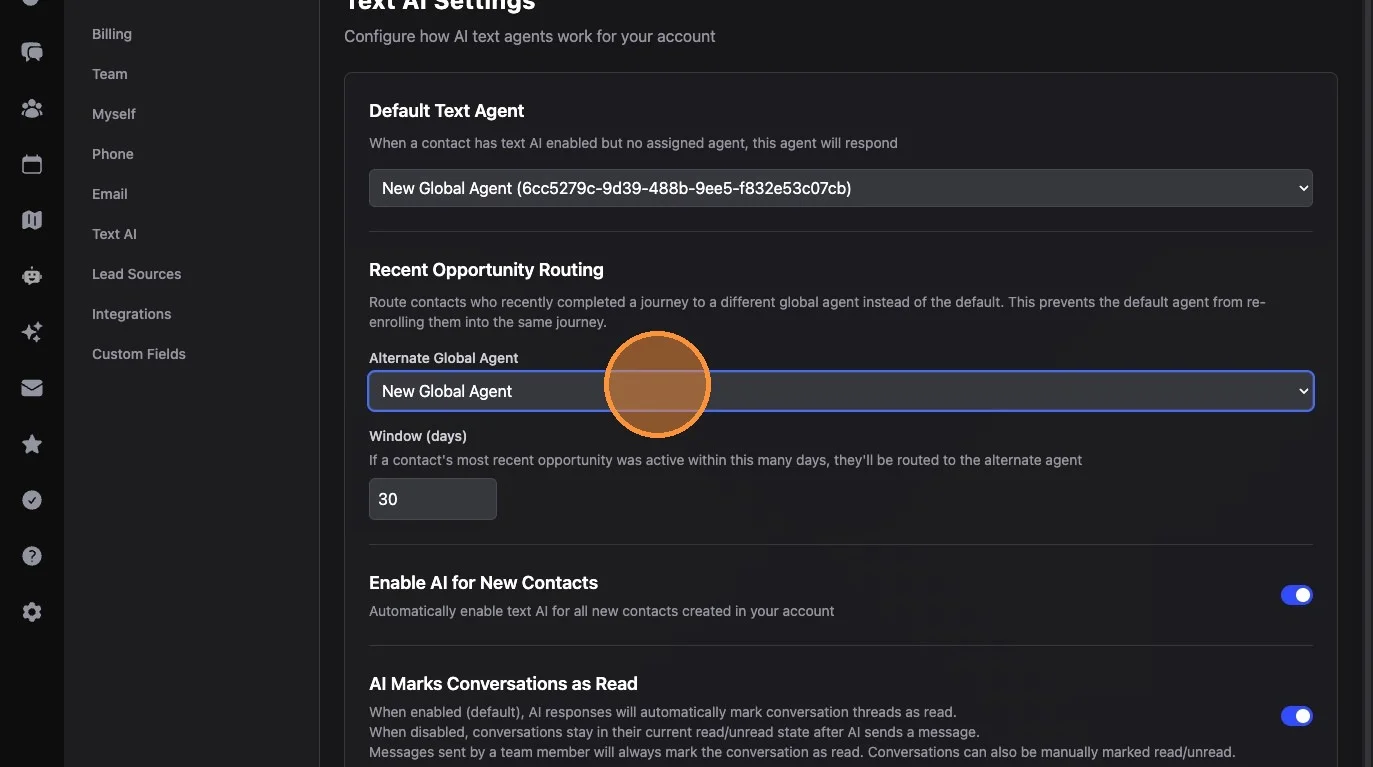
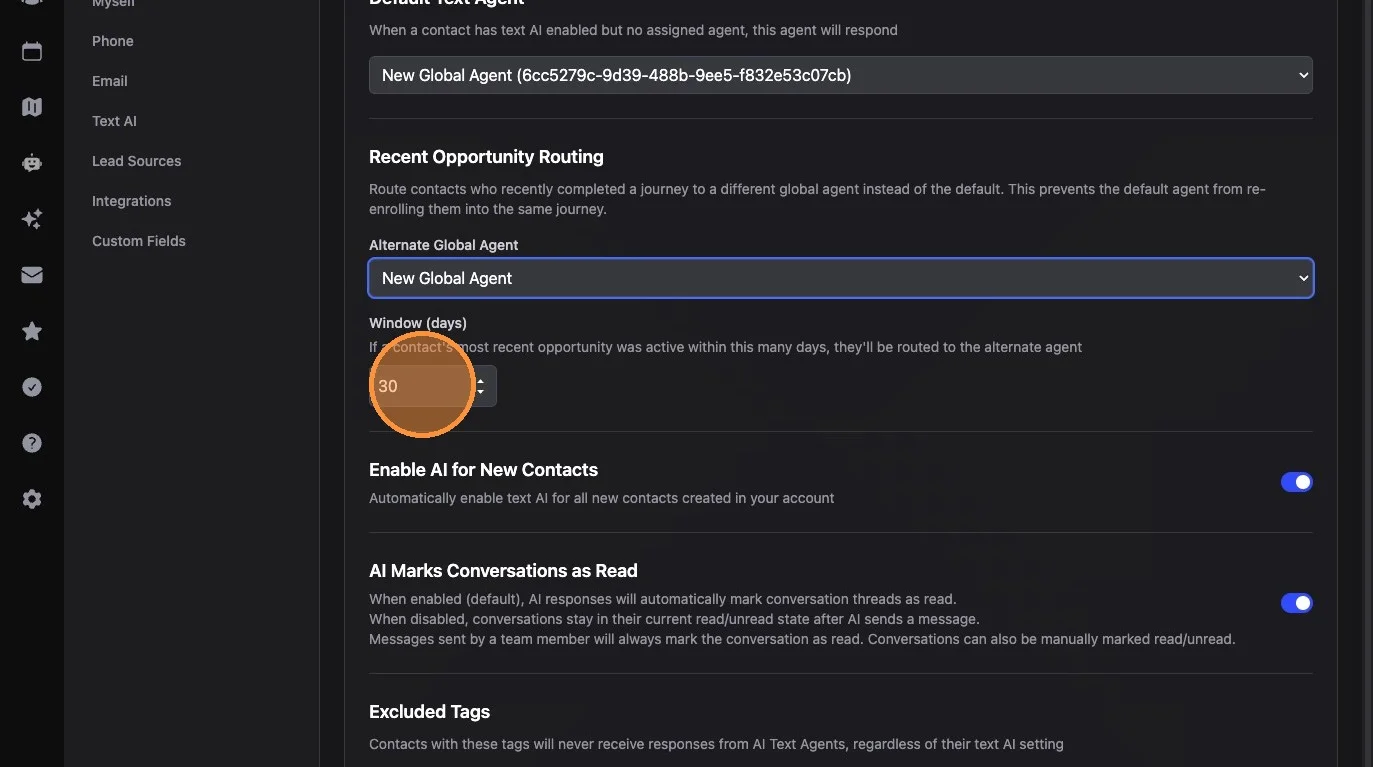
37. Set the window (days) to the appropriate number (e.g., 30)
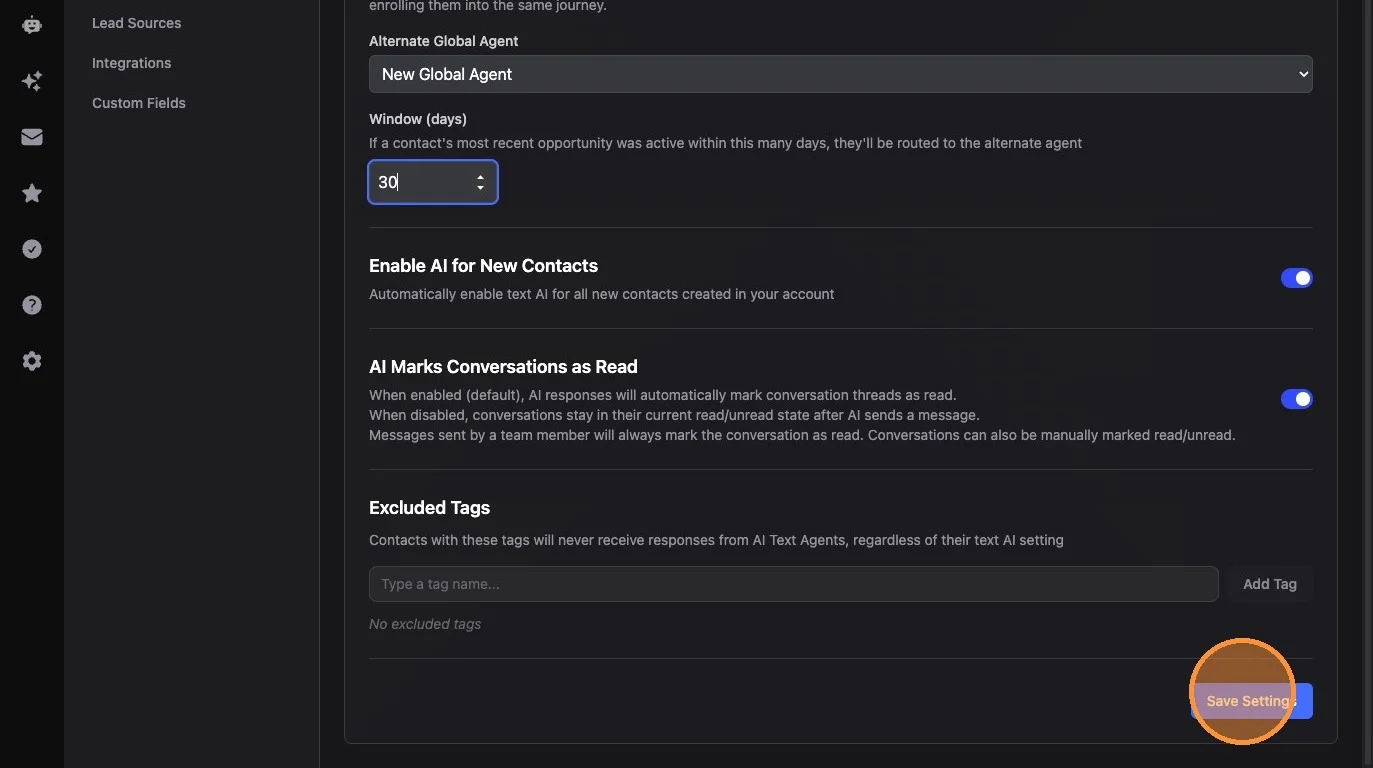
38. Click "Save Settings"
39. Go back to AI Agents to confirm. You now have separate handling for contacts who exited a journey within your defined window!
Refine your agents' instructions and tools as needed.
Tip: You may want to change the informative name of each agent to differentiate them in logs and message details. The agent's conversational name (what it calls itself) is set in the first line of its instructions.
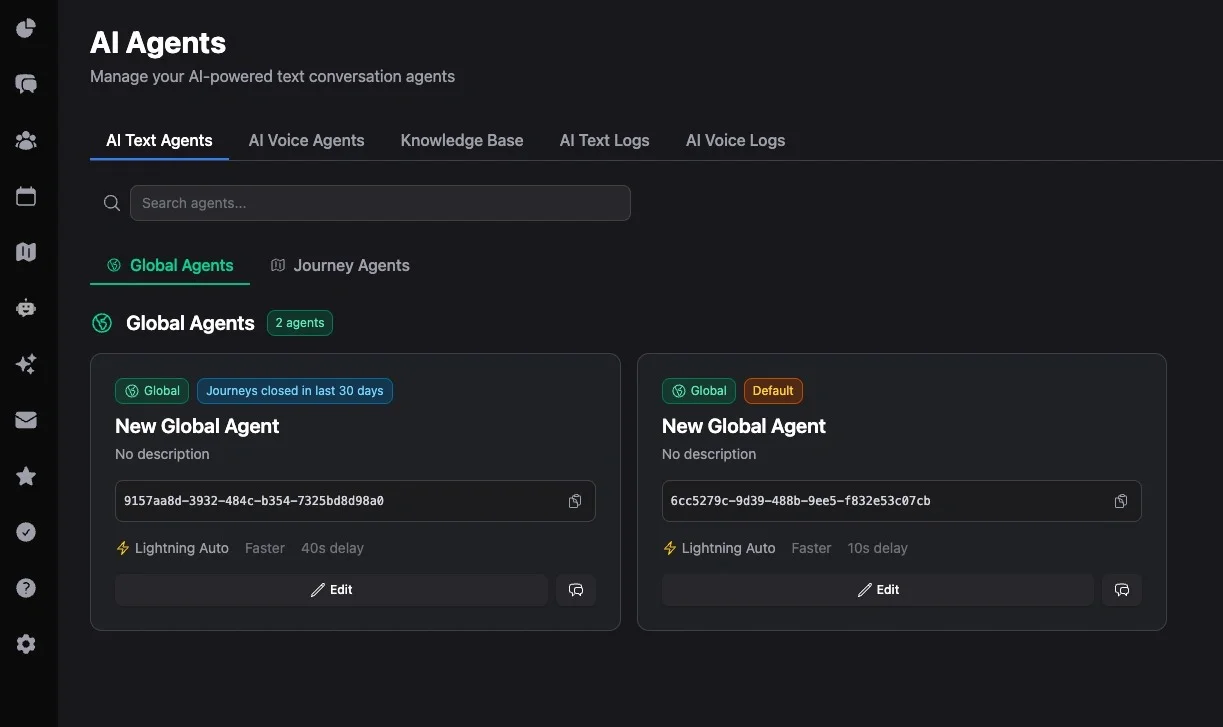
Key Tips
Default vs Recent Opportunity Agents:
- Default global agent handles contacts with no recent journey history. Good place for journey enrollment tools.
- Recent opportunity agent handles contacts who exited a journey recently. Keep this one simpler - focus on customer service, not re-enrollment.
Model Selection:
- Use "Faster" model for general customer service agents
- Use "Optimized" or a full GPT model (4o+) if the agent needs to book appointments
Don't Forget Settings: Creating a global agent isn't enough - you must assign it in Settings > Text AI, or it won't be used.
Use Ava for Complex Tools: Instead of manually building conditional tools, use "Edit with AI" and describe what you want in plain language. Ava handles the configuration.
Related Features
- AI Text Agents Overview - Complete agent configuration reference
- Customer Journeys - Understanding journeys that global agents can route into
- Conditional Tools - Building tools for journey enrollment and notifications
- Field Extractors - Capturing contact info from conversations
- Knowledge Base - Training agents with FAQs and documents
- Human-in-the-Loop - Manually handling global agent conversations
Summary
Global text agents provide AI-powered customer service for contacts not in a journey:
- Create a global agent with appropriate model, instructions, callback tool, and name extractors
- Assign as default in Settings > Text AI
- Add journey enrollment tools so the agent can route contacts into specific journeys
- Set up recent opportunity routing with a second agent for contacts who recently exited a journey
- Configure the time window (e.g., 30 days) in Settings > Text AI
The result: Every inbound text gets handled intelligently - new contacts get routed into journeys when appropriate, recent leads get attentive customer service without re-enrollment, and your team gets notified when someone needs a callback (or based on any other condition you configure).