
Related Articles
AI Email Campaigns Guide
Quick Reference Keywords: AI email campaigns · Email templates · Sending domain · DNS records · Bulk email · Campaign enrollment · AI template design · Marketing email
Overview
This guide walks you through the full email marketing workflow in brayv.ai: setting up your sending domain, designing AI-powered email templates, creating campaigns, and enrolling contacts - both in bulk and automatically through journeys.
Part 1: Setting Up Your Sending Domain
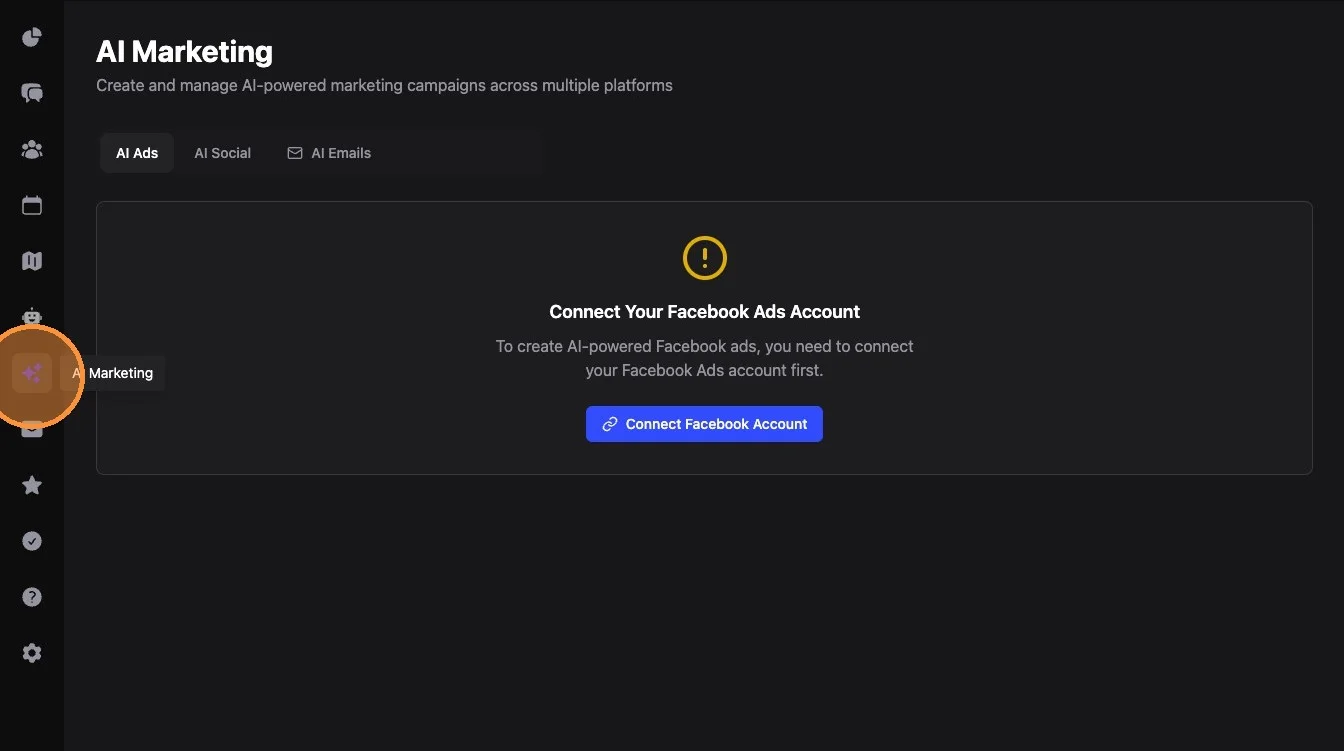
1. Go to AI Marketing (sparkles icon, main left-hand menu)
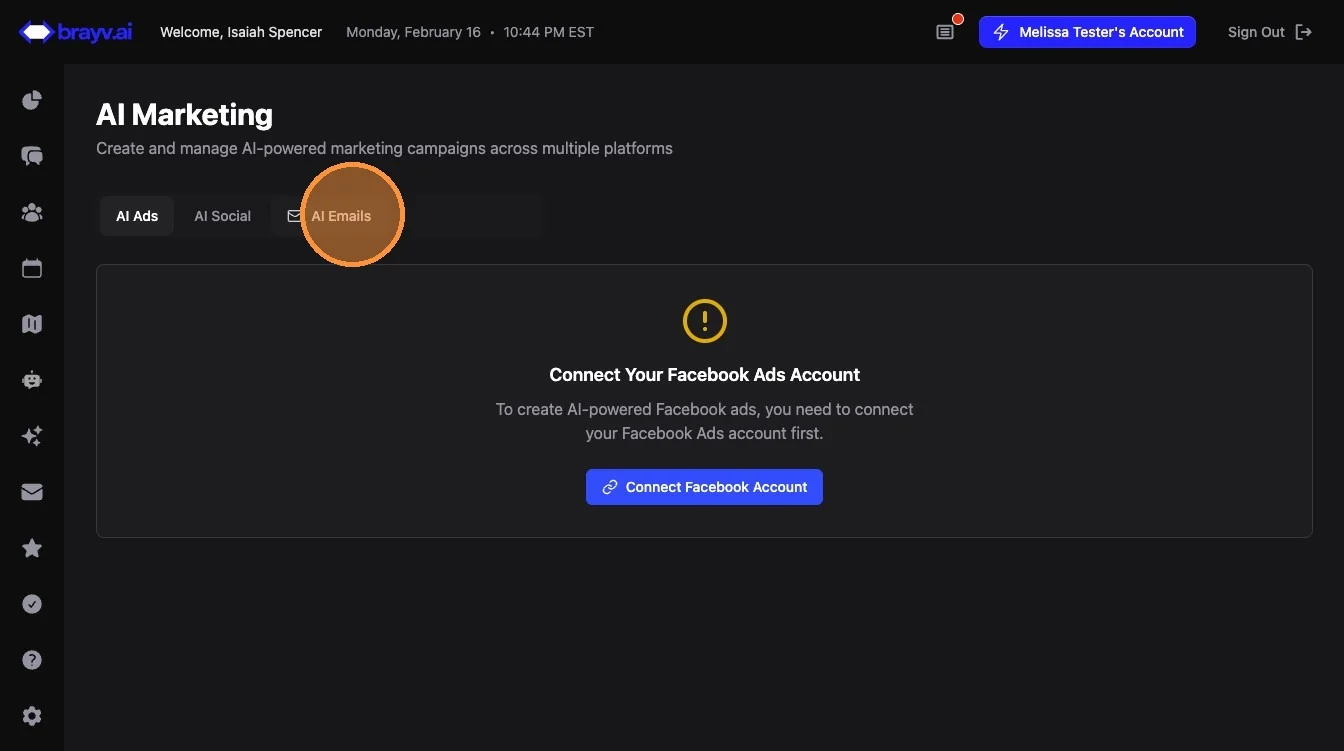
2. Click "AI Emails"
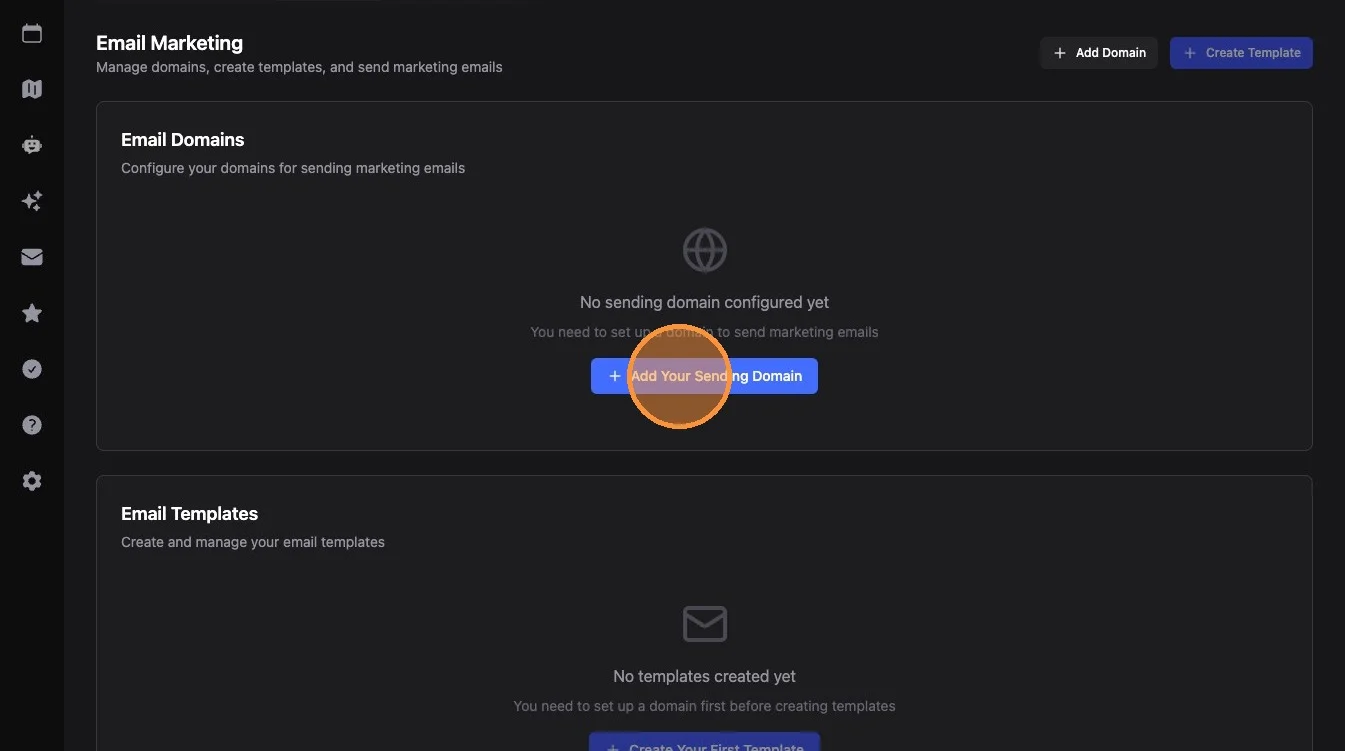
3. Click "Add Your Sending Domain"
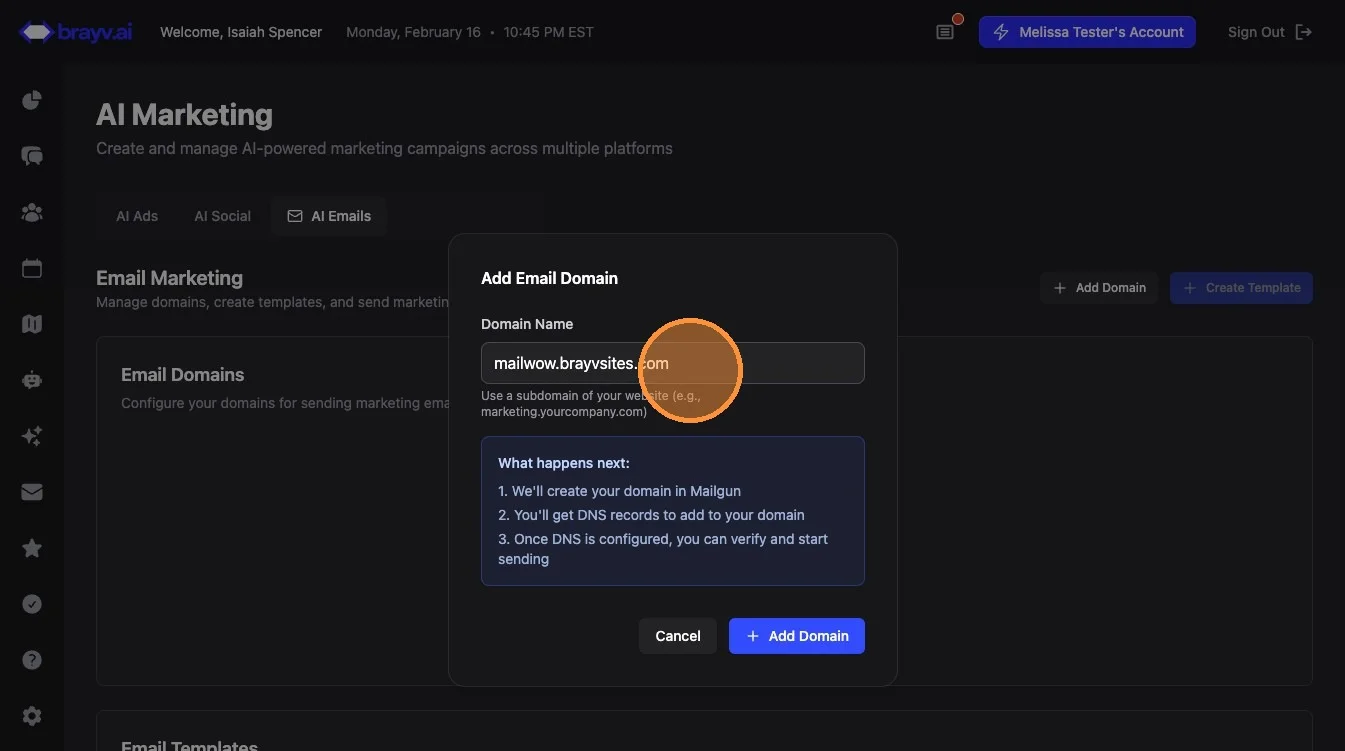
4. Enter a domain. In most cases, use a subdomain of your main website (e.g., hello.mywebsite.com).
Important: Do not use the same domain you use for regular company email. If your team sends from addresses like
[email protected], do not addmycompany.comhere. Instead, use something likenews.mycompany.com.Many franchise businesses cannot send marketing emails from the corporate domain - that's completely normal. Simply purchase your own locally branded domain (e.g.,
brandcity.com) and use that. Using a separate domain for marketing emails is extremely common, even among large companies, to protect their main website and email reputation.You can purchase a domain from providers like Cloudflare, GoDaddy, or Namecheap (we recommend Cloudflare).
5. After clicking Add Domain, you'll see a list of DNS records to add to your DNS provider. Copy each one and add it in Cloudflare (or your provider).
There are 6 total records:
MX- 2 records, 3 fields per recordTXT- 3 records, 2 fields per record (SPF, DKIM, and DMARC)CNAME- 1 record, 2 fieldsIn your DNS provider, select the record Type first, then fill in the remaining fields.
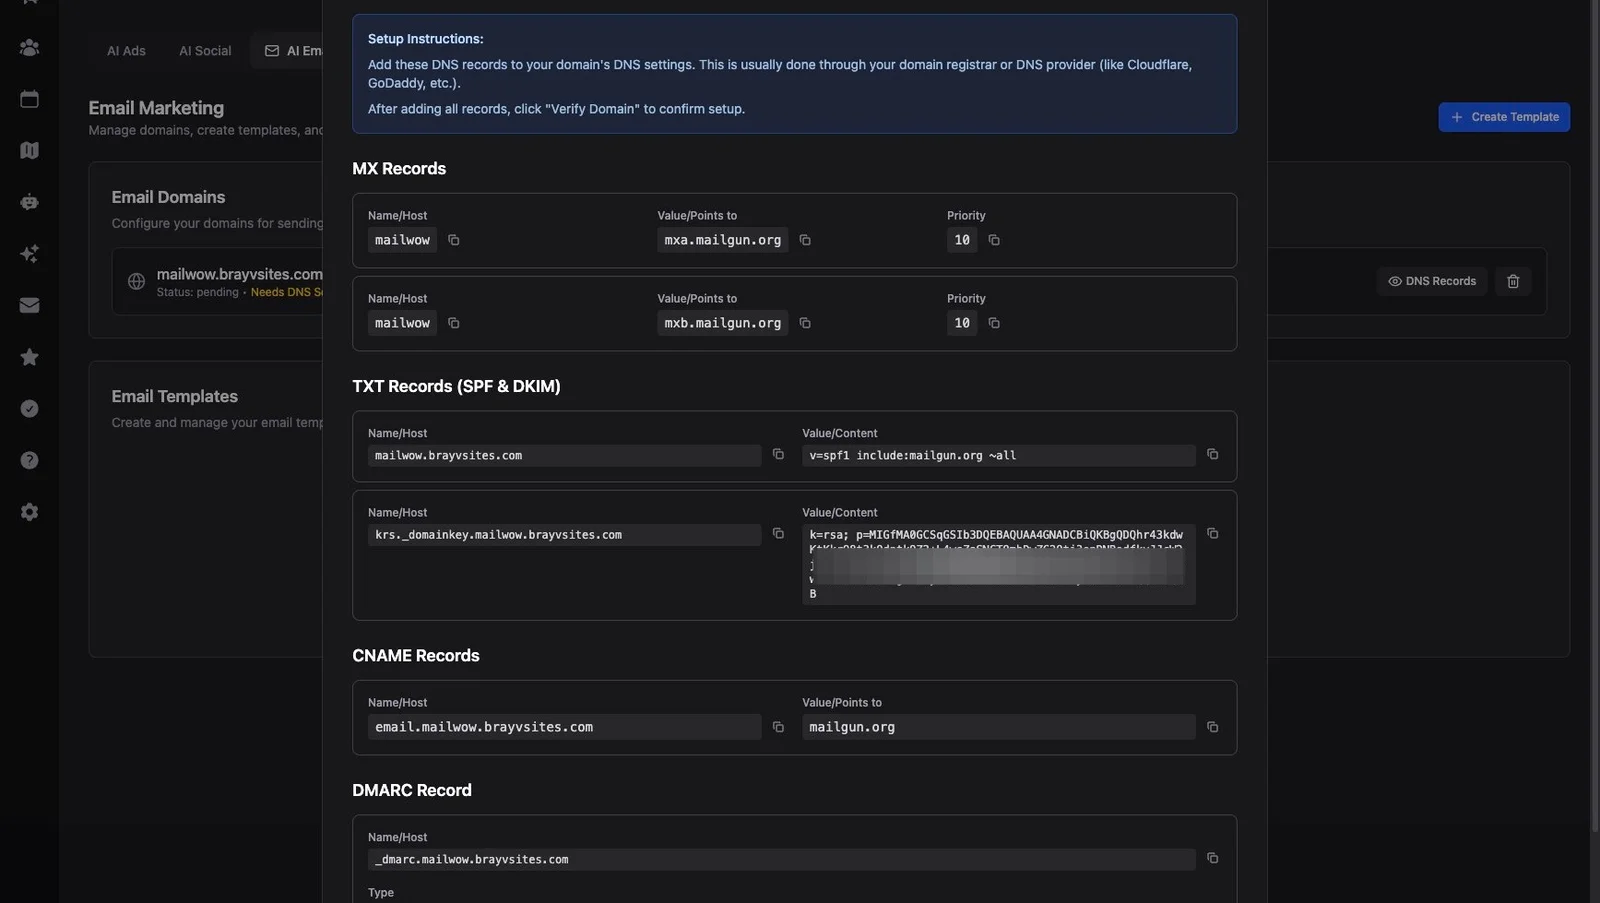
6. After saving all 6 records, wait 2 minutes then click "Verify Domain."
DNS records can technically take up to 24 hours to propagate, but 95% of the time it's done in under 5 minutes.
If you get partial success (some records verified but not others), double-check your DNS settings for accuracy. If they look correct, just wait a couple more minutes and click verify again.
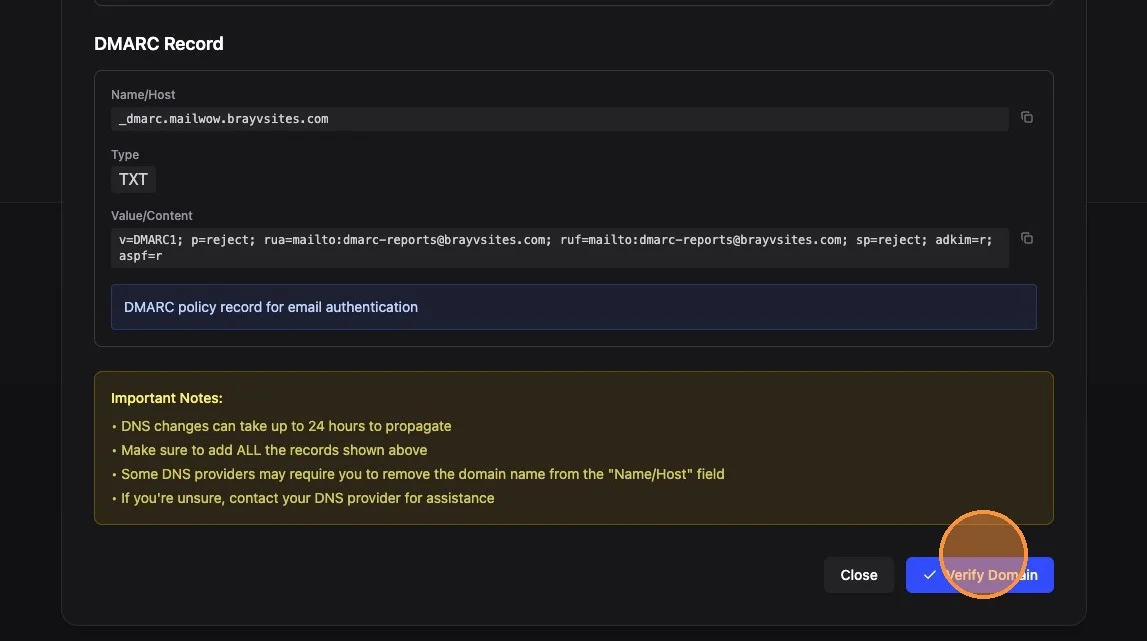
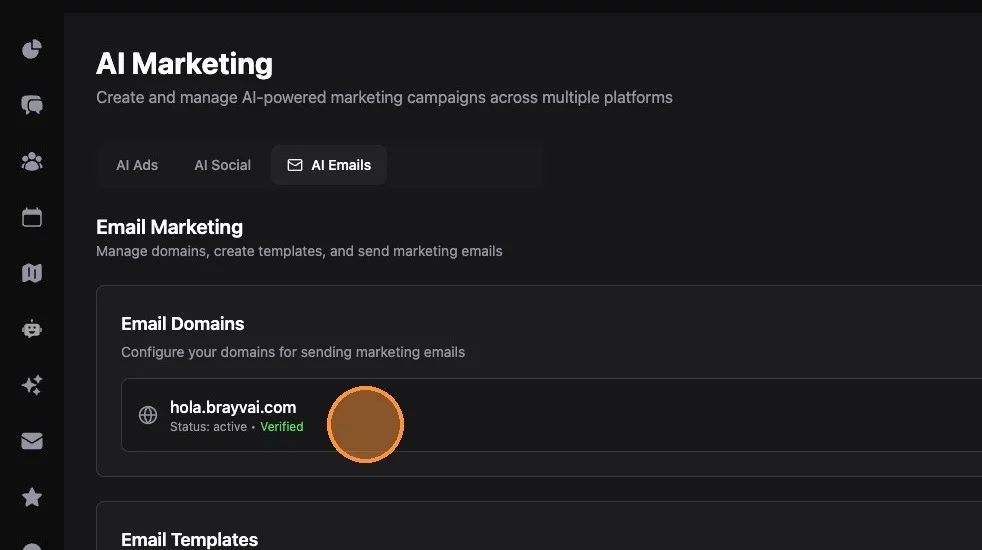
7. Once verified, your domain will appear under Email Domains
Part 2: Creating an Email Template
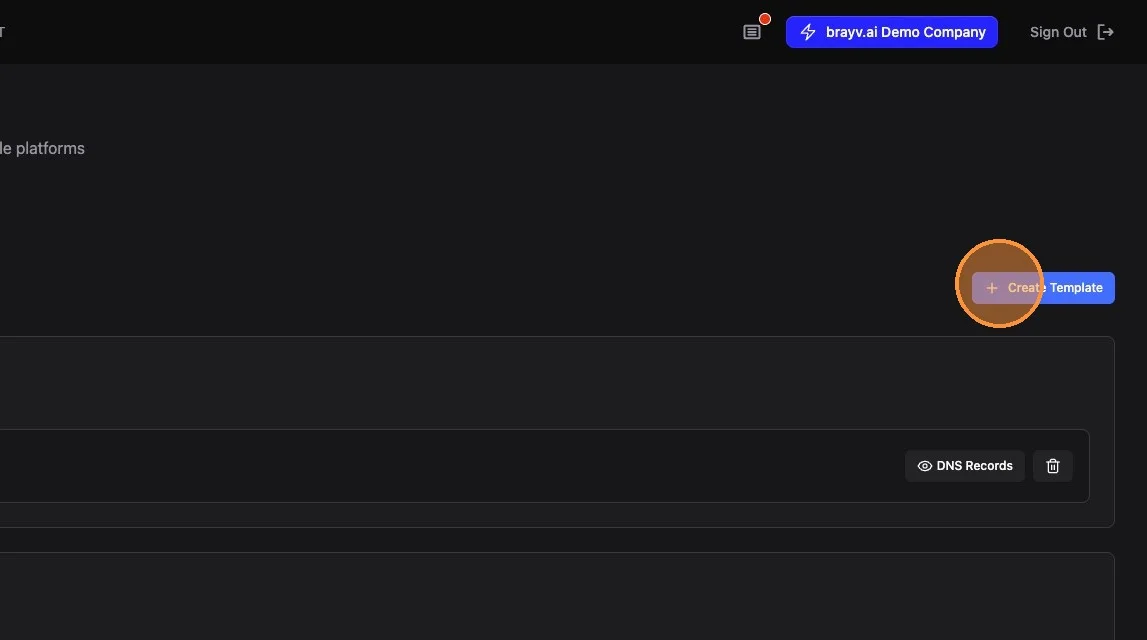
8. Click "Create Template"
9. Give the template a name, description, default subject line, and default from name.
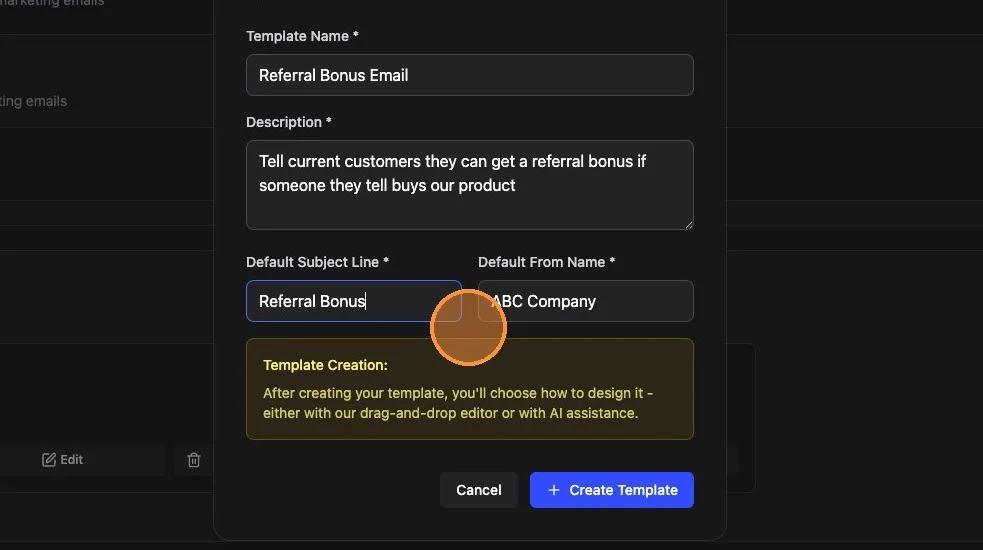
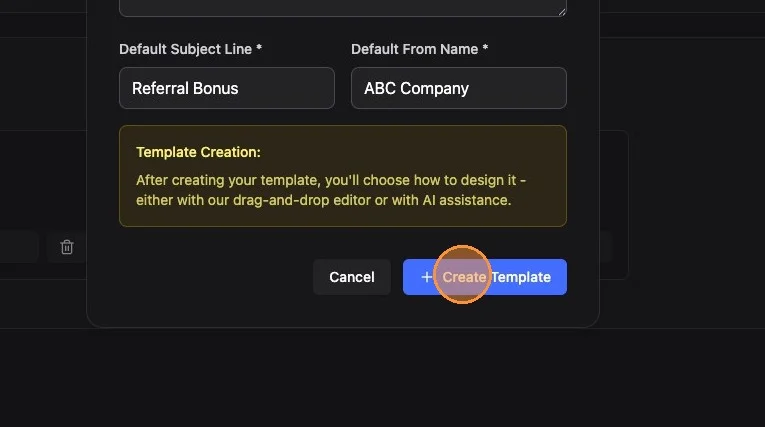
10. Click "Create Template"
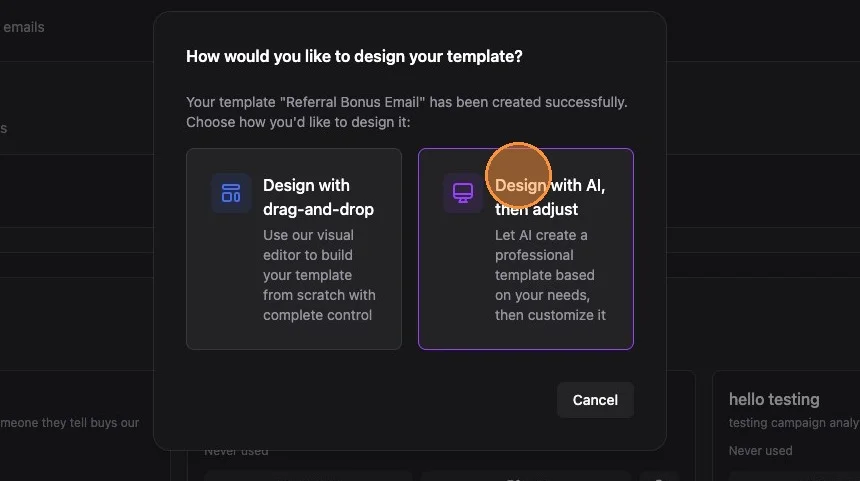
11. Choose how to design: start from scratch with drag-and-drop, or design with AI and then adjust.
12. If you choose the AI option, describe what you want your email to be about. Ava will pull in your business context from account settings. You can be as general or specific as you like.
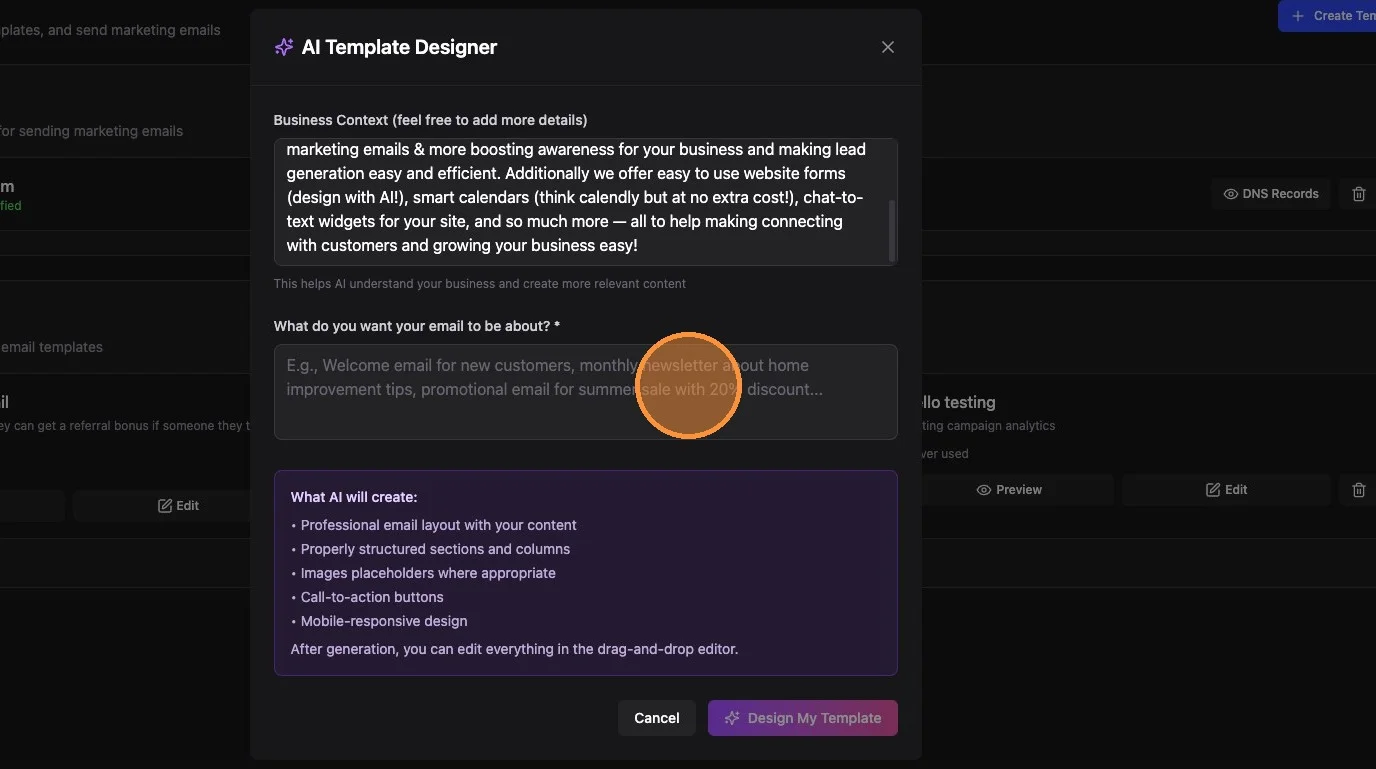
13. Click "Design My Template"
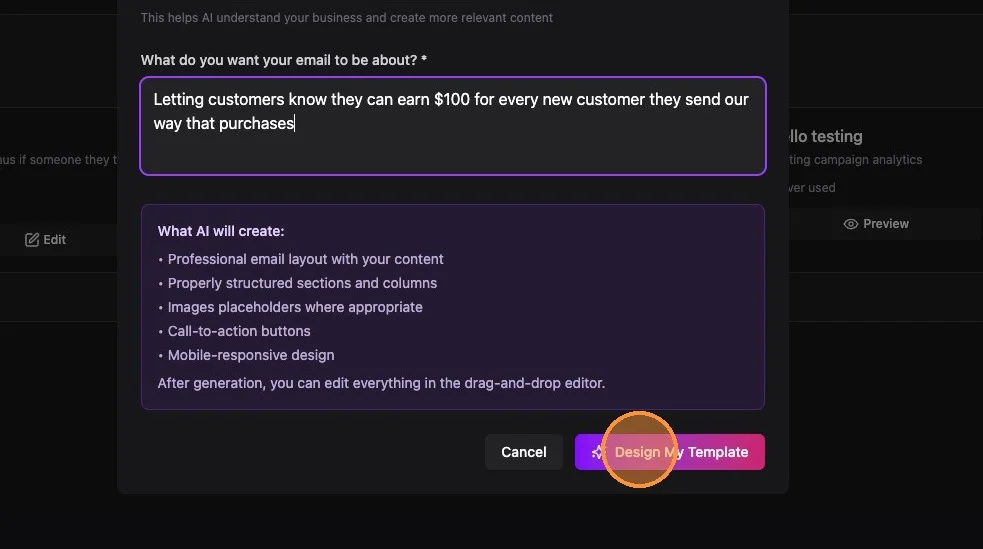
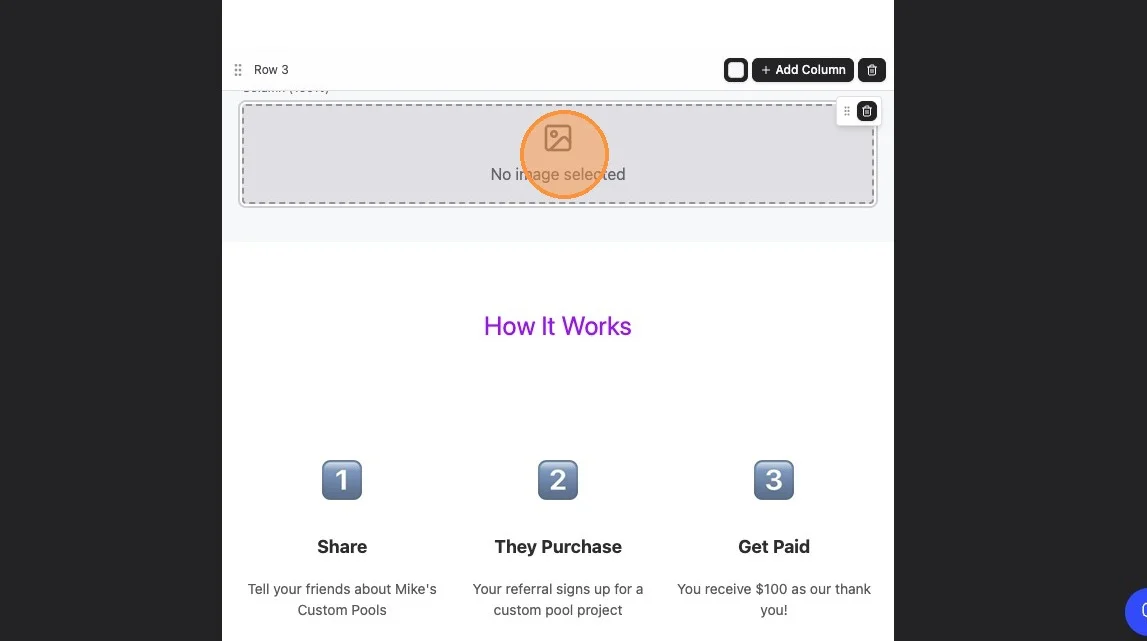
14. The AI will design a mobile-optimized email template with placeholders for images.
Editing Your Template
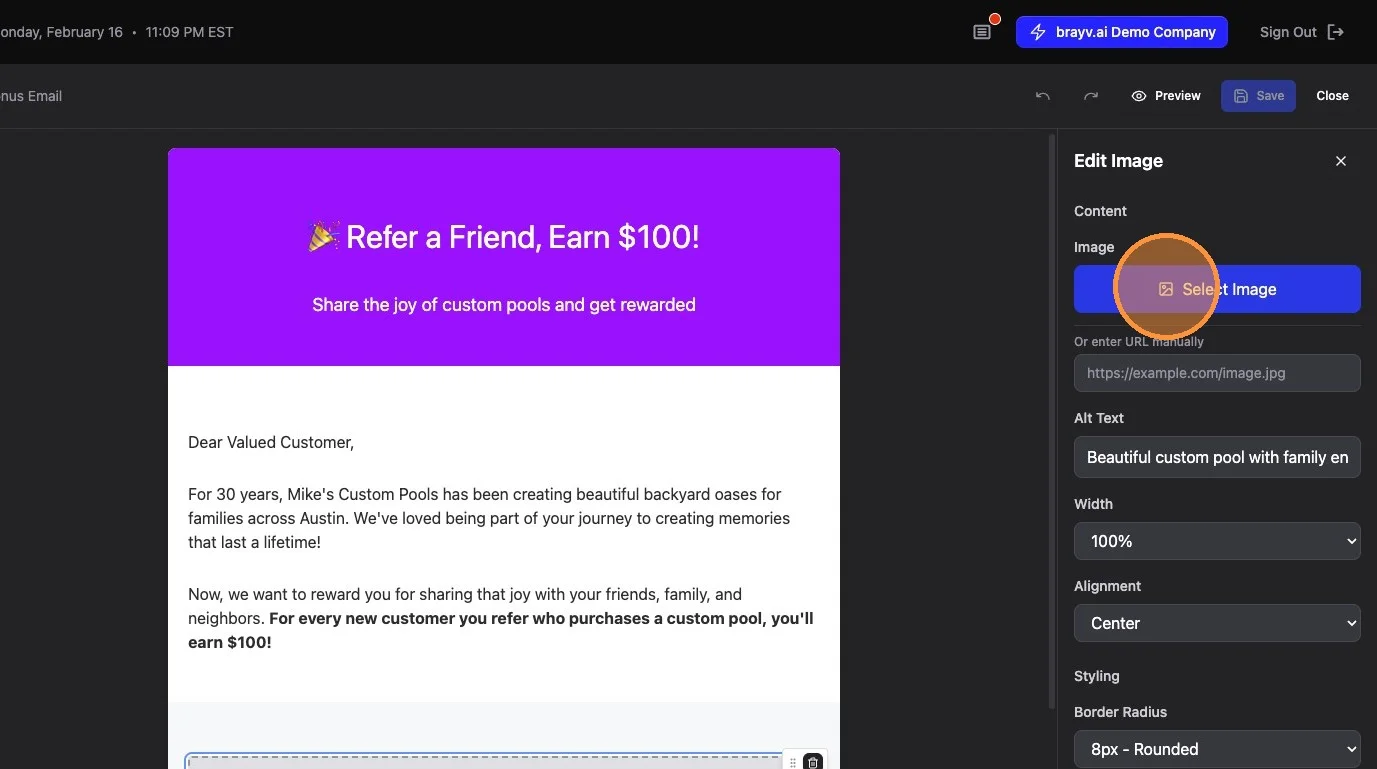
15. Click on an image placeholder to select an image
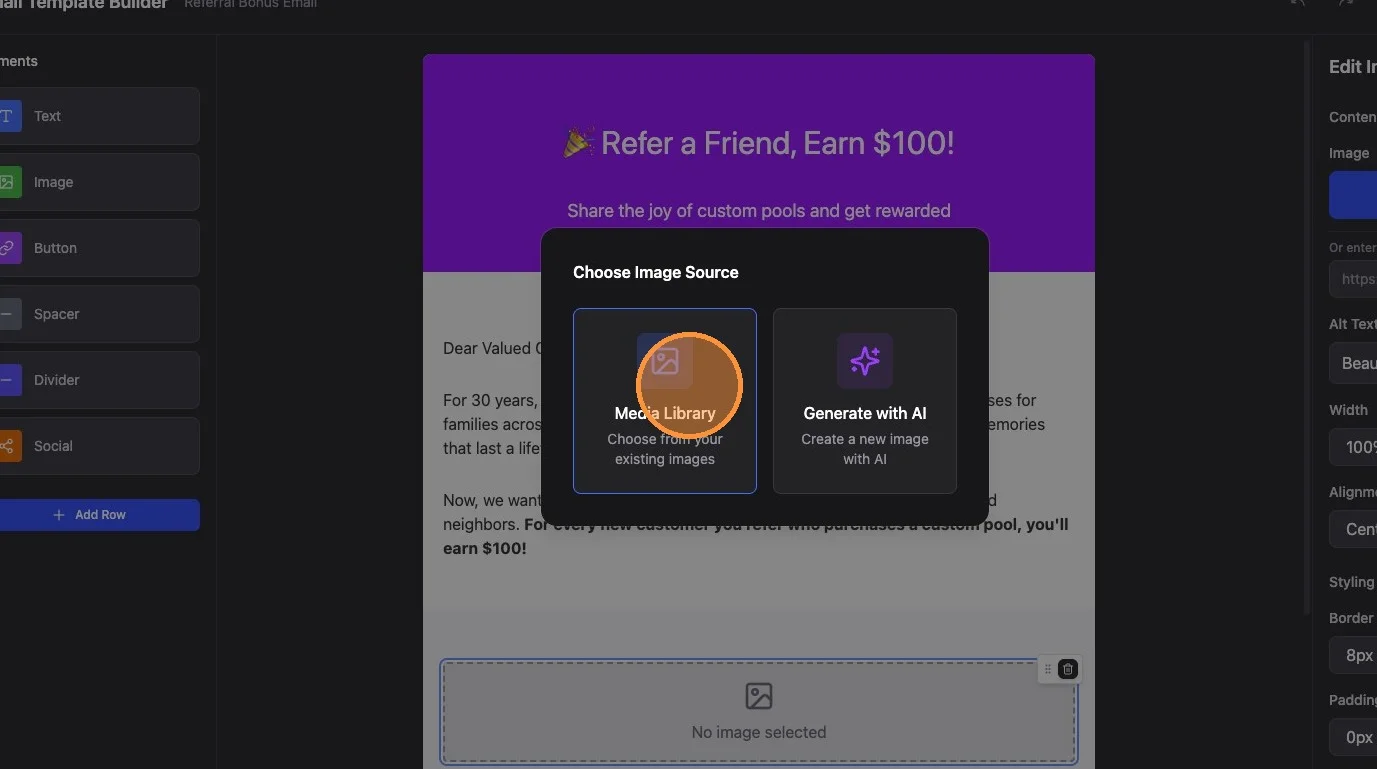
16. Choose from your media library (with option to upload new media) or generate with AI
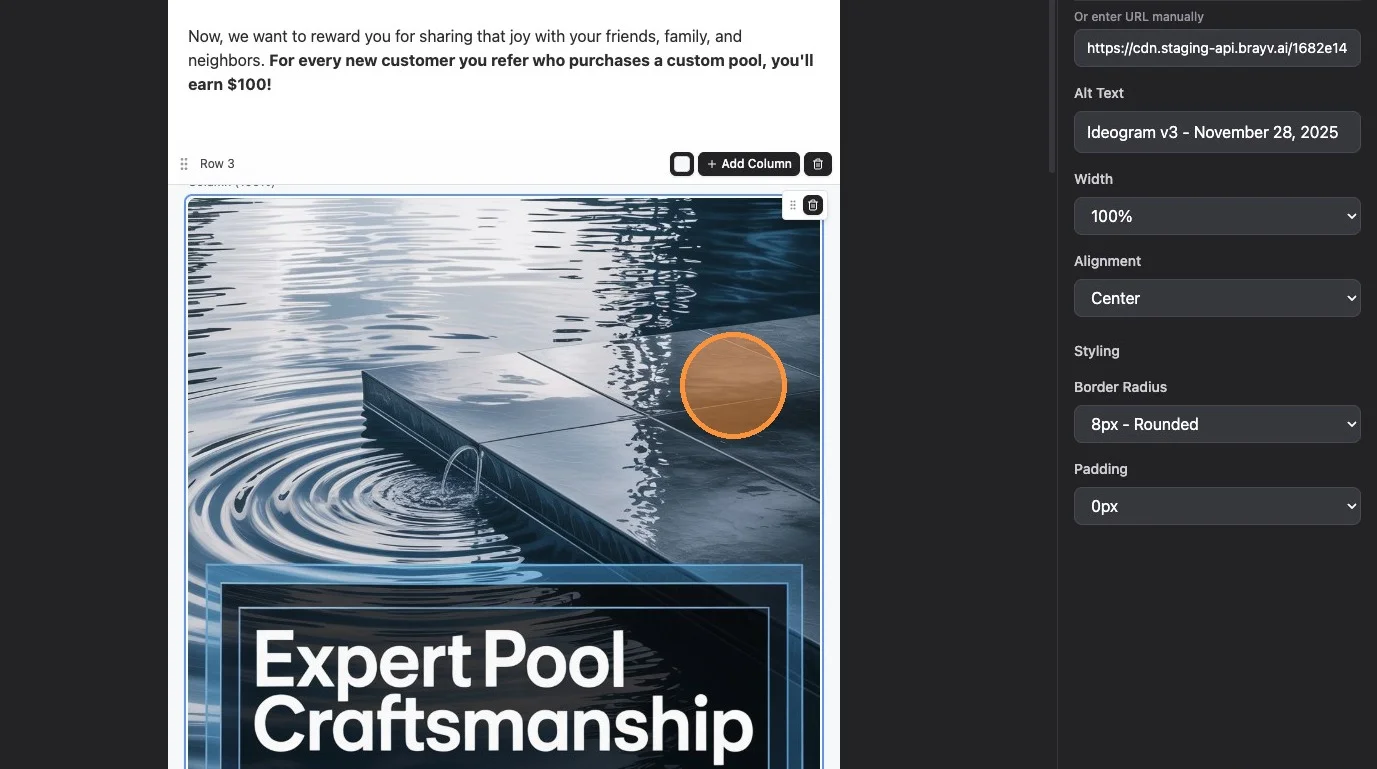
17. Adjust image properties like width, alignment, and border radius (corner rounding) to fit your design
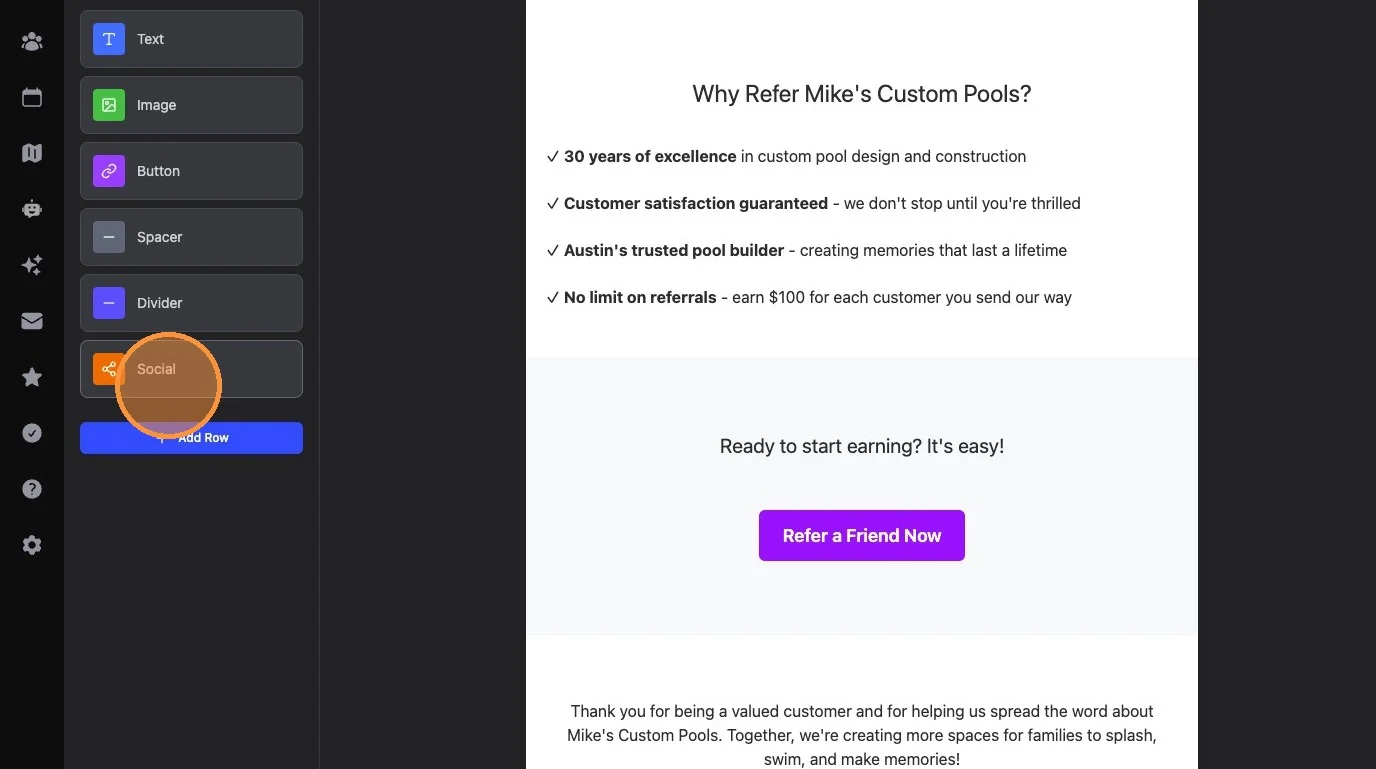
18. Add elements from the left panel: Text, Image, Button (with any URL), Spacer, Divider, Social (with your social links), or Row
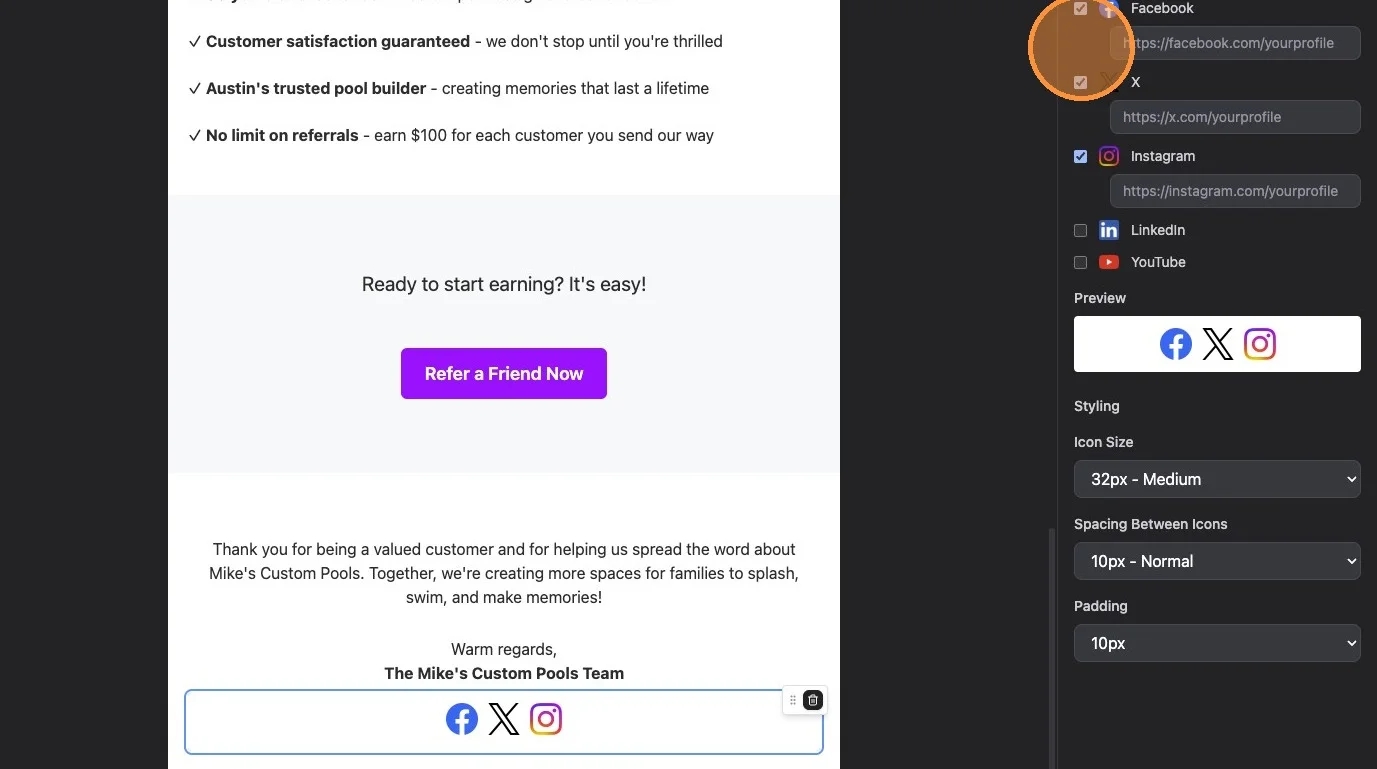
19. Clicking any element opens its controls in a panel on the right
20. Hover over an element to see the drag icon (to reposition) and delete icon (to remove)
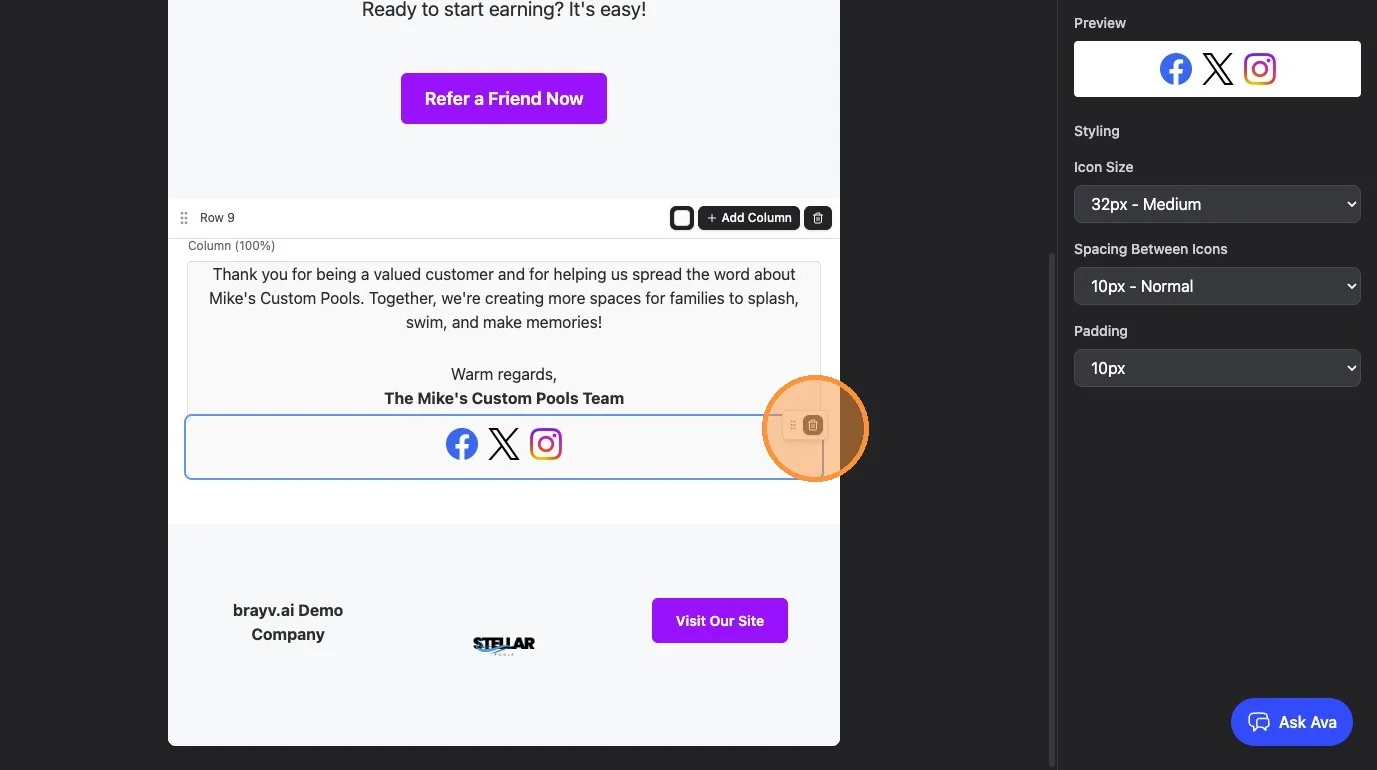
Tip: Hovering over a row displays options to add or delete columns, letting you control the layout and centering of individual elements.
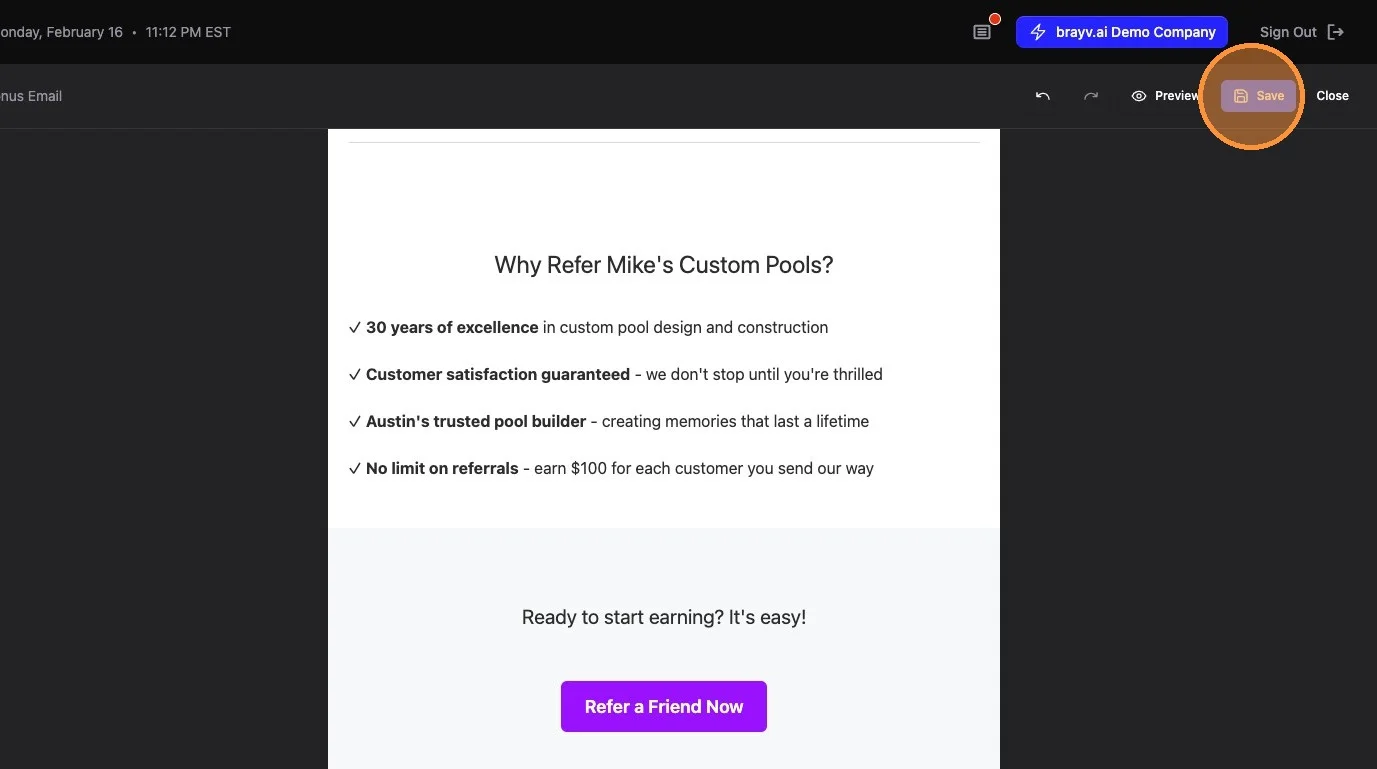
21. Click "Save"
Part 3: Creating an Email Campaign
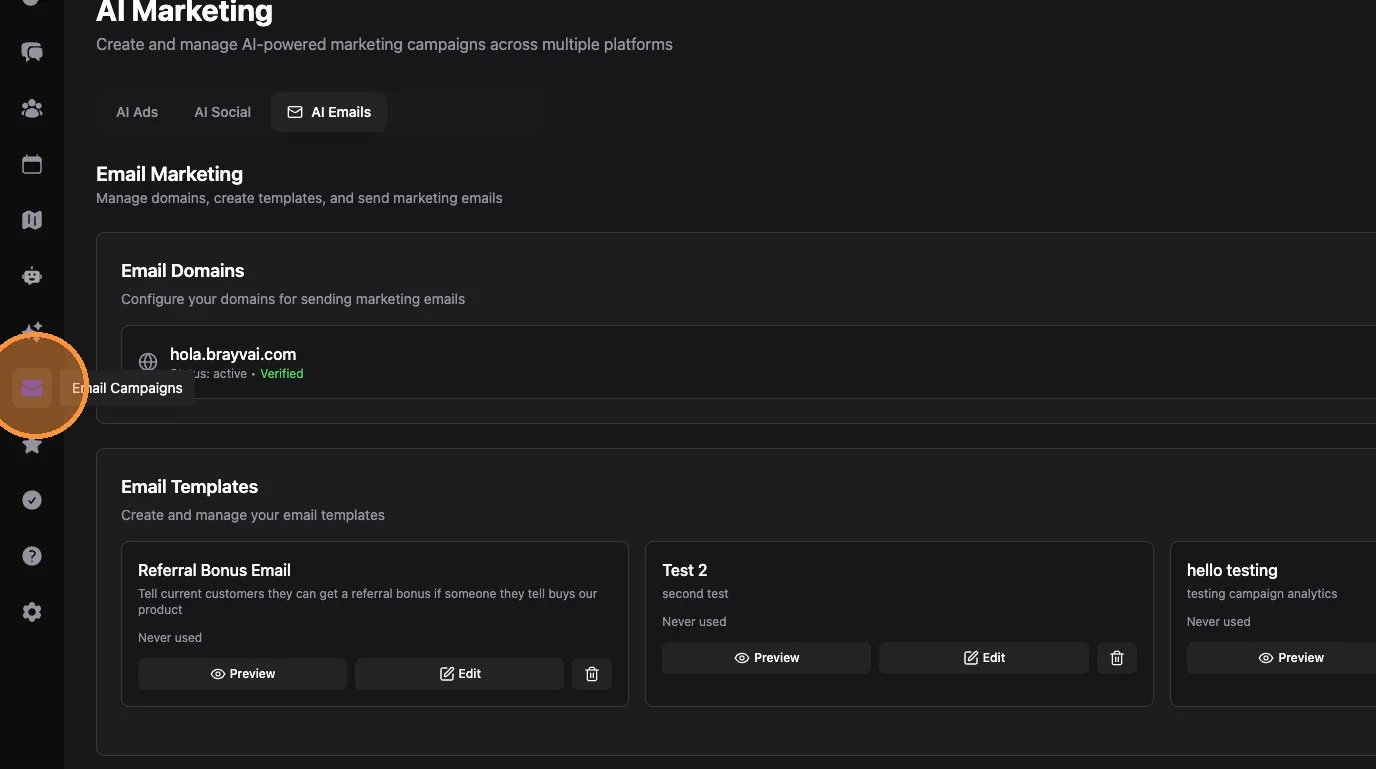
22. Open AI Marketing → AI Emails → Campaigns
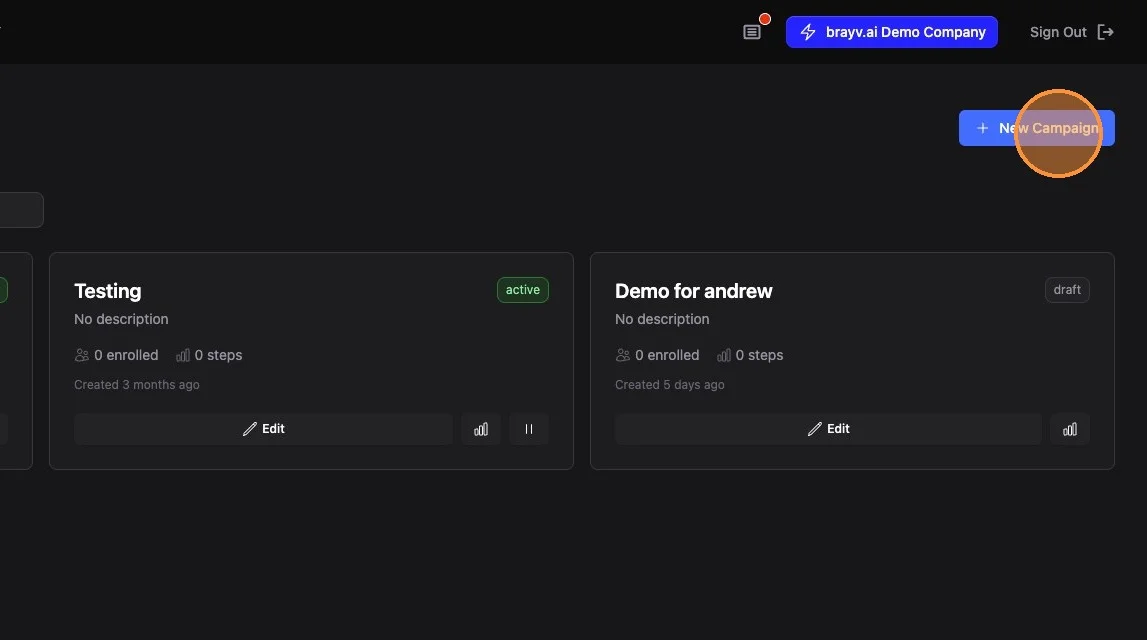
23. Click "New Campaign"
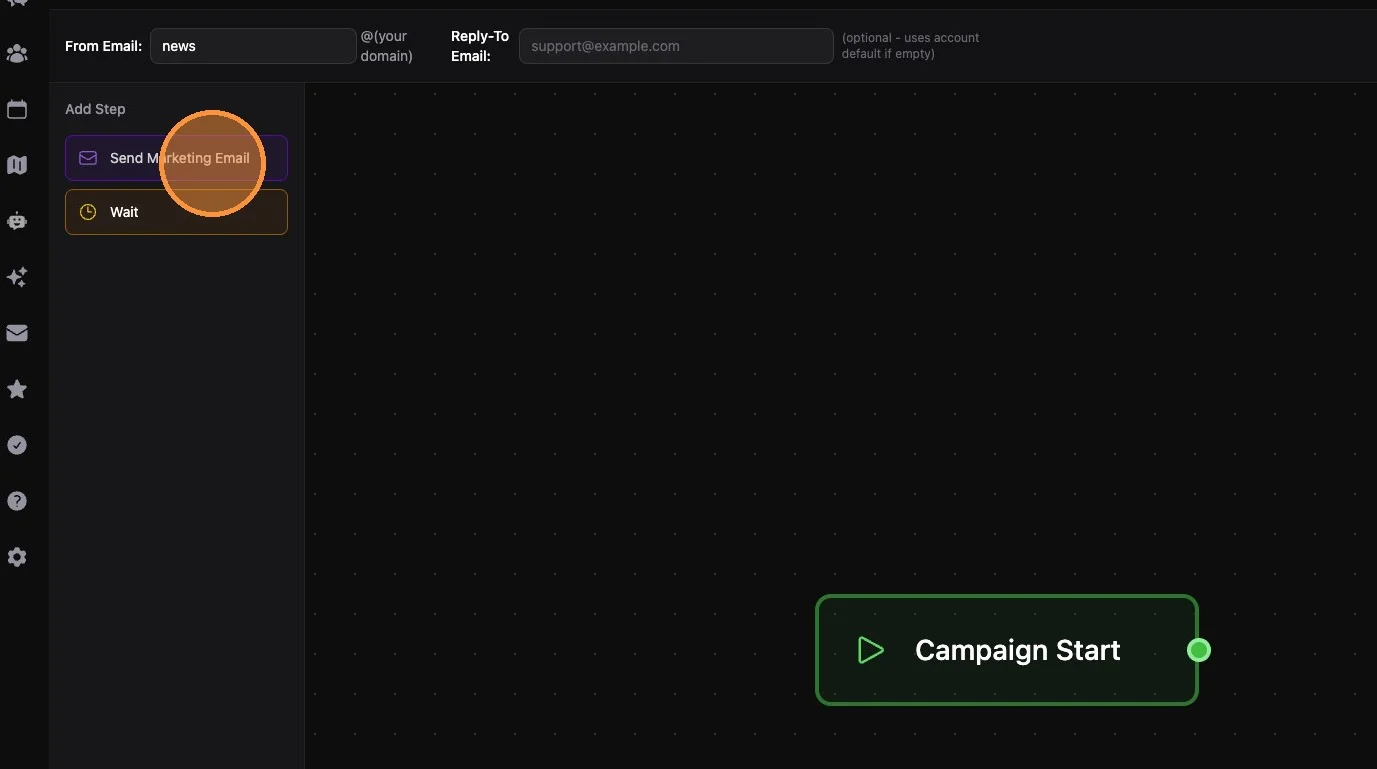
24. In the Add Step panel on the left, click "Send Marketing Email"
25. Click on the "Send Marketing Email" step you just added, then select your email template in the panel on the right
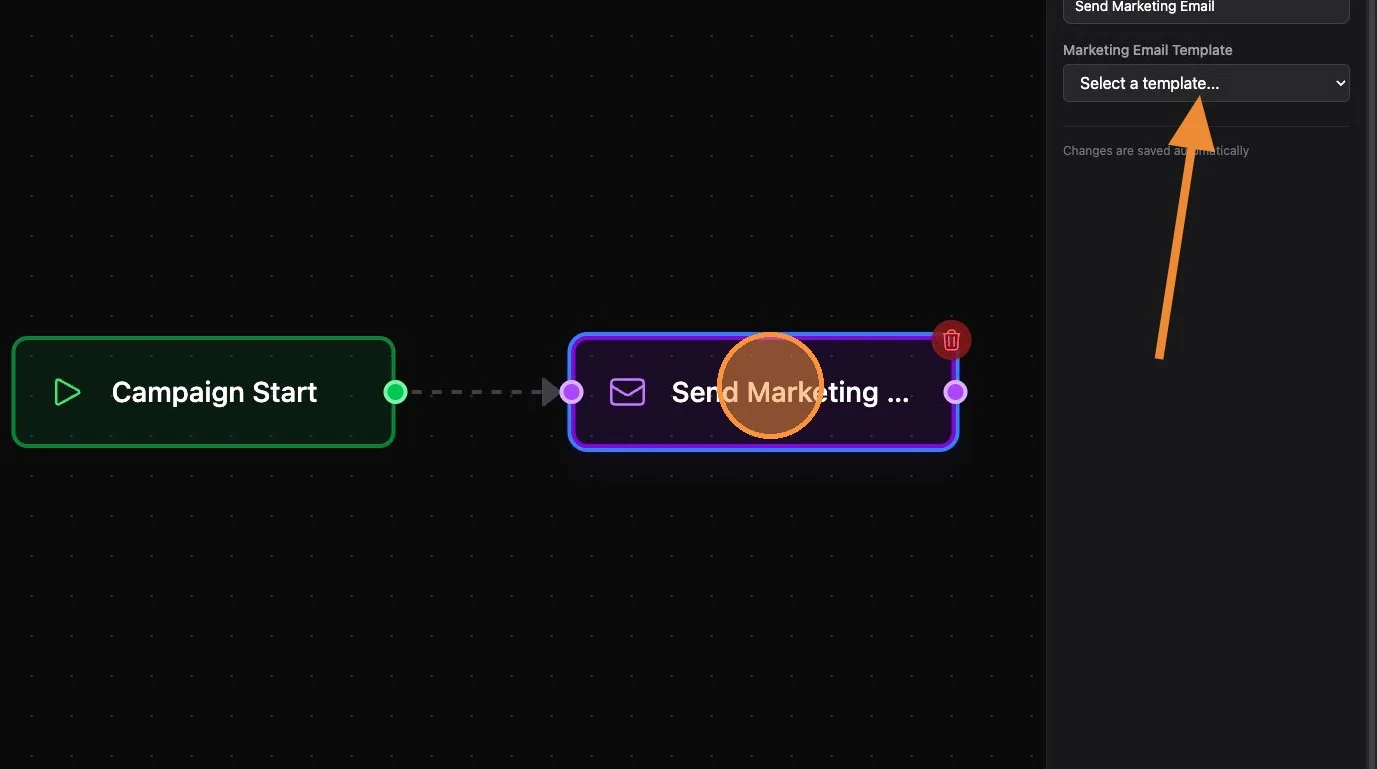
25b. Optionally add a Wait step between emails
In Add Step, choose Wait. Set Step Name, Wait Duration, and unit (Minutes / Hours / Days). This delays the next Send step so contacts are not emailed back-to-back.
For Wait steps, analytics, single-contact enroll, and campaign statuses, see Email Drip Campaigns.
26. Name your campaign, and optionally add a description and reply-to email.
The reply-to address is where responses go if someone replies to your email. Marketing emails should generally drive click actions (like visiting your website) rather than replies.
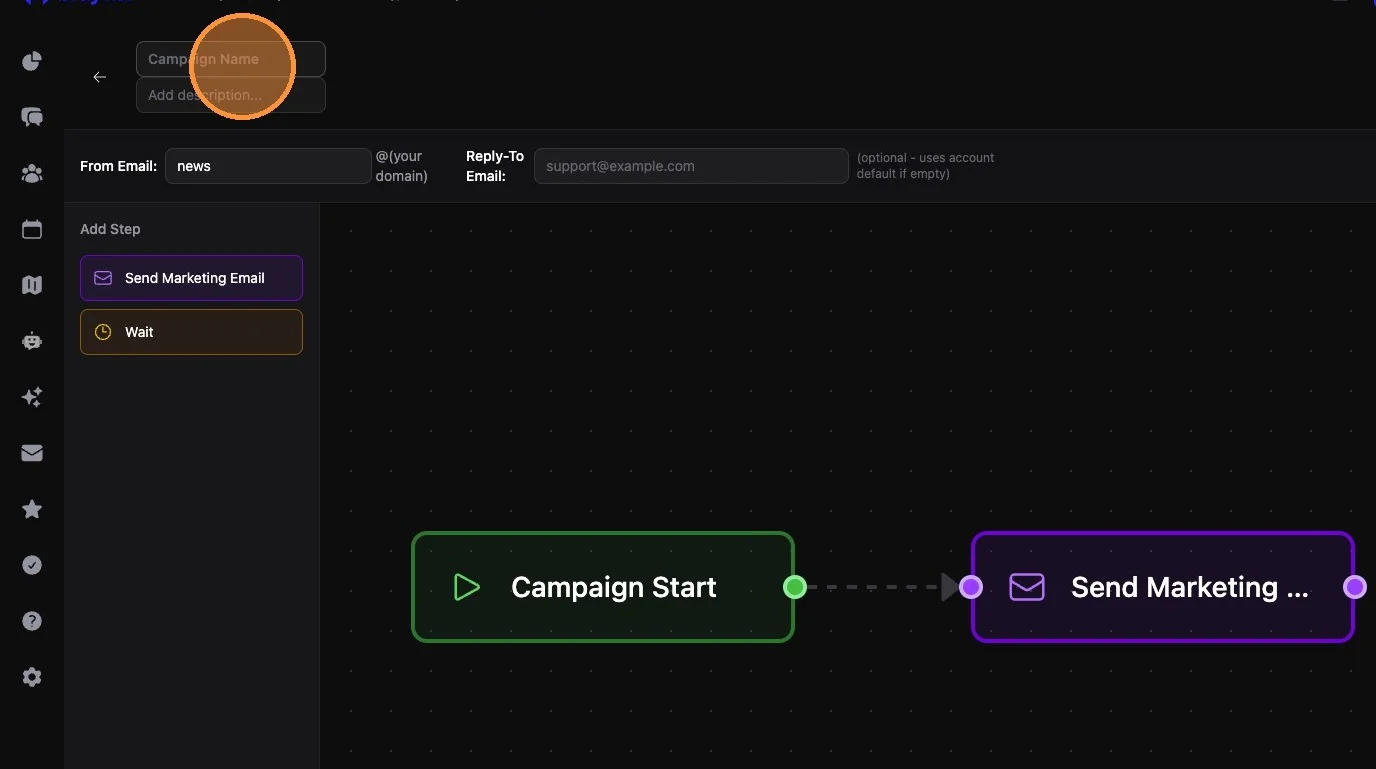
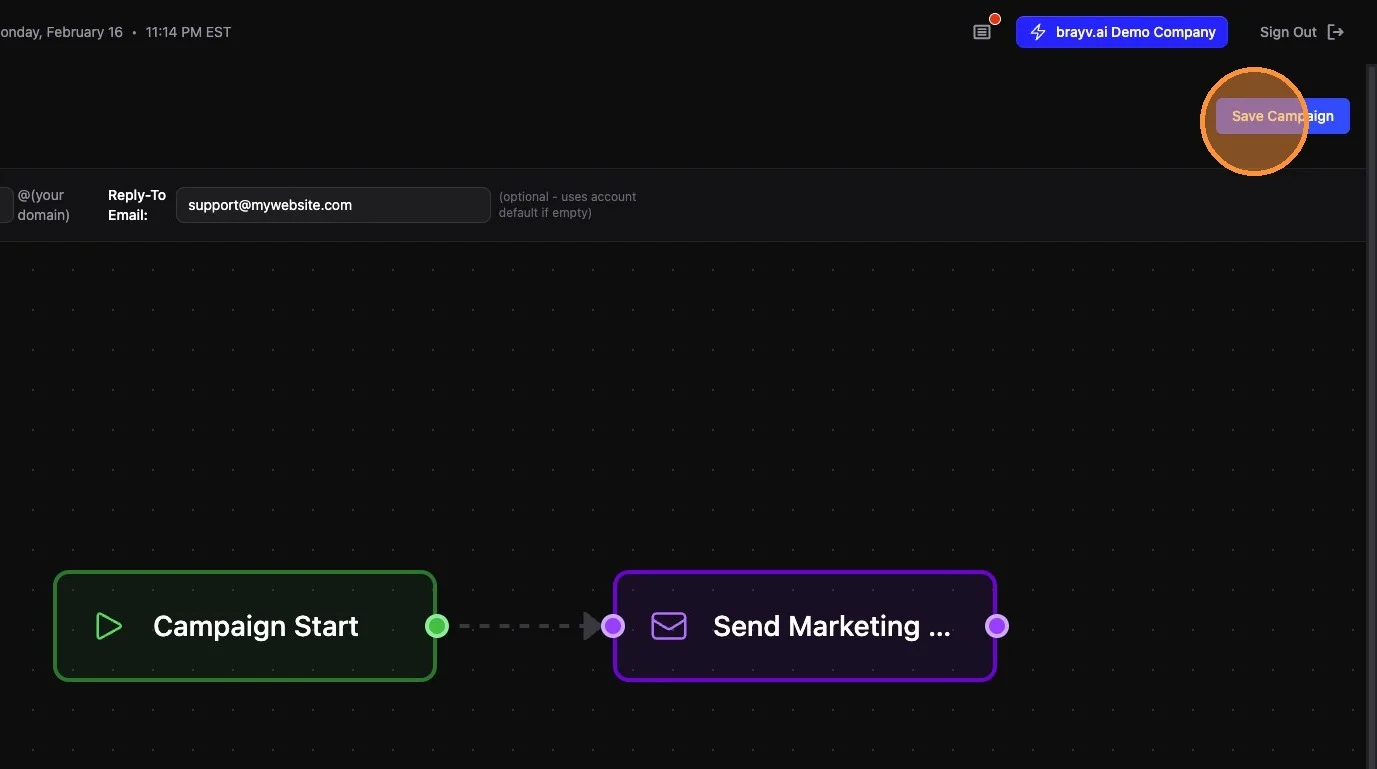
27. Click "Save Campaign"
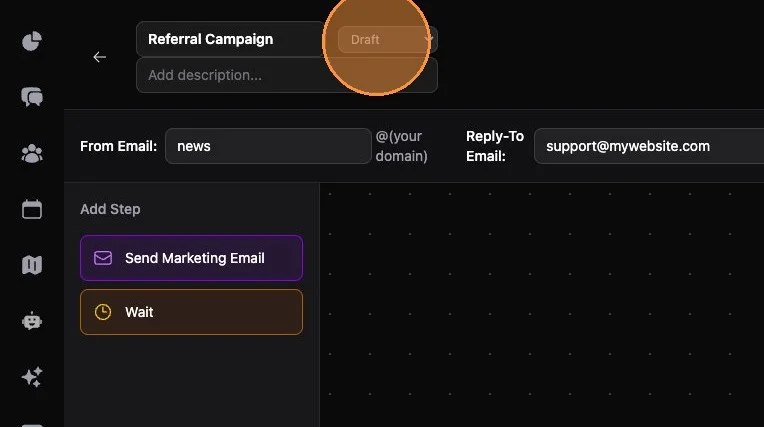
28. Change status from "Draft" to "Active" then click "Save." Your email campaign is ready!
Part 4: Enrolling Contacts
There are two ways to enroll contacts in campaigns: bulk enrollment from the Contacts page, or automatic enrollment through Customer Journeys.
Bulk Enrollment
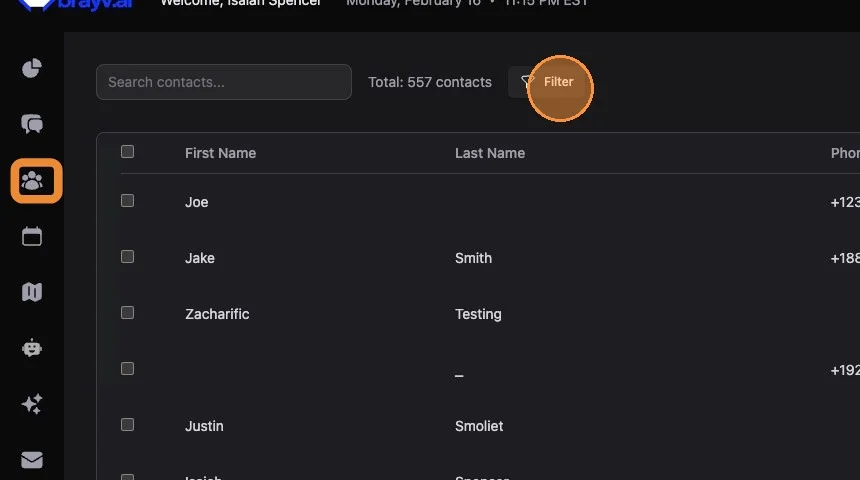
29. Navigate to Contacts and click "Filter"
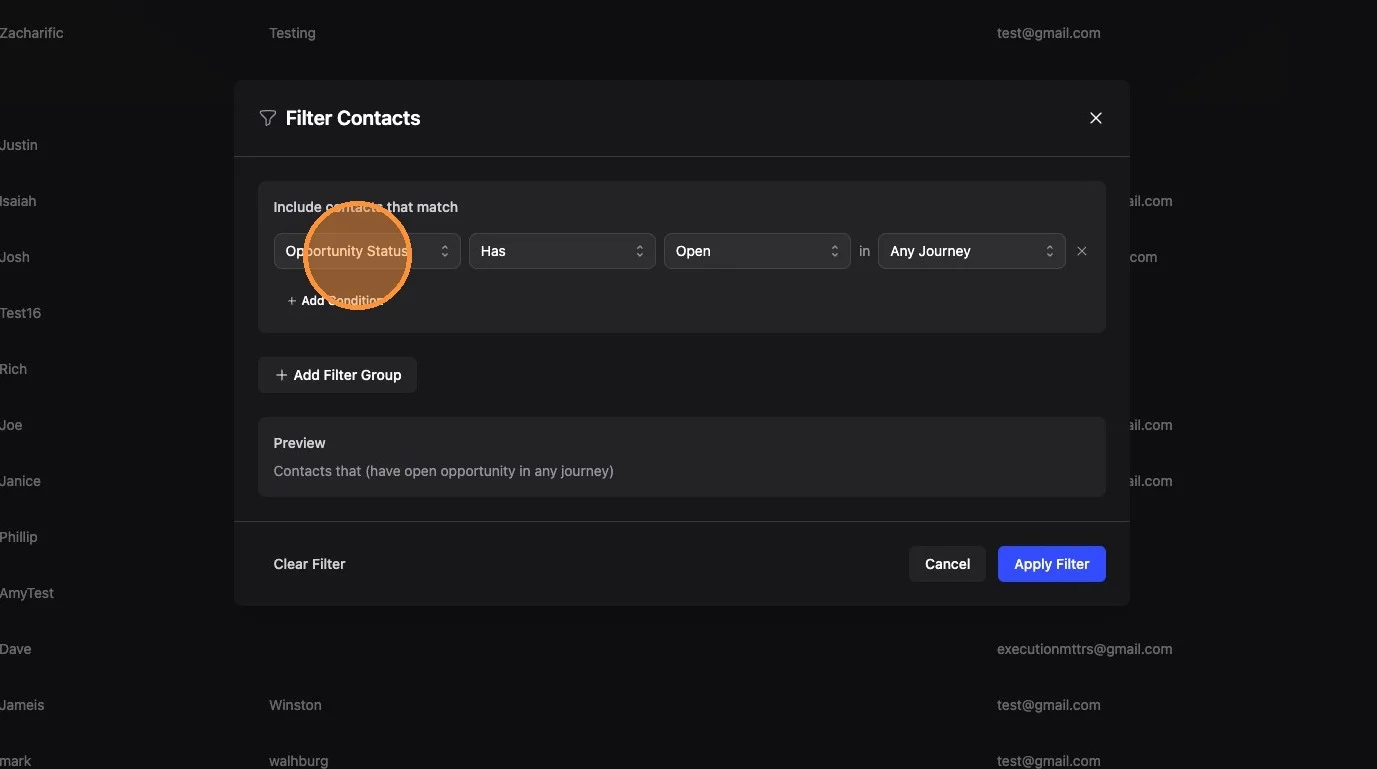
30. Filter your contacts to get the audience you want
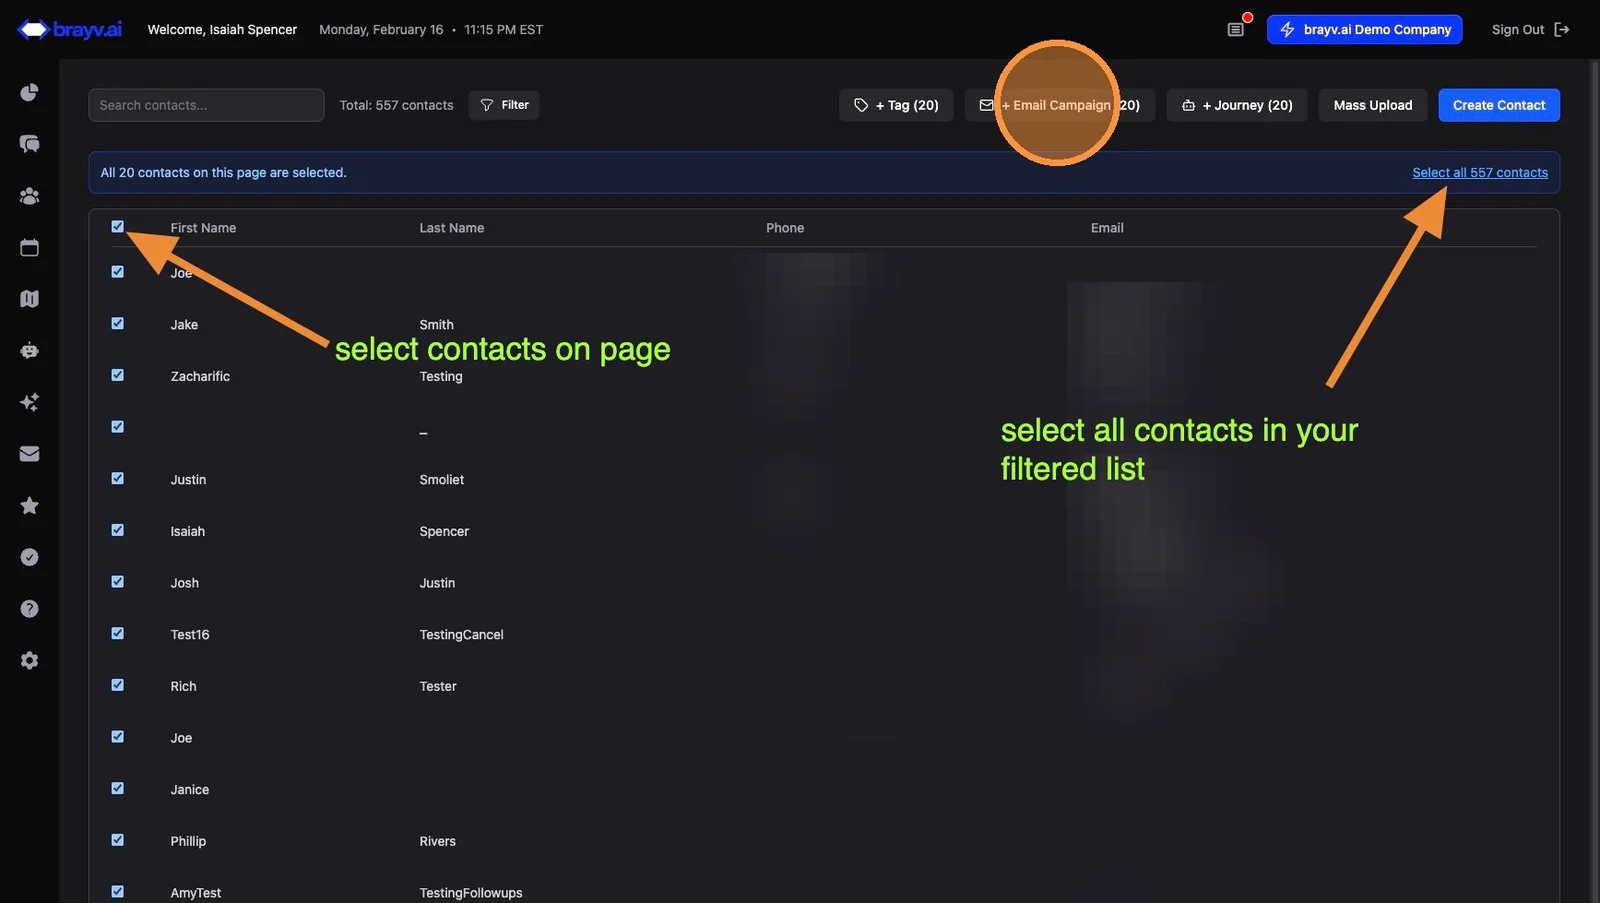
31. Select all contacts on the page, then select all in your filtered list. Click the "+ Email Campaign" button.
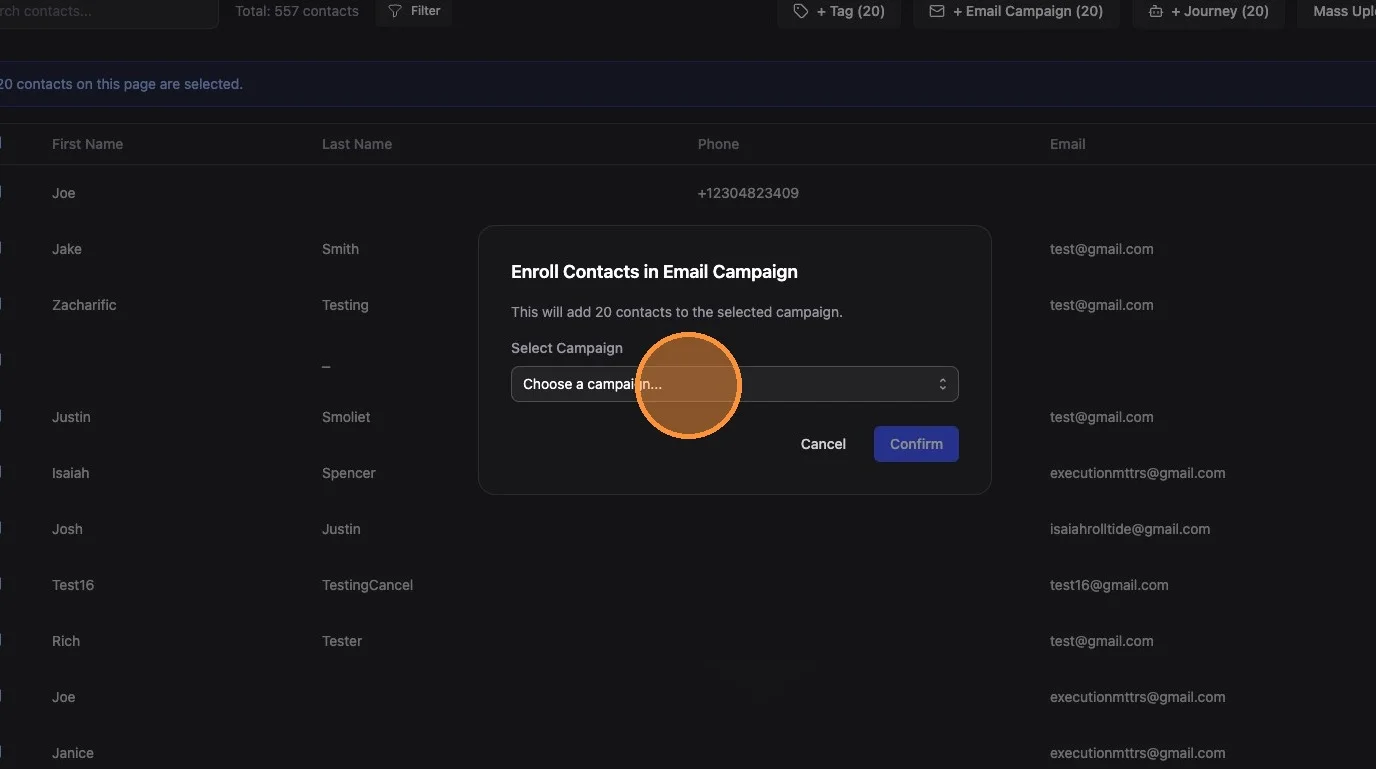
32. Select your campaign in the dialog and click Confirm
Tip: Before doing a bulk send, add yourself to the campaign first. This lets you verify the email looks right and is working as intended before it goes out to your full list.
Automatic Enrollment via Journeys
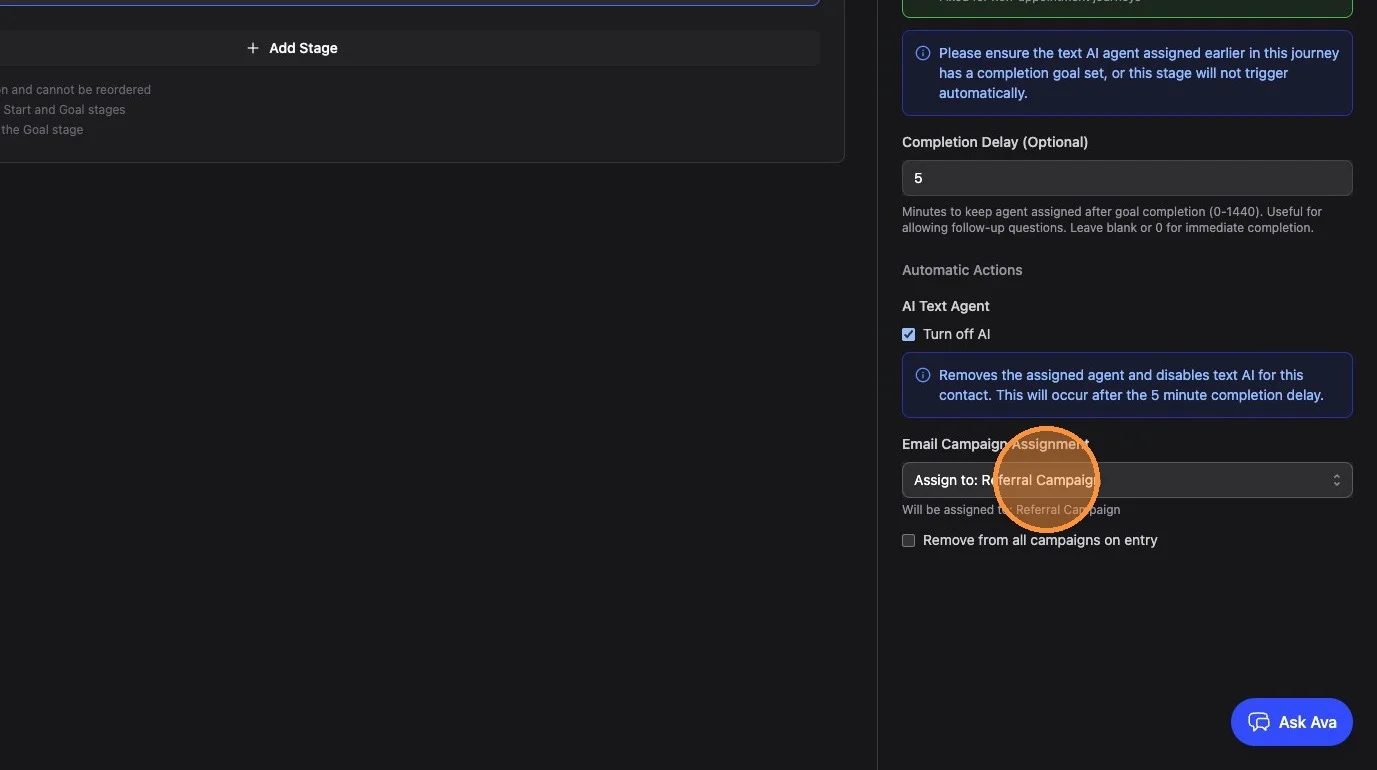
33. Navigate to any Journey and click on the stage where you'd like contacts to enter the campaign. In the stage configuration panel (right side), select your campaign under Email Campaign assignment. Save the journey.
Now all contacts that enter that stage will be automatically added to that email campaign!
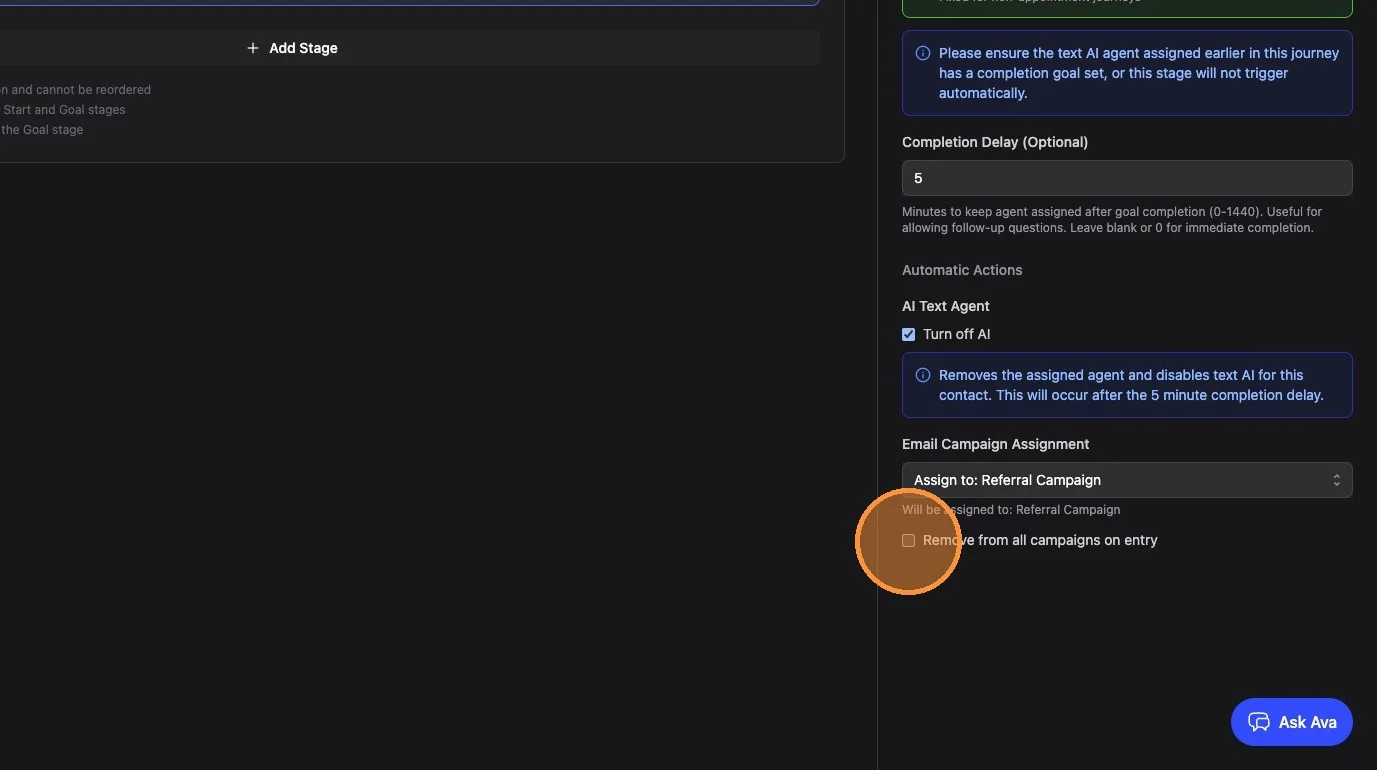
34. Optionally, enable "Remove from all campaigns on entry" to remove contacts from any other campaigns when they enter this stage.
This only removes pre-existing enrollments. The campaign configured on this stage will still be activated for the contact.
Key Tips
Use a Separate Domain for Marketing: Never send marketing emails from your main business email domain. A subdomain or separate domain protects your reputation.
Warm Up Slowly: Don't send 1,000 emails on day one - you'll hurt your deliverability. Start with 50-100 of your most engaged contacts, once per week with relevant content, for several weeks. Then gradually increase volume. Patience pays off long-term!
Test Before Sending: Always add yourself to a campaign first to verify the email looks good and arrives properly.
Design for Mobile: AI-generated templates are already mobile-optimized. When customizing, keep text concise and buttons large enough to tap.
Related Features
- Launch a Meta Ad - Create AI-powered Facebook and Instagram ads
- Customer Journeys - Automate campaign enrollment through journey stages
- Managing Contacts - Contact filtering and bulk actions
- Bulk Import Contacts - Import contacts to enroll in campaigns
Summary
The email marketing workflow in brayv.ai:
- Set up sending domain - Add and verify DNS records (one-time setup)
- Design email templates - Use AI to generate or build from scratch with drag-and-drop
- Create campaigns - Add email steps, name, and activate
- Enroll contacts - Bulk from Contacts page or automatically via Journey stages
Key reminders:
- Use a subdomain or separate domain for marketing emails
- Start slow with volume (50-100/week) and build up over time
- Test emails on yourself before bulk sending
- Connect campaigns to journey stages for automatic enrollment